

This trim installation FAQ is here to make the planning decisions easier: what to include in an estimate, which materials and profiles suit the room, how installation and painting fit together, when damage may be repaired, how scheduling works, what to prepare, and whether service is available for your project.
The useful details begin with your home. Room measurements, wall and floor condition, existing trim, chosen product, finish expectations, and the amount of removal or repair work all shape the final scope. For example, a smooth painted MDF profile and a stain-grade wood profile call for different material and finishing decisions, while uneven walls can require more fitting work for clean-looking joints.
Use the answers below as a practical starting point, then bring photos, room details, and your preferences to the estimate conversation. Cost, timing, and appointment availability are finalized only after the project details are reviewed.
What Is Included in a Trim Installation Estimate?
A clear estimate turns a room-by-room idea into a defined scope of work. It should identify the areas measured, the assumed trim profile and material, and the installation work being priced, not simply provide a single total with no explanation.
For a typical interior trim project, the written scope may list baseboards, door and window casing, corners, transitions between rooms, and any shoe molding or quarter round. Shoe molding is a narrow piece that covers a small gap where baseboard meets the floor; quarter round serves a similar purpose but has a more rounded face. The estimate should make clear which, if either, is included.
- Removal of existing trim and disposal of the removed material
- Cutting, fitting, fastening, and joining the selected trim
- Caulking small seams and filling nail holes before finish work
- Painting or touch-up work, when that option has been selected
Some trim estimate questions come down to details that are easy to miss in a quick walkthrough. Uneven walls or floors can require extra fitting so the trim follows the surface cleanly. Flooring gaps may affect whether shoe molding is needed. Damaged drywall behind old trim can add patching work, while custom profiles, stair runs, built-ins, and tight transitions usually involve more measuring and cutting than a straight wall.
Removal matters, too. Leaving existing trim in place may limit what can be installed over or beside it, while removal can reveal wall damage or paint lines that need attention. A strong estimate separates these choices rather than assuming one universal package.
Before approving the work, look for both inclusions and exclusions: which rooms and trim pieces are covered, the material and profile assumed, whether disposal and prep are included, and whether painting is part of the price. That level of detail makes it easier to compare options and request revisions if your priorities change.
How Do Baseboard, Crown Molding, and Trim Material Choices Differ?
Trim choices shape both the look of a room and how well the finished work suits daily use. Baseboards run along the wall-floor joint, crown molding finishes the wall-ceiling transition, and door and window casing frame openings while covering the gap between the wall and the jamb. Shoe molding or quarter round can finish the bottom edge when a flooring gap needs to be concealed.
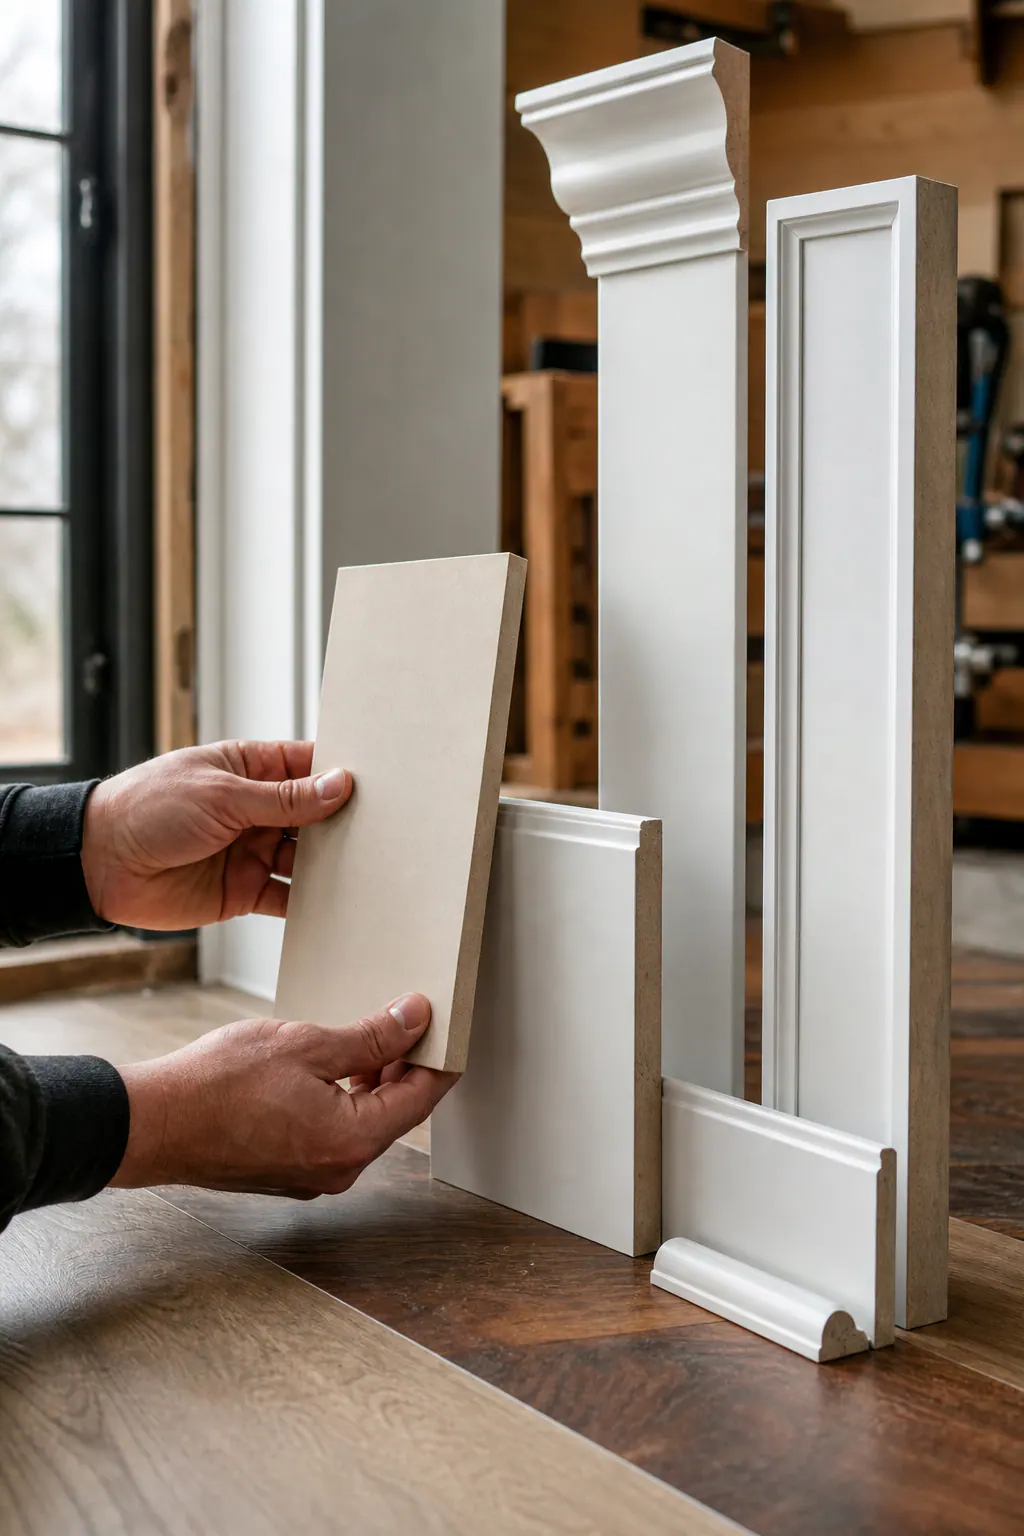
For many baseboard installation questions, the main decision is proportion: taller baseboards can give a room a more substantial look, while crown molding is most at home where ceiling height and room style can support its added detail. Matching casing and baseboard profiles creates a coordinated appearance; mixing them intentionally can work, but the scale should still feel balanced.
Among interior trim materials, MDF is a smooth, consistent option for painted trim in dry interior spaces. It accepts paint well and is widely available in many profiles, but it is moisture-sensitive, can dent more readily than solid wood, and does not provide a stainable wood grain. It is not interchangeable with wood for damp locations, high-impact areas, or a project designed for a stained finish.
- Finger-jointed pine is commonly selected for painted trim. It offers a wood-based alternative with readily available profiles, though its joints and grain make it less suitable when the wood itself will remain visible.
- Poplar is a practical choice for smooth painted work and can be more resistant to everyday dings than MDF. Its subtle grain may show under a clear finish, so it is usually chosen for paint rather than a prominent stained appearance.
- Hardwood is the natural choice when a stained finish and visible grain are priorities. It generally offers stronger dent resistance, but species, profile selection, and finish expectations can raise material cost.
For crown molding questions, consider the desired finish first, then the room condition and expected wear. A painted, dry living room may suit MDF or paint-grade wood; a stained oak casing or a busy hallway baseboard often calls for a more durable wood selection. Bringing a paint color, stain sample, and photos of adjoining trim to the estimate helps narrow the profile and material together.
What Should Homeowners Expect During Installation and Painting?
A clean painted result depends on more than selecting the right profile: the pieces must be fitted to the room before the finish work can make them look seamless.
For a typical painted trim installation, the installer measures and lays out each run, cuts the trim, test-fits it, and fastens it in place. Inside corners may be coped, one piece is shaped to meet the face of the other, or mitered, where two angled cuts meet. When walls, floors, or ceilings are not perfectly straight, scribing trims the edge of a piece to follow that surface more closely. These fitting steps help avoid relying on a wide bead of caulk to hide a poor joint.
After fastening, the finish-preparation work usually includes caulking small wall-to-trim gaps, filling nail holes, and sanding filled areas smooth. A strong visual checkpoint is a joint that sits tightly and a nail hole that disappears under paint; a thick, uneven caulk line or a visible depression after painting can detract from otherwise well-installed trim.
Installation-ready trim is fitted, secured, and prepared for finish work. It is not necessarily a fully painted result. Painting is included only when it is part of the approved scope, and the required prep can change with wall damage, rough or peeling existing paint, a major color change, and the requested finish level.
Trim may be painted before installation, after installation, or through a combination of both. Pre-painting can coat more of the material before it goes on the wall, while painting after installation helps blend caulked edges and filled nail holes. Either approach commonly needs final touchups after fastening and fitting. Before work begins, make sure the scope identifies who handles caulk, hole filling, sanding, primer if needed, paint, and the final touchup pass for your painted trim installation.
Should Damaged Trim Be Repaired or Replaced, and How Long Will the Work Take?
Should damaged trim be repaired or replaced?
Small, surface-level flaws are often good candidates for repair. Nail holes, open caulk lines, shallow dents, small chips, and isolated paint damage can usually be filled, smoothed, and refinished when the trim itself is sound and firmly attached.

Replacement becomes the more practical option when the damage affects the board rather than just its finish. Swelling, rot, widespread water staining, warping, loose sections, or layers of old patches can keep a repaired piece from looking clean or staying stable. A missing or discontinued profile can also shift the decision: matching a short replacement piece may be harder than replacing a longer, more visually consistent run.
Before replacing trim affected by moisture, the moisture source needs attention first. Otherwise, new material may develop the same staining, swelling, or separation problems.
How long does trim installation take?
The answer depends on the approved scope. A small-room baseboard project is a different job from whole-home trim, crown molding, removal of existing material, wall repairs, painting, or custom-ordered profiles. Uneven walls and floors can add fitting time, while repairs and finish touchups add steps after the new pieces are installed. Custom materials can also affect when work can be scheduled.
On project day, expect noise from cutting and fastening and limited access to the rooms being worked on. Before the appointment, ask which dust-control and floor-protection measures are included, whether furniture must be moved, and whether wall décor should come down. Keeping pets and children away from active work areas makes it easier to maintain a clear workspace while cuts, fastening, and touchups are underway.
How Can Homeowners Confirm Service Availability and Request an Estimate?
How can I confirm service availability and request an estimate?
Start by submitting an estimate request with your project address and a short description of the trim work you want done. The address helps determine whether service is available for your home, while the project description helps establish whether the requested work fits the available trim installation services.
Useful requests give the estimator enough context to understand the space before a visit or follow-up conversation. Include:
- Your project address and the rooms involved.
- Approximate measurements, such as wall lengths, ceiling height, or the number of doors and windows receiving trim.
- Clear photos of the existing trim, corners, transitions, and any visible damage or uneven areas.
- Your preferred trim style, whether that means a simple square profile, taller baseboards, decorative crown molding, or new casing.
- Your material or finish preference, such as painted MDF, paint-grade wood, stain-grade wood, or a particular paint color.
- Whether painting is needed as part of the work.
- Your flooring status, especially if new flooring is planned, already installed, or leaving gaps that may need shoe molding.
- Your target timing, including any renovation deadlines that could affect scheduling.
Photos and measurements are a helpful starting point, but they do not replace an on-site review when fitting details matter. Service availability, room conditions, material selection, painting scope, and the final installation plan are confirmed through the estimate process. Use the estimate-request contact option provided on this site, and share as much of the list above as you can for a more focused conversation.
Get Clear Answers for Your Trim Project
The strongest starting point is a request that shows the whole picture: the rooms involved, existing conditions, preferred trim and finish, repair concerns, painting needs, and any access limits that could affect the work.
Photos are especially useful when they show more than the main wall. Include corners, doorways, floor transitions, uneven areas, damaged sections, and the space around furniture or stairways. Those details help reveal whether the project calls for straightforward installation, localized repair, replacement, or additional fitting and finish preparation.
When you are ready, use the estimate-request option on this site to share your address, project notes, measurements if available, and photos. The estimate conversation can then establish whether the work is a fit and turn your priorities into a written scope.
A written scope is more useful than relying on assumptions about a standard price, a fixed completion time, or what painting and preparation might include. It gives you a practical basis for reviewing the proposed work before making a decision.
Plan the next step
When you are ready, request a free estimate with the rooms, trim goals, city, and available photos.
FAQs
What is included in a trim installation estimate?
A trim installation estimate should identify the measured rooms, selected trim profile and material, and included work such as removal, disposal, cutting, fitting, fastening, caulking, and nail-hole filling. It should also specify whether baseboards, casing, crown molding, shoe molding or quarter round, painting, wall repairs, and prep are included or excluded.
What is the difference between shoe molding and quarter round?
Shoe molding is a narrow trim piece used to cover a small gap where the baseboard meets the floor. Quarter round serves the same gap-covering purpose but has a more rounded face.
Is MDF a good choice for baseboards and crown molding?
MDF is a smooth, consistent material that accepts paint well and works best for painted trim in dry interior spaces. It is moisture-sensitive, dents more easily than solid wood, and is not suitable for stained finishes or damp, high-impact locations.
Do you paint trim before or after installation?
Trim can be painted before installation, after installation, or with a combination of both methods. Pre-painting coats more material before it is installed, while post-installation painting blends caulked edges and filled nail holes; both approaches commonly need final touchups.
Should I repair or replace damaged baseboards?
Repair sound, firmly attached trim with surface issues such as nail holes, open caulk lines, shallow dents, small chips, or isolated paint damage. Replace trim with swelling, rot, widespread water staining, warping, loose sections, or repeated old patches, and correct any moisture source before installing new material.