
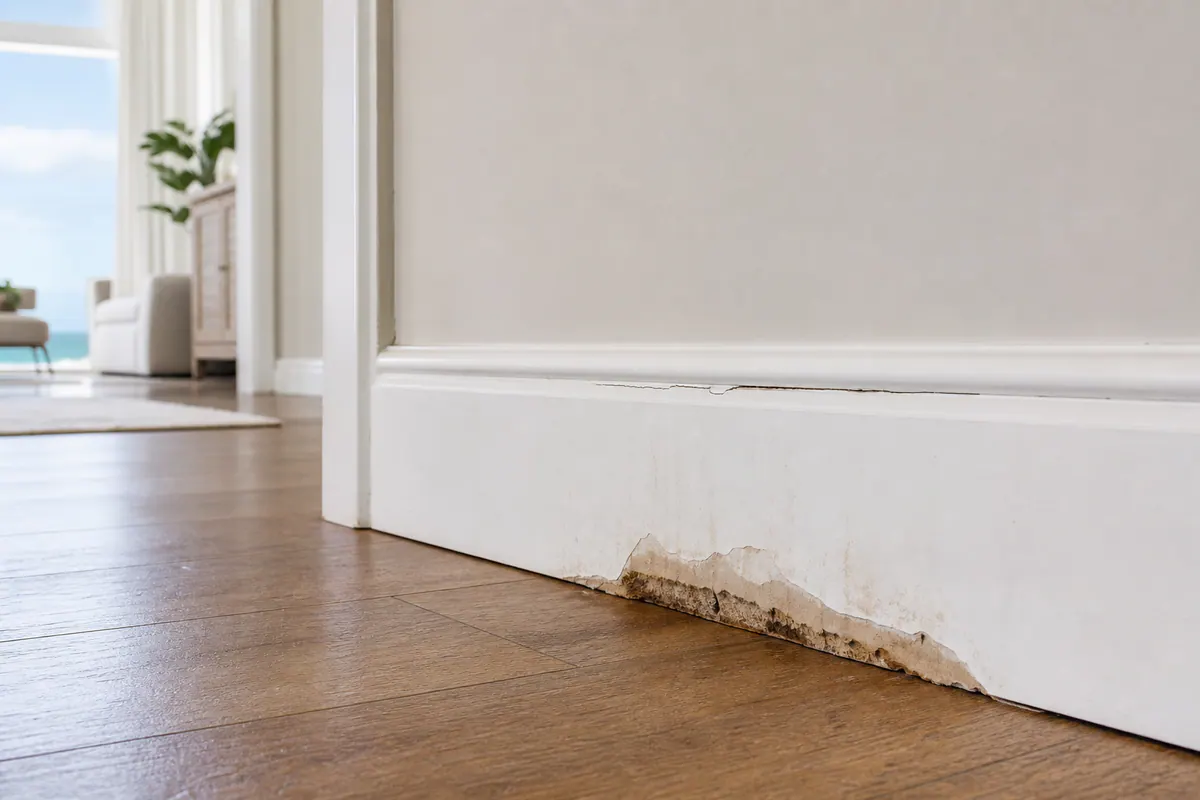
Damaged interior molding can make an otherwise finished room feel worn: cracked baseboards, loose door casing, open wall gaps, failed caulk lines, pet-chewed corners, water-marked trim, or profiles that no longer match the rest of the home. Trim repair addresses localized damage while preserving sound material and the room's existing look. For example, a small scuff, hairline crack, or one separated seam may be a good candidate when the surrounding trim is solid and the finish can be blended reasonably.
Trim replacement is often the cleaner choice when damage extends beyond one spot, such as swollen MDF, broken sections, repeated loose runs, widespread chewing, or several mismatched pieces installed over time. Material matters: painted trim may allow a repaired area to blend more easily, while stained wood makes grain and color matching more demanding. Profile availability matters too; a replacement piece must suit the shape and scale of nearby molding.
Water damage deserves more than a cosmetic patch. Before new trim goes in, the moisture or movement causing the damage needs to be addressed so the same problem does not return. An in-person interior trim repair assessment can distinguish a repairable blemish from deterioration that calls for replacement and help set realistic expectations for the finished appearance.
Common Trim Problems and the Signs Behind Them
The pattern of the damage often tells more than the blemish itself. A hairline crack in one painted length, a few nail holes, or a shallow dent may be limited finish damage. A broken piece, recurring split at the same joint, or trim that shifts when pressed points to a condition worth addressing before the final paint and caulk work.
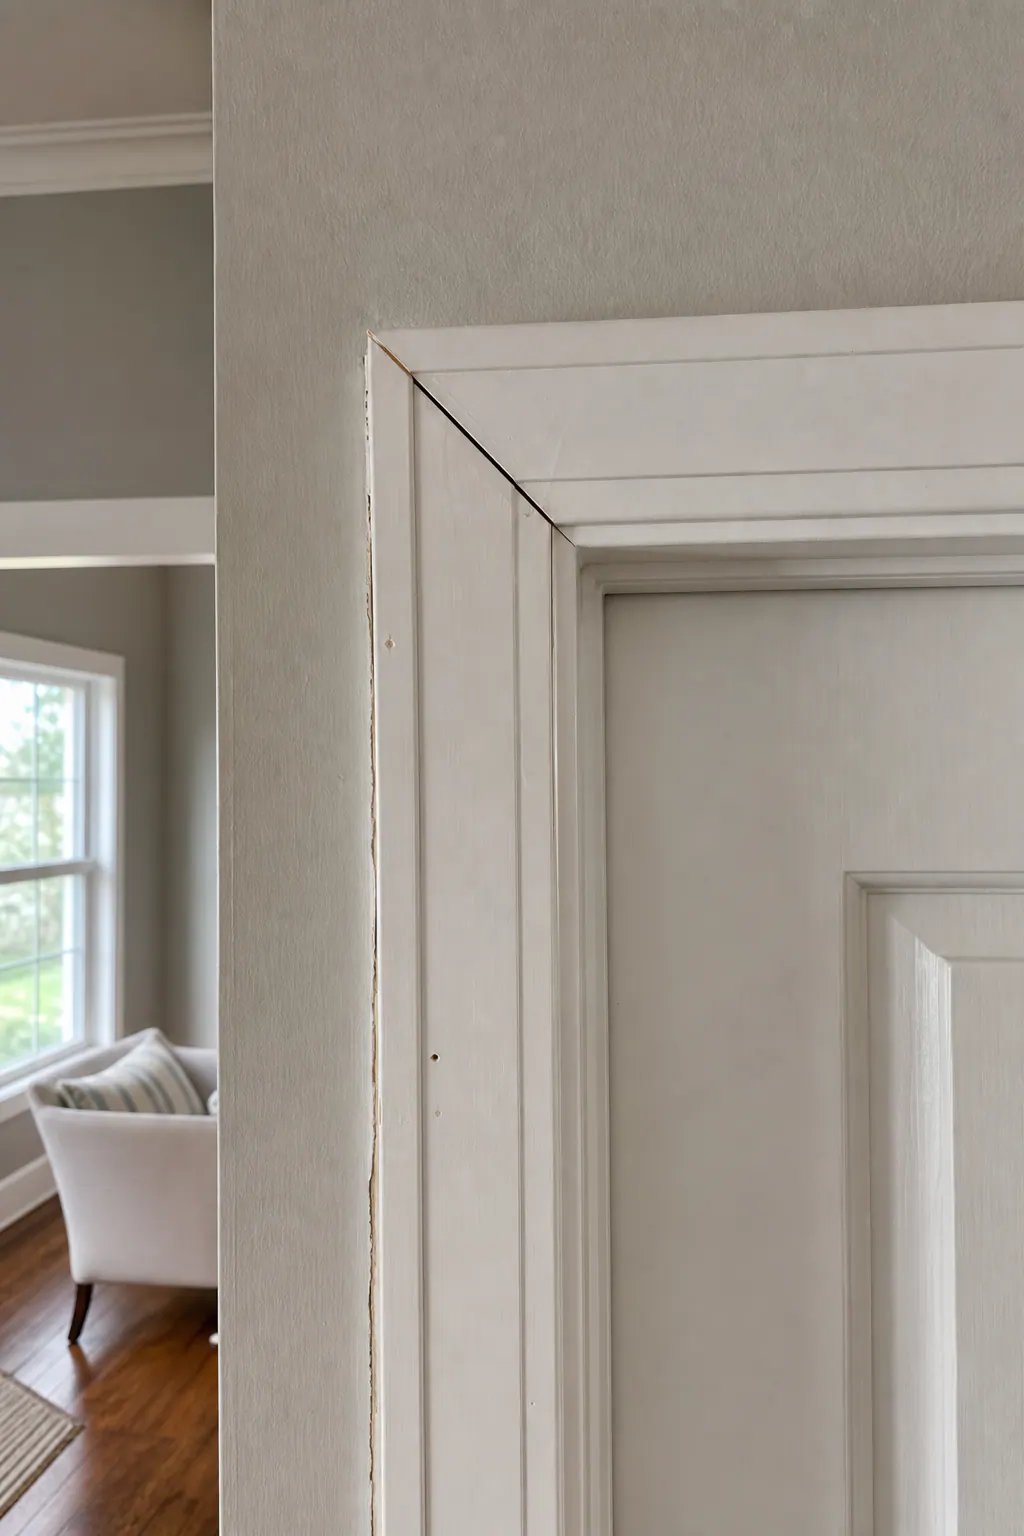
- Separated miter joints are the angled corners where two pieces of molding meet. One small opening can be a localized seam issue; repeated openings at several corners suggest ongoing movement that a new bead of caulk alone will not solve.
- Loose door or window casing can leave a shadow line against the wall. If the casing moves, the attachment or the wall surface behind it needs attention before it is refastened and finished.
- Failed caulk is a cracked, shrunken, or missing line along the wall-to-trim edge. It is primarily cosmetic when the trim and wall are stable; a widening gap may instead accompany wall movement, damaged drywall, or loose trim.
- Pet-chewed baseboards, scuffs, dents, and nail holes are easiest to evaluate by extent. A single damaged corner may suit damaged trim repair, while repeated chewing or deeply missing edges can leave a patch more noticeable than a new section.
Water marks require a closer look. Dark staining, soft spots, swollen edges, or crumbling MDF are not simply paint defects; the moisture source, whether a leak, floor-level exposure, or persistent humidity, should be resolved before finishing the area. Repair cracked trim only after the surrounding material is stable, and fix loose trim only after the reason it released is understood.
When a Focused Trim Repair Is the Better Choice
A focused repair makes sense when the surrounding run is dry, firm, and worth keeping. Sound wood and paint-grade trim are especially good candidates because a localized flaw can be prepared and repainted without disturbing otherwise consistent baseboards, door casing, window casing, shoe molding, or crown molding.
- Dents, chips, and nail holes: A shallow impact mark or chipped baseboard corner can be patched with a suitable filler, shaped to the existing edge, sanded smooth, and prepared for paint. This is a practical scope when the damage is confined to one area rather than spread along the length.
- Small cracks and pet damage: A hairline crack in solid molding or a small chewed spot at one baseboard corner may be filled, sanded, and refinished. The repair is more convincing on smooth, painted trim than on a prominent grain pattern or deeply textured profile.
- One loose section or open seam: Casing that remains straight and intact can often be reglued or refastened once it is seated properly. A minor seam separation can be filled and touched up after the pieces are secured, rather than using caulk to hide a joint that is still moving.
- Cosmetic caulk failure: When the trim itself is stable, old cracked caulk along a wall edge can be removed and replaced as part of finish preparation. Fresh caulk closes a paintable transition; it does not correct a loose board, active moisture damage, or a widening structural gap.
Good trim repair is a contained finish-restoration job: secure the piece, patch or fill the damaged area, sand the transition, recaulk where appropriate, and prepare the surface for primer and paint. For painted molding, that sequence can make isolated damage far less distracting while retaining the original profile and the rest of the run.
Stained wood calls for a more cautious expectation. Filler, repaired grain, and a fresh stain application may absorb color differently from aged wood, particularly where sunlight has faded the surrounding finish. Heavily textured molding can also make a smooth patch stand out. In those cases, the decision is not just whether the trim can be repaired, but whether the likely blend will look acceptable in that location.
When Trim Replacement Will Look Cleaner and Last Longer
There is a point where patching begins to create a collection of visible compromises instead of one clean finish. Trim replacement is usually the better path when MDF has swollen, softened, or begun to crumble at its edges; when wood is rotted; or when repeated water exposure has changed the shape of the material. A painted surface may hide discoloration, but it cannot restore a crisp profile to material that no longer holds its form. The moisture source should be resolved before replacement work begins.
- Damage that extends beyond one small spot: Deep pet-chewed edges across several baseboards, broken lengths, severe profile loss, or multiple prior patches can leave the run uneven even after filling and paint. Replacing the affected length provides a consistent edge and profile rather than asking a series of repairs to blend together.
- Movement that keeps returning: One opening joint can be addressed locally, but several loose pieces or gaps that reopen after prior fastening and caulk work suggest a broader issue with the run, wall, floor, or substrate. New material should be installed only after the reason for that movement has been identified and addressed.
- Missing or mismatched molding: A short substitute piece with a different height, edge detail, or thickness can be more noticeable than the original damage. If an exact match is not available, replacing one entire wall, a complete door opening, or another natural visual boundary often looks more intentional than inserting a lone unmatched patch.
The right replacement scope depends on continuity. Replacing one damaged section can work when the profile and paint finish continue cleanly into the adjoining pieces. Replacing a full run is often cleaner when the baseboard has widespread damage, the available profile differs slightly, or repaired areas would fall in prominent sightlines. For door and window casing, replacing the complete opening generally keeps the paired legs and header visually consistent.
Replacement can also be a design decision rather than a failure decision. Homeowners who want to replace builder grade trim may choose taller baseboards or a more substantial casing profile throughout a room, rather than mixing one upgraded wall with older, thinner molding nearby. Thoughtful baseboard replacement gives the room a unified finish; the goal is not to replace sound trim automatically, but to avoid a result that looks pieced together.
Matching Existing Molding Profiles, Materials, and Finishes
A replacement piece only disappears into the room when its details belong there. For molding repair Sarasota County homeowners can expect a comparison of the profile's curves and edges, overall height and thickness, the reveal left at the wall or jamb, and the way neighboring miter joints meet. A close-looking baseboard that is even slightly taller or thicker can create a visible step where old and new lengths join.
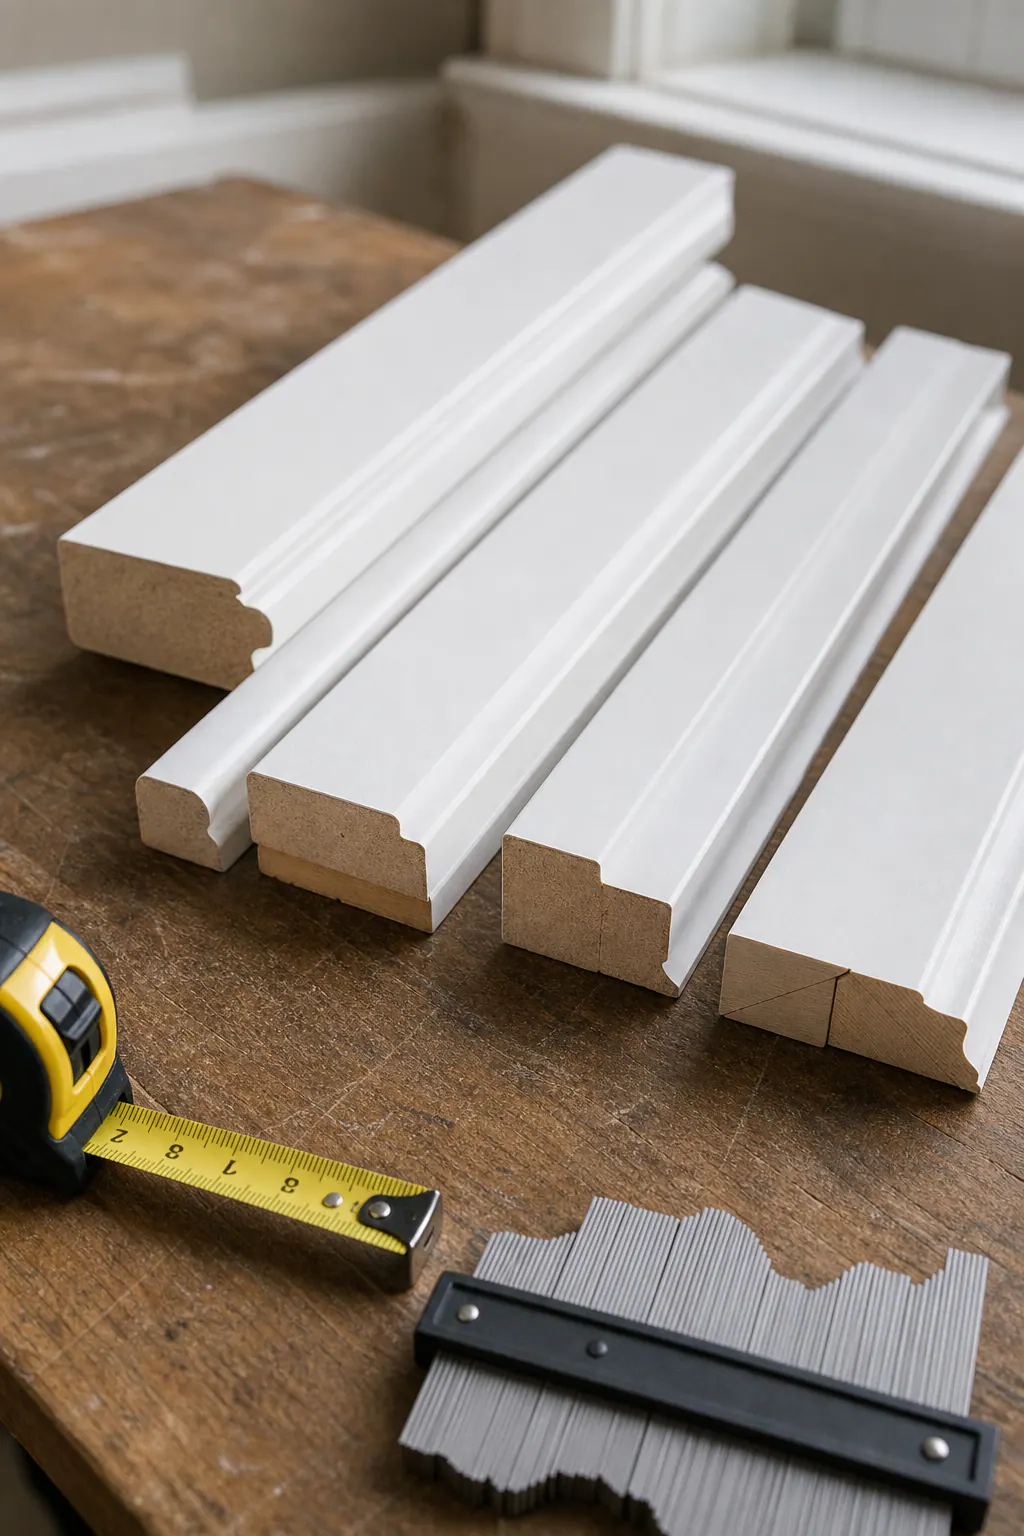
Material affects both the match and the finishing approach. MDF trim has a smooth, paint-ready face, but an undamaged replacement must match the existing profile and dimensions. Wood trim may carry grain, knots, and milling variation that make a patched or new section more apparent. PVC trim is a separate material with its own surface and flexibility characteristics, so it should not be substituted casually into an interior run simply because the outline looks similar. Paint-grade molding is generally the most forgiving: after proper preparation, a matched profile can often be blended with the surrounding painted trim.
Finish matching is just as important as the molding shape. Paint color, sheen, and age can affect whether a repair reads as one continuous surface; a fresh semi-gloss touch-up may stand out against an older satin finish. Stained wood is less forgiving because grain direction, stain absorption, natural color variation, and sun fading can make even the right species look different.
- Exact or convincing close match: Retaining a short repair or replacing one damaged length can preserve the room's continuity when the profile, reveal, joints, and finish transition cleanly.
- No practical match: Replacing a visually connected area, such as a full wall run, an entire door casing, or all trim within one small room, usually looks more deliberate than adding a near-match beside original molding.
A Practical Process for Repairing or Replacing Interior Trim
The work begins at the edges of the damaged area, not just on the molding face. An assessment looks at the trim, adjacent wall, floor line, nearby joints, and the damage pattern: one open seam is different from several loose runs, and a surface blemish is different from material that has changed shape. Moisture history and signs of movement help determine whether another repair must happen first.
If a wall has cracked, softened, or been opened for a repair, drywall repair should be completed before the trim is finished. Likewise, staining or deterioration tied to an active leak calls for water-damage repair before new material is installed. Door casing may also need to be coordinated with door work when the jamb, reveal, or operation of the door is contributing to the issue.
- Plan the smallest clean scope: When the profile and finish can be carried forward, trim repair may involve removing only the affected length or loose section rather than disturbing an entire run.
- Rebuild stable details: Repaired or replacement pieces are secured so edges sit tight, miters align, and reveals remain consistent at walls and jambs. Nail holes and minor surface transitions are filled and smoothed for finishing.
- Use caulk for the right gap: Paintable caulk can refine stable wall-to-trim gaps and separated joints after attachment is corrected; it is not used to disguise continuing movement or moisture damage.
The final checkpoint is finish readiness: clean lines, firm attachment, smooth filled areas, and properly tooled caulk. Coordinating interior painting at this stage helps the repaired area read consistently with the surrounding trim and wall.
Get a Clear Recommendation for Damaged Trim in Sarasota County
A brief assessment can turn an uncertain patch-or-replace decision into a defined scope of work. Share photos of the affected baseboards, door or window casing, crown molding, or other interior trim, or schedule an on-site visit in Sarasota County. Include a wider room view and a close-up of the damage so the relationship to adjacent runs and finishes is easier to see.
You will receive a practical recommendation: preserve a sound section when the repair can remain secure and blend reasonably, or replace the appropriate run when broken material, swelling, repeated damage, or an inconsistent profile would leave a weaker visual result. Exact paint, stain, and profile matches are not assumed; those details help determine whether a localized trim repair is the sensible choice.
For baseboard repair, damaged casing, or molding repair in Sarasota County, request an assessment and move forward with a cleaner plan for the room, not another temporary-looking fix.
Plan the next step
Compare the broader Trim Repair and Replacement service.
When you are ready, request a free estimate with the rooms, trim goals, city, and available photos.
FAQs
Can cracked trim be repaired instead of replaced?
Yes. A hairline crack, shallow dent, nail holes, or a single separated seam can usually be repaired when the surrounding trim is dry, firm, and securely attached. The area is filled, sanded, recaulked where appropriate, then primed and painted.
How do you fix gaps between trim and the wall?
First secure any loose trim and address damaged drywall or movement behind it. Paintable caulk can fill stable wall-to-trim gaps, but it should not be used to hide a widening gap caused by loose boards, moisture damage, or ongoing movement.
Can water-damaged baseboards be repaired?
Water-marked trim can be repaired only if the material remains dry, firm, and retains its shape after the moisture source is fixed. Swollen, softened, crumbling MDF and rotted wood should be replaced because paint cannot restore a crisp molding profile.
Can you match existing molding profiles when replacing trim?
A replacement should match the existing molding’s profile curves, height, thickness, wall or jamb reveal, and joint details. Even a slightly taller or thicker baseboard can create a visible step, and paint color, sheen, grain, and stain aging also affect the match.
When should I replace baseboards instead of repairing them?
Replace baseboards when damage extends across multiple areas, edges are deeply pet-chewed, sections are broken, MDF is swollen, or prior patches would leave an uneven appearance. If an exact profile is unavailable, replacing a full wall run or another natural visual boundary usually looks cleaner than installing one near-match piece.