
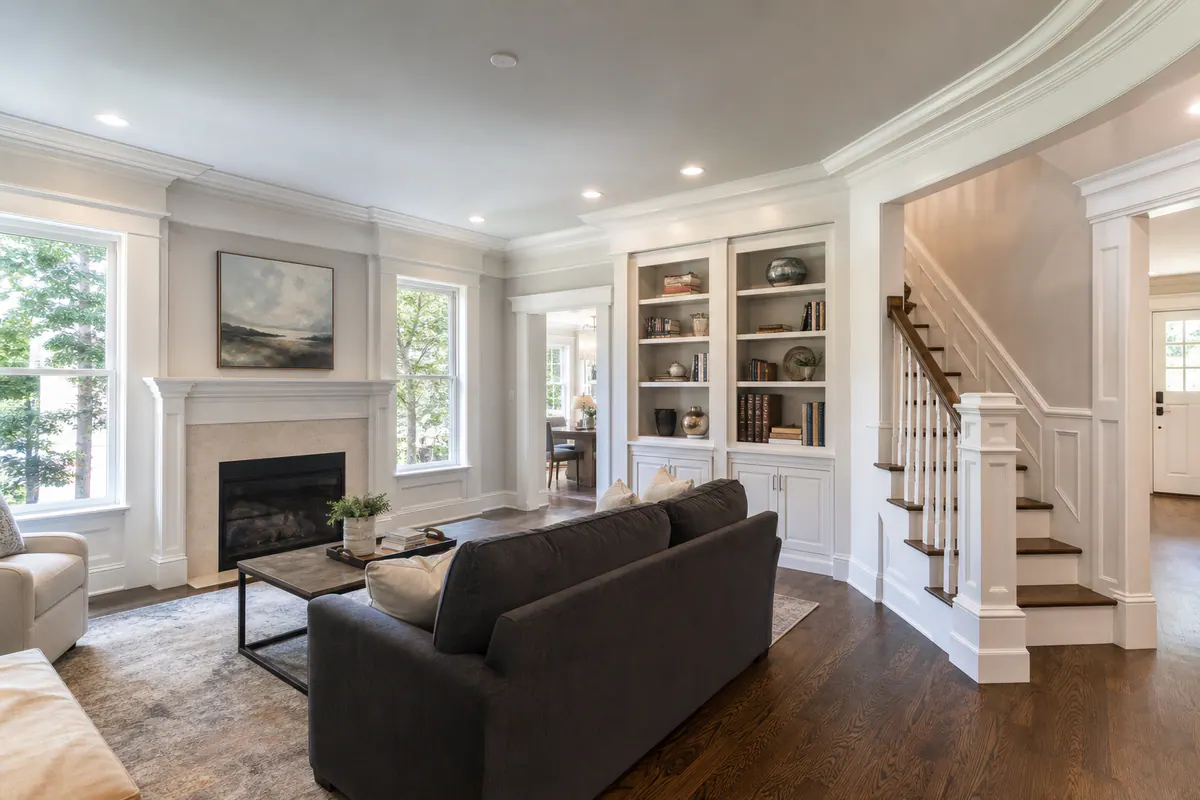
Trim and molding are estimated as an installed project, not as a single off-the-shelf product. Linear footage, the total run of board needed, matters, but it cannot show every condition that shapes the work. A straight run of baseboard in an open, newly finished room is a different scope from trim that must fit around doorways, stairs, built-ins, uneven walls, or existing flooring.
What affects trim cost includes the trim’s type and profile, the amount and layout, the material, access to the work area, removal or repair needs, and the requested paint- or stain-grade finish. For example, a simple painted profile may involve repeated straight cuts, while an ornate molding or a stain-grade installation calls for more exact fitting and a more polished final appearance. Neither option is inherently better; they simply require different preparation and installation steps.
An initial interior trim estimate can begin with room dimensions, photos, the trim locations, and the finish you want. A final quote may need an on-site assessment when existing conditions are unclear, such as walls that need scribing for a close fit, old trim that must be removed, or surfaces requiring repair before new molding can be installed. Clear details help define the full scope before work begins.
The Type, Quantity, and Layout of Trim Shape the Scope
The trim category determines where the work happens and how pieces must meet. Baseboards follow the floor line; door and window casing frames openings; crown molding joins wall and ceiling; and chair rail runs across a wall at a chosen height. Wainscoting adds a wall-covering system below that line, while panel molding creates applied rectangles or other patterns on the wall face. Each can involve a different mix of measuring, cutting, fitting, and aligning.
Linear footage remains useful because it describes the total amount of trim to be handled and installed. But it is only one of the important trim estimate factors. Room count alone can miss the details that interrupt a run: doors, closets, window openings, outside corners, bump-outs, returns where a profile ends visibly, and transitions between one trim treatment and another. Stairs and built-ins can add changes in direction, angles, and short sections that need individual fitting.
Consider two rooms with similar perimeter measurements. A straightforward baseboard installation estimate for an open rectangular room may consist largely of long runs and a limited number of corner joints. A room with several doors, closets, a projecting chimney wall, and built-in cabinetry breaks that same footage into many smaller pieces. Each stop, restart, corner, and return needs to be laid out and cut so the profile reads as a continuous detail rather than a collection of board ends.
Detailed wall treatments add another layer of layout work. Panel molding and wainscoting depend on consistent spacing, level rails, and panels that look balanced around windows, outlets, doors, or fixed furniture. For a more useful quote, identify the trim types by room and include photos or a simple sketch that marks openings, stairs, built-ins, and any wall treatment changes. Those details show the installer far more than a perimeter measurement alone.
Material Selection and Profile Design Affect Both Handling and Finish Work
Material selection changes both the look of the trim and the way the finished result must be approached. MDF is often considered for painted interior profiles with a uniform, smooth appearance. Finger-jointed pine is another paint-grade option, while solid wood and hardwood are commonly selected when the natural grain will remain visible. PVC is a separate option often considered where moisture exposure is part of the project conversation. The useful takeaway is not that one material is universally better, but that the intended location and finish should be decided together.

Those choices affect the installation plan. A paint-grade scope can allow attention to seams, fastener holes, caulk lines, and a consistent painted surface. A stain-grade scope places more emphasis on the appearance of the face grain, color variation, cut ends, and joints because those details remain visible. If a homeowner wants stained casing beside existing woodwork, photos and a close description of the existing color and grain character help define the matching expectation.
Profile design is one of the molding cost factors that can change the amount of cutting, fitting, and touch-up involved. A simple stock profile is a readily available, single-piece shape with relatively uncomplicated edges. A wider or thicker decorative profile has more visual presence, but its corners and returns need to preserve more detail. Ornate contours can also make small alignment differences more noticeable after installation and finishing.
Built-up molding takes the design a step further. Rather than one board, it combines multiple pieces, such as a base cap, flat stock, and crown element, to create a larger custom-looking assembly. That approach involves laying out each layer, maintaining reveals (the intentional visible offsets between pieces), and keeping the full composition consistent through corners and transitions. For a clearer estimate, share the material, paint or stain intent, a photo or product link for the profile, and whether the design is a single stock piece or a multi-piece assembly.
Ceiling Height, Corners, and Access Can Make Installation More Involved
An open room with standard-height ceilings gives installers room to measure, cut, carry long pieces, and work along the wall. Tall ceilings, stairwells, and difficult-to-reach upper walls change that setup. They can require more time to position access equipment, move between work areas, and handle molding at height. Vaulted or sloped ceilings also create changing angles rather than one consistent line around the room.
Crown molding typically demands more fitting attention than a simple baseboard run because it meets both the wall and ceiling at once. At an inside corner, coping shapes the end of one piece to follow the face of the adjoining profile; this can produce a close-looking joint when a corner is not perfectly square. Outside corners commonly use miter joints, or angled cuts that meet at the corner. Scarf joints join two lengths along a straight run when one board is not long enough. Each joint needs layout that keeps the profile, spring angle, and visible edges aligned.
Walls and ceilings that bow, dip, or meet at irregular angles can make a perfectly straight piece appear to leave gaps. A straightforward crown molding estimate may involve a level, open room with repeatable corners. A more involved one may include a stair landing, a vaulted ceiling transition, or an uneven ceiling line that calls for test fitting and careful adjustment so the molding reads as intentional from normal viewing distance.
Access inside an occupied home matters, too. Tight layouts, built-ins, fragile surfaces, and furniture that cannot be moved easily affect how the area is protected and how readily installers can reach cuts, corners, and fastening locations. Photos showing ceiling height, stair geometry, room contents, and any angled transitions help define these conditions before the visit.
Existing Walls, Floors, and Old Trim May Require Preparation or Repair
A replacement project begins with the surfaces left behind. In a newly prepared room, trim can be fitted to clean walls and a known floor line. In an occupied or previously finished home, removing old baseboards or casing may expose nail holes, adhesive residue, torn drywall paper, paint ridges, or gaps that the previous trim concealed.
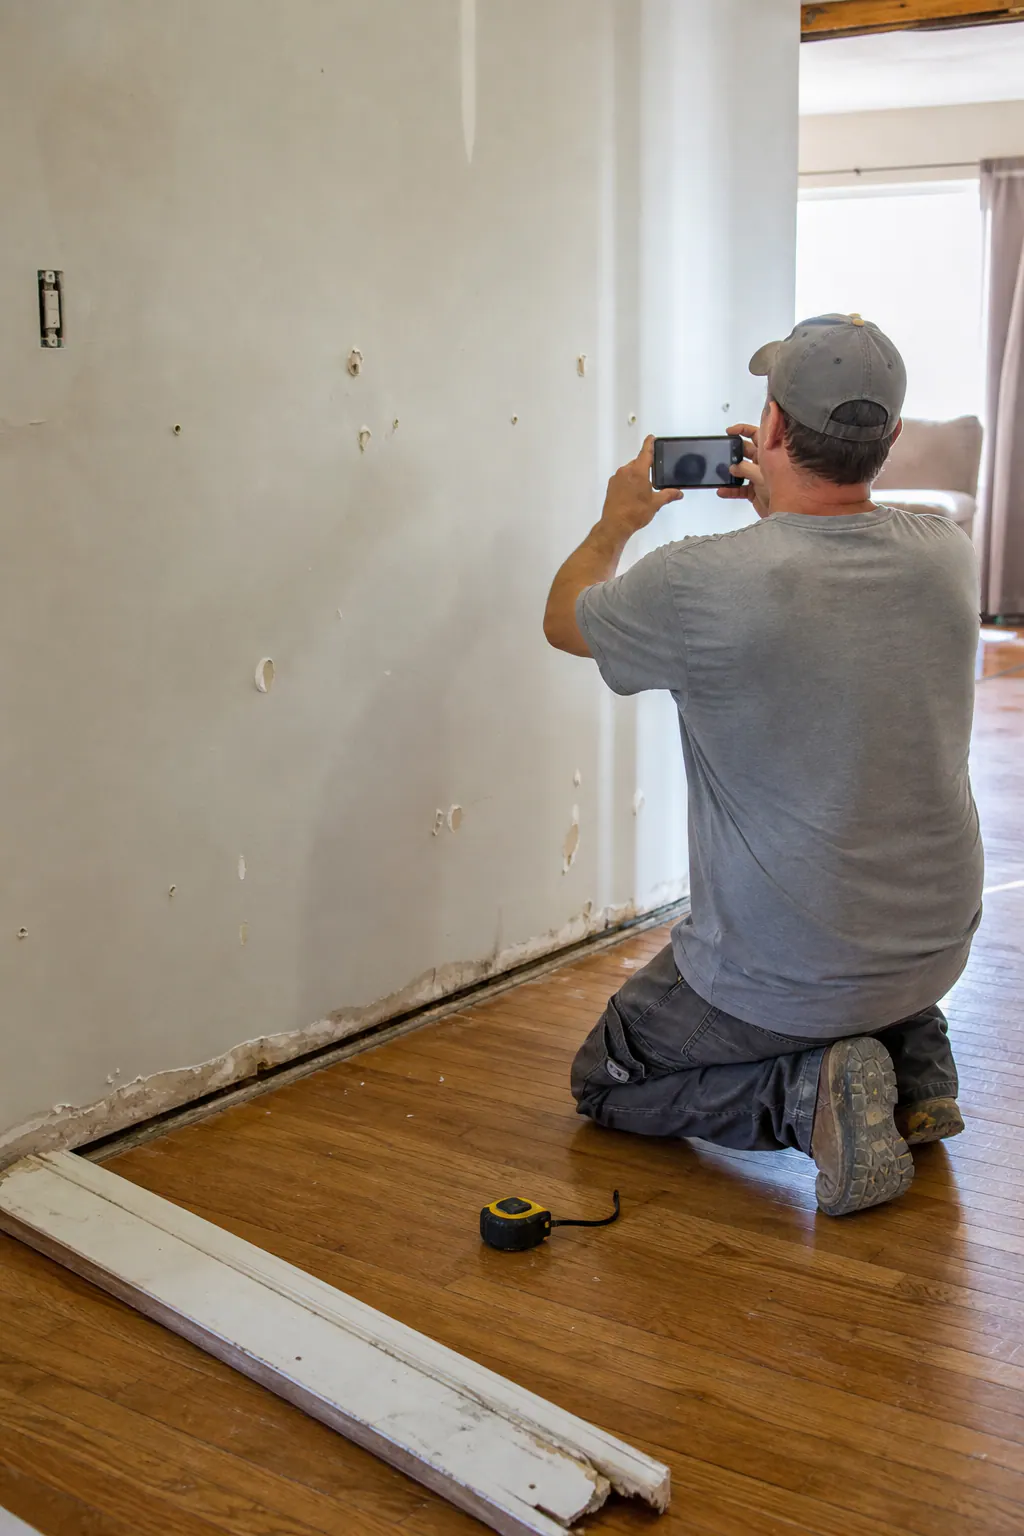
Those conditions are not automatically problems; they simply define the preparation needed for a clean result. Adhesive and heavy paint buildup may need to be removed or feathered so the new piece sits flat. Damaged drywall may need patching before installation. If a wall bows away from a straight board, the installer may scribe the trim, marking and trimming its edge to follow the surface, or use shims behind it where appropriate. Caulk can refine small finish gaps, but it is not a substitute for correcting a visibly poor fit.
Floors and framing also affect trim replacement versus installation. An existing floor may have an uneven edge or a gap where thinner trim was removed; a home that has settled can leave walls out of plane or corners less predictable. Missing backing, the solid material behind drywall that provides a fastening point, can require a different fastening plan or coordination with a repair before trim is installed.
Photos of the current trim, floor transitions, wall damage, and any areas where boards already pull away help identify these finish carpentry estimate factors early. Some irregularities are only visible after removal, so an estimate can reasonably distinguish the visible scope from preparation or repair that becomes clear once the old material is off.
Custom Details and Paint or Stain Expectations Define the Level of Finish
Custom trim work starts with a design decision, then adds the work needed to make that design belong in the room. Matching an older casing or crown profile may mean finding a close stock profile, combining separate pieces, or creating a sample to reproduce its shape. A new panel-molding layout also needs to be set out so the panels remain balanced around windows, doors, switches, and other fixed features. The same attention applies when trim dies into cabinets, wraps a fireplace, or transitions at a built-in: proportions, reveals, returns, and joint locations all need to look intentional.
Built-up assemblies are a clear example. They use several trim components to create one larger treatment rather than installing a single decorative board. That can allow a tailored scale for a tall room or a closer match to existing millwork, but each layer must be aligned and fitted as part of the assembly. For custom trim work, a photo of the trim to match and a sketch or inspiration image for the proposed layout help establish whether the request is a straightforward installation or a fabrication-and-layout project.
Finish carpentry cost considerations also depend on where installation ends and coating work begins. Installation-only scope can mean boards are cut, fitted, fastened, and left ready for the next trade. A fully finished paint-grade result may include priming, caulking small paintable seams, filling nail holes, sanding those filled areas, masking adjacent surfaces, applying the selected coating, and completing touch-ups. Those are distinct tasks, not an automatic add-on to mounting the trim.
Paint-grade versus stain-grade trim creates different visual expectations. Paint can unify filled fastener holes and minor seams after preparation; stain leaves the wood’s grain and color variation visible, so material selection, board matching, clean cuts, sanding, and finish consistency become more prominent. Before requesting an estimate, specify who will paint or stain, the desired sheen, whether a particular color or clear finish is planned, and whether the new work must match existing trim.
How to Provide Better Information for a More Accurate Trim Estimate
A few clear details can turn a broad conversation into an interior trim estimate that reflects the work you want completed. A remote estimate is useful for establishing the visible scope, but an on-site assessment may still be needed where fit, removal, or surface conditions cannot be seen clearly in photos.
- Share wide photos of each room plus close-ups of corners, door and window openings, floor transitions, and any damaged or uneven areas.
- Include approximate wall runs and ceiling heights. A simple sketch that notes doors, windows, stairs, and built-ins is more useful than a perimeter number alone.
- Name the trim by location: for example, new baseboards throughout, casing at three doors, or crown in a stairwell.
- Provide a material preference or a photo of the profile to match. If the design is still open, identify whether the goal is a simple painted profile, visible-grain wood, or a built-up look.
- State whether painting or staining is included, who will do it, and whether the finish must match existing trim.
- Point out old trim to remove, wall or floor concerns, furniture or access limitations, and areas that may need protection.
The stronger the scope, the easier it is to align the proposed work with the finished appearance you expect. A site review can then resolve the details that measurements and photos cannot fully show, reducing avoidable surprises once installation begins.
Plan the next step
When you are ready, request a free estimate with the rooms, trim goals, city, and available photos.
FAQs
What affects the cost of installing trim and molding?
Trim cost depends on the trim type and profile, total linear footage, room layout, material, access, removal or repair needs, and the requested paint- or stain-grade finish. Doors, windows, corners, stairs, built-ins, and transitions can create extra cuts, joints, and fitting work beyond the footage total.
Does the type of molding material affect the estimate?
Yes. MDF and finger-jointed pine are common paint-grade choices, while solid wood and hardwood are often used when visible grain will remain exposed; PVC may be considered in moisture-prone locations. Stain-grade work requires closer attention to grain, color variation, cut ends, sanding, and visible joints.
Do tall ceilings make crown molding more expensive to install?
Tall ceilings, stairwells, and difficult upper-wall access add time for positioning access equipment and handling long molding pieces at height. Vaulted or sloped ceilings also create changing angles, while crown molding requires fitting at both the wall and ceiling.
What existing wall or floor conditions can affect a trim estimate?
Removing old trim can reveal nail holes, adhesive residue, torn drywall paper, paint ridges, floor gaps, uneven walls, and missing backing behind drywall. These conditions may require removal, patching, scribing, shimming, or a different fastening plan before new trim can be fitted cleanly.
What information should I provide for an accurate trim estimate?
Provide wide room photos, close-ups of corners and floor transitions, approximate wall runs, ceiling heights, and a sketch showing doors, windows, stairs, and built-ins. Also identify trim locations, material or profile preferences, paint or stain responsibilities, old trim to remove, and any access or furniture limitations.