
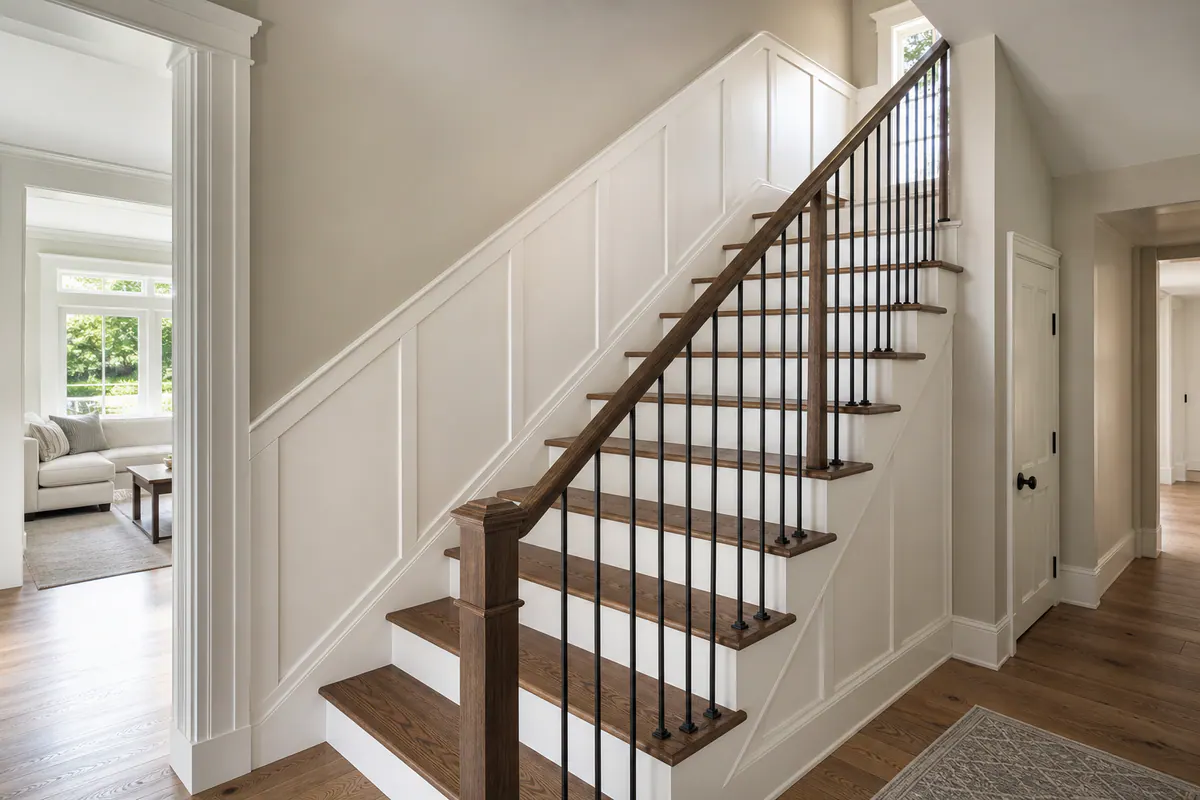
A finished staircase is rarely the result of one decorative strip of molding. It comes from treating the stair run, wall, and landing as connected surfaces rather than separate problems. A plain wall beside the steps can feel exposed; a skirt board creates a deliberate edge where the wall meets the treads, while staircase wainscoting gives the wall a measured lower-field detail instead of leaving it visually blank.
The surrounding parts matter just as much. Treads and risers set the stair's material and color direction, landing trim carries that detail through a change in level, and baseboards and door casing show where the new work needs to begin or end. Railing-adjacent finish carpentry must frame the rail without crowding the area used for a secure handhold or disrupting its existing clearances.
Good stair trim installation is therefore a layout decision before it is a molding decision. In a clean-lined home, a painted skirt board with a simple wall cap may be enough. In a more traditional space, evenly proportioned wall panels can continue from the entry or upper hall onto the stair wall. The strong signal is a repeatable rhythm that resolves neatly at the landing; a weak one is forcing narrow, mismatched panels around obstructions just to fill every inch.
Finish carpentry for stairs should make the route through the home feel connected, not overworked. The right treatment takes its cues from the adjacent rooms and the staircase's actual geometry, then uses restraint to make each transition look intentional.
The Main Elements of a Finished Staircase
Each piece has a specific job, and the names can make a scope of work easier to understand. The most visible boundary is the skirt board: the sloped board running beside the treads along the wall. A stair skirt board installation gives that junction a crisp, continuous line, rather than relying on paint or a bead of caulk to disguise an uneven wall edge.
- Tread and riser trim addresses the horizontal walking surfaces and the vertical faces between them. It may include refined edge details, painted risers, or trim where stair parts meet adjacent walls, helping the stair run relate to its selected woodwork and finish scheme.
- Wall panel molding is the general term for applied trim arranged on a wall. Board and batten uses vertical boards or battens to create a simple, regular rhythm, while picture-frame molding forms outlined rectangular panels for a more tailored appearance. Both can give the lower stair wall a defined surface and a measure of protection from everyday contact.
- Wall caps finish the top edge of wainscoting or panel work. They create a deliberate stopping point, especially where the treatment meets a plain upper wall, door casing, or an upper-hall baseboard line.
- Stair landing trim carries the detail through the flat platform where the stair changes direction or meets a hall. Baseboard, cap molding, and panel layout should resolve there instead of ending abruptly at the last step.
- Return trim wraps an exposed end of a board or molding back toward the wall. A clean return avoids a raw cut end and is particularly useful at open panel runs, caps, and stair edges.
Railing-adjacent trim fills in the wall and post areas around a handrail, newel, or balusters without making the rail feel boxed in. This is often where mitered transitions and scribed edges matter most: walls are not always flat, and a fitted piece can follow an uneven surface more cleanly than a broad caulk line. The intended handhold and open space around the railing should remain usable as these details are planned.
A restrained combination might be a painted skirt board, matching baseboard at the landing, and a simple cap over modest panel molding. That approach gives the stair its own finished identity while still allowing nearby casing and trim to lead the design.
Choosing the Right Stair Trim Treatment for Your Home
The best treatment is often the one that gives the stair wall a clear boundary without asking it to become the room's main attraction. In a clean-lined or contemporary interior, a simple painted skirt board paired with the home's existing baseboard profile is usually the strongest choice. It sharpens the diagonal along the steps and lets broad walls, modern railings, or stained treads remain visually quiet.
Board and batten suits a more casual or transitional home where the lower wall needs both rhythm and a more protected, finished surface. The vertical battens break up a long run without the formality of inset-looking panels. It works especially well on a visible stair wall with enough width to establish repeatable spacing; cramped battens on a narrow, steep wall can make the climb feel busier rather than more intentional.
Picture-frame molding creates a tailored, more formal version of staircase wainscoting. Its outlined rectangles bring order to a generous wall and can echo nearby door casing or traditional panel details. The tradeoff is proportion: small, uneven panels forced around a sloped ceiling, a landing opening, or a handrail read as an afterthought. A tall foyer stair may carry this level of detail gracefully, while a compact contemporary stair may need only a skirt board and a restrained cap.
A wall cap or limited accent molding is the middle path. It draws a deliberate horizontal stopping line between a detailed lower wall and a plain upper wall, but avoids filling every available surface. This approach is useful where ceiling height is modest, the stair angle is pronounced, or existing trim already has enough character. Matching the cap, baseboard, and casing profiles matters more than adding another decorative layer.
Painted custom stair trim tends to blend separate elements into one calm composition; stain-grade work is more selective, usually chosen to relate directly to wood treads, a rail, or nearby millwork. Before settling on a layout, staircase finish carpentry should account for wall size, landing geometry, openings, and the room's sightlines. The selected treatment also needs to leave the handrail and its surrounding usable space unobstructed.
What Professional Stair Trim Installation Involves
Before material is cut, professional stair trim installation begins with the stair run as it actually exists, not as it appears from the foyer. Measurements capture tread and riser relationships, the stair angle, wall width, landing depth, nearby door openings, and the profiles of baseboard and casing that the new work must meet. Walls are also checked for bows or waves that can throw off an otherwise straight-looking trim line.
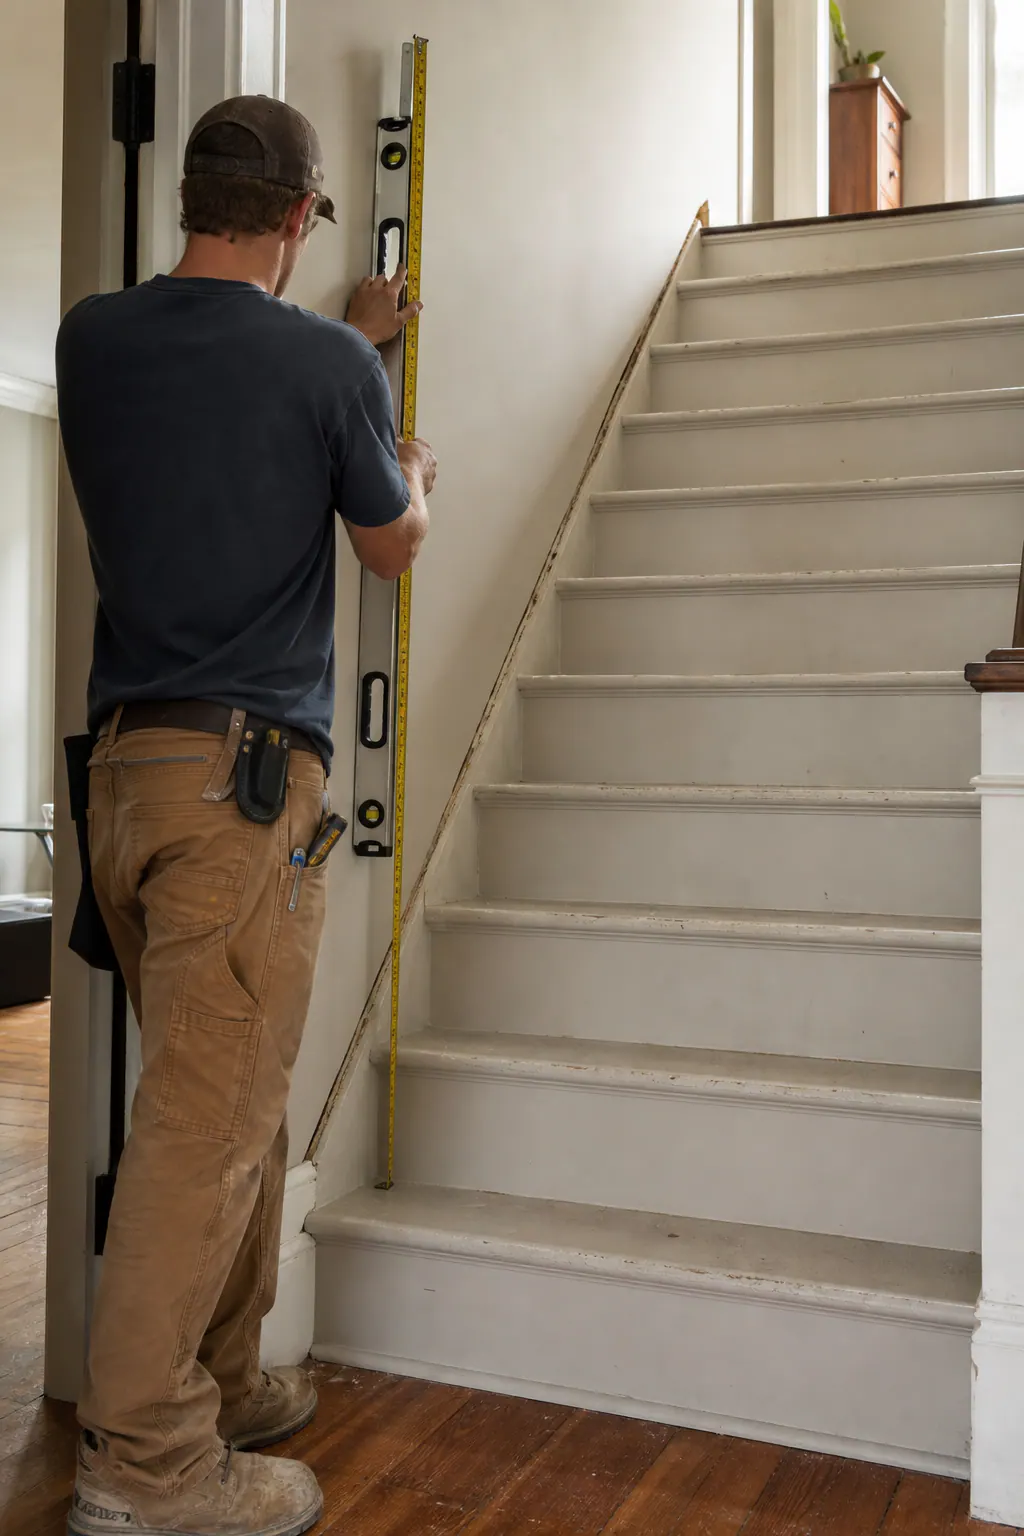
Layout comes next. A carpenter establishes level elevation lines for caps or panel systems and maps panel spacing across the full wall and landing rather than starting at one end and accepting whatever narrow space remains. Consistent reveals, the intentional visible gaps around molding, are a strong signal of careful planning. Panels that become noticeably narrower near a landing or stair opening usually need a different layout, not a last-minute filler strip.
The diagonal changes the work considerably. Templates help transfer the actual angle of the stair to skirt boards, returns, and molding pieces, while dry fitting exposes gaps before final attachment. A skirt board must meet individual treads and risers cleanly while following the wall; when the wall is irregular, scribing trims the board's edge to its contour. That produces a fitted connection instead of relying on a wide bead of caulk to hide a mismatch.
Landings require their own transition plan. The sloped run may need to turn into level baseboard, wrap a corner, or meet casing with a deliberate mitered return. Tight miters create a crisp change of direction; a poorly planned joint can leave the landing looking like a separate project. Staircase trim installation also accounts for rail brackets, newel areas, and adjacent wall trim so added material does not crowd the handrail or interrupt its usable path.
Only after the pieces are fitted are fastener holes filled, joints selectively caulked, edges sanded, and surfaces prepared for their final finish. Paint can visually unify these repaired transitions; stain demands especially clean grain, joins, and cut quality because it does not conceal them. The goal of stair trim work is not simply attached molding, but straight visual lines and composed connections from the first tread through the landing.
Working Around Railings, Landings, and Existing Stair Conditions
A railing can be the deciding constraint, not a detail to trim around at the end. Existing handrail brackets, newel posts, balusters, and the rail's return ends determine where wall molding can stop. Well-integrated stair railing trim terminates with a clean return at a bracket or meets the face of a newel with a deliberate reveal; it does not wrap tightly around the rail or leave a thin, awkward strip of wall paneling behind it.
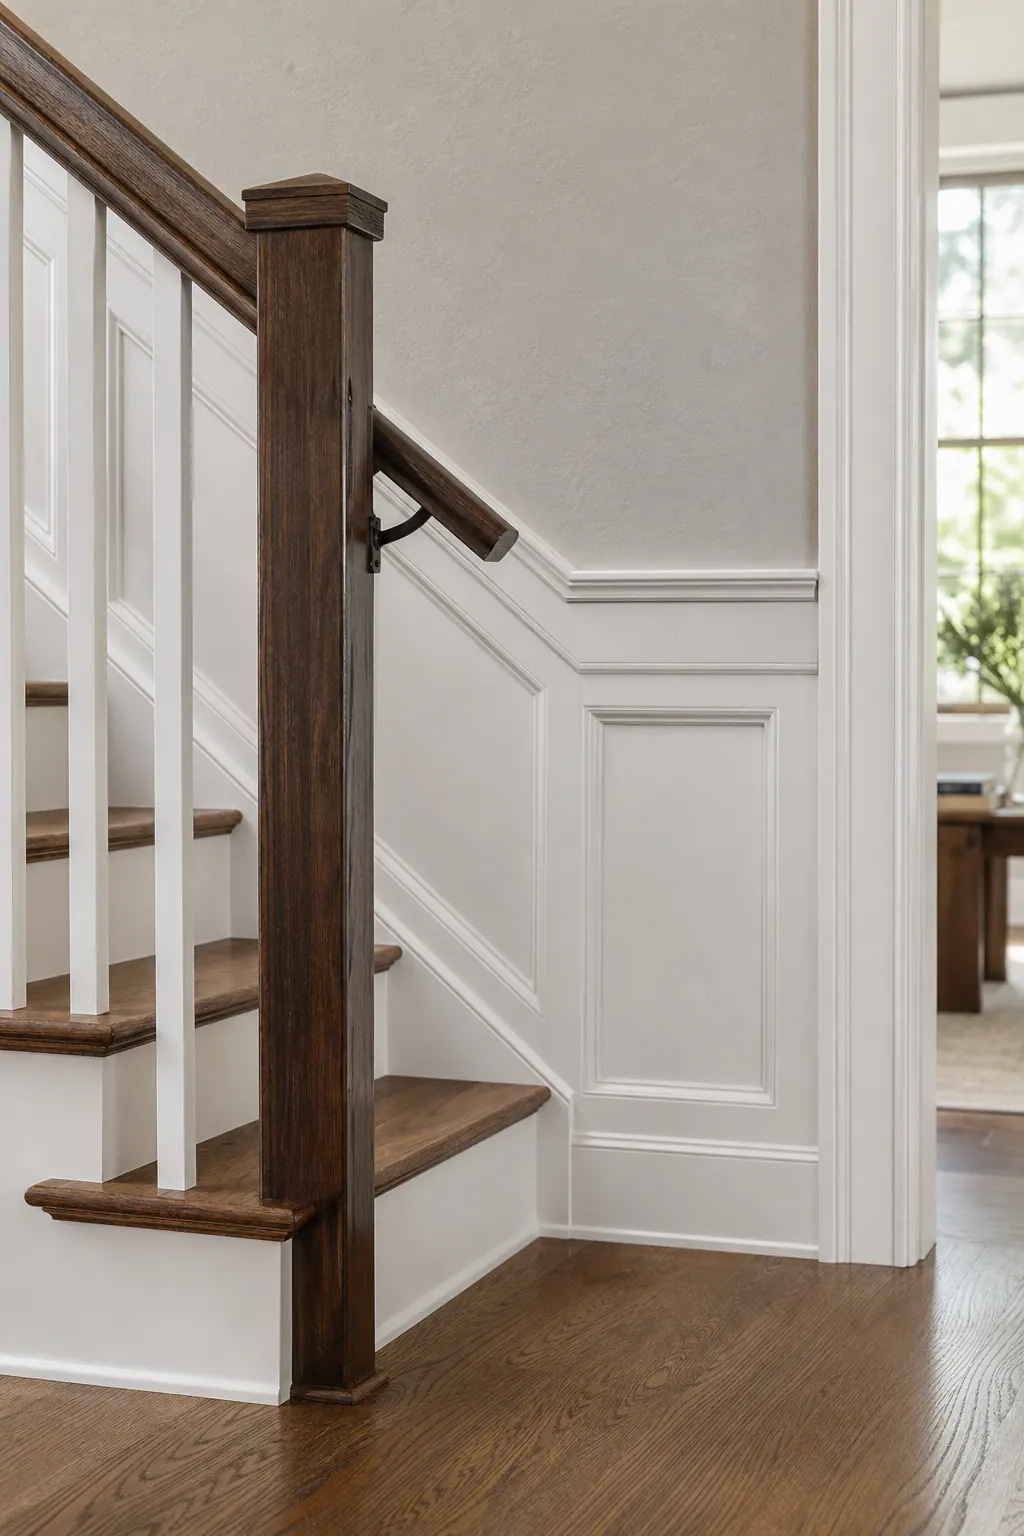
The rail also needs to remain comfortable to grasp, securely mounted, and clear of added material along the walking path. A deeper cap, thick board-and-batten system, or new panel field can reduce the usable space beside an existing handrail. In those cases, the better solution may be a shallower wall treatment, revised bracket placement, or a coordinated railing update rather than forcing the original rail to work around new trim. Site-specific, code-sensitive conditions should remain functional throughout the design.
At landings, the key question is how the angled wall resolves into a level wall, baseboard run, corner, or door casing. A strong transition lets the skirt board arrive cleanly at the landing and lets the level trim continue at a matching height. A weak one produces a cramped panel beside a door opening or a sudden profile change with no visual reason for it.
Finish carpentry stairs also calls for a close look at stair nosings, wall damage, protruding vents or switches, and the condition of nearby baseboards and casing. A stair skirt board installation may need repair work or adjusted details where walls are uneven or existing trim profiles conflict. Not every staircase can accept a full panel layout unchanged; selective trim is often what keeps the result composed rather than crowded.
Materials, Paint, and Detail Choices That Hold Up on Stairs
Finish selection determines whether the new work reads as one quiet surface or as a collection of added parts. Paint-grade wood is a flexible choice for crisp edges and shaped profiles, while MDF can suit straight, painted wall panel molding on dry, stable interior walls. Where the stair area sees moisture, damaged walls, or frequent bumps at a landing, the material and repair approach should be chosen for those conditions rather than appearance alone.
Stain-grade wood is most convincing when it has a clear relationship to existing treads, a handrail, or nearby wood casing. Its grain remains visible, so mismatched species, uneven color, filled joints, and rough cuts are harder to hide. Painted custom finish carpentry, by contrast, can connect a skirt board, baseboard, cap, and board and batten system even when those components serve different parts of the stair.
On scuff-prone walls, a durable, washable trim coating and careful surface preparation matter as much as the color. A modest profile that echoes nearby baseboard or casing usually looks more settled than a heavy molding introduced only on the stairs. Panel spacing should feel repeatable from the bottom run through the landing; a narrow, forced final panel is a warning that the layout needs adjustment.
For color, matching trim to the home's existing painted millwork creates a calm boundary. A wall color that contrasts with the trim makes panels and the stair angle more visible, while low contrast keeps the treatment quieter. The useful choice is the one that supports the room's light, existing finishes, and desired level of visual emphasis.
Plan a Staircase Upgrade That Looks Built In
The most useful starting point is a walk-through of the staircase, not a catalog of moldings. For stair trim Sarasota County projects, an on-site evaluation can show whether a clean painted skirt board is enough, whether the wall has room for measured wainscoting, and how the treatment should turn across a landing without competing with existing casing or baseboard.
A cohesive scope ties those decisions together: the trim profile and material, wall and surface preparation, paint or stain approach, landing transitions, and the points where finish work meets the railing. A strong layout has intentional endpoints and repeatable panel widths; a weak one leaves a sliver of paneling beside a door casing or crowds the handrail.
Bring photos of nearby rooms and any finishes you hope to match. From there, custom finish carpentry can be planned as one coordinated stair trim installation rather than a collection of decorative add-ons. Request a consultation or estimate to develop a staircase scope that fits your home's actual walls, railings, and stair geometry.
Plan the next step
Compare the broader Stair Trim and Wainscoting service.
When you are ready, request a free estimate with the rooms, trim goals, city, and available photos.
FAQs
What is a skirt board on a staircase?
A skirt board is the sloped board installed along the wall beside the treads. It creates a crisp, continuous boundary between the wall and stair treads instead of relying on caulk or paint to hide uneven edges.
Can you add wainscoting to an existing staircase?
Yes, wainscoting can be added to an existing stair wall using board and batten, picture-frame molding, or a wall cap with panel molding. The layout should account for wall width, stair angle, landings, door openings, baseboards, and handrail clearance.
Should stair wainscoting follow the angle of the stairs?
The sloped skirt board should follow the stair angle, while caps and panel layouts need intentional transitions at the landing. A level cap or baseboard should resolve cleanly where the angled stair wall meets the level landing or hall wall.
Can new stair trim be installed around an existing handrail?
Yes, but trim must stop cleanly at handrail brackets, newel posts, balusters, or rail returns without crowding the usable handhold. Thick caps or deep panel systems can reduce clearance, so a shallower treatment, revised brackets, or a coordinated railing update may be needed.
What type of wainscoting looks best on a modern staircase?
A modern staircase usually looks best with a simple painted skirt board paired with the home’s existing baseboard profile. If additional detail is needed, use a restrained wall cap or modest panel molding rather than formal picture-frame panels or tightly spaced battens.