
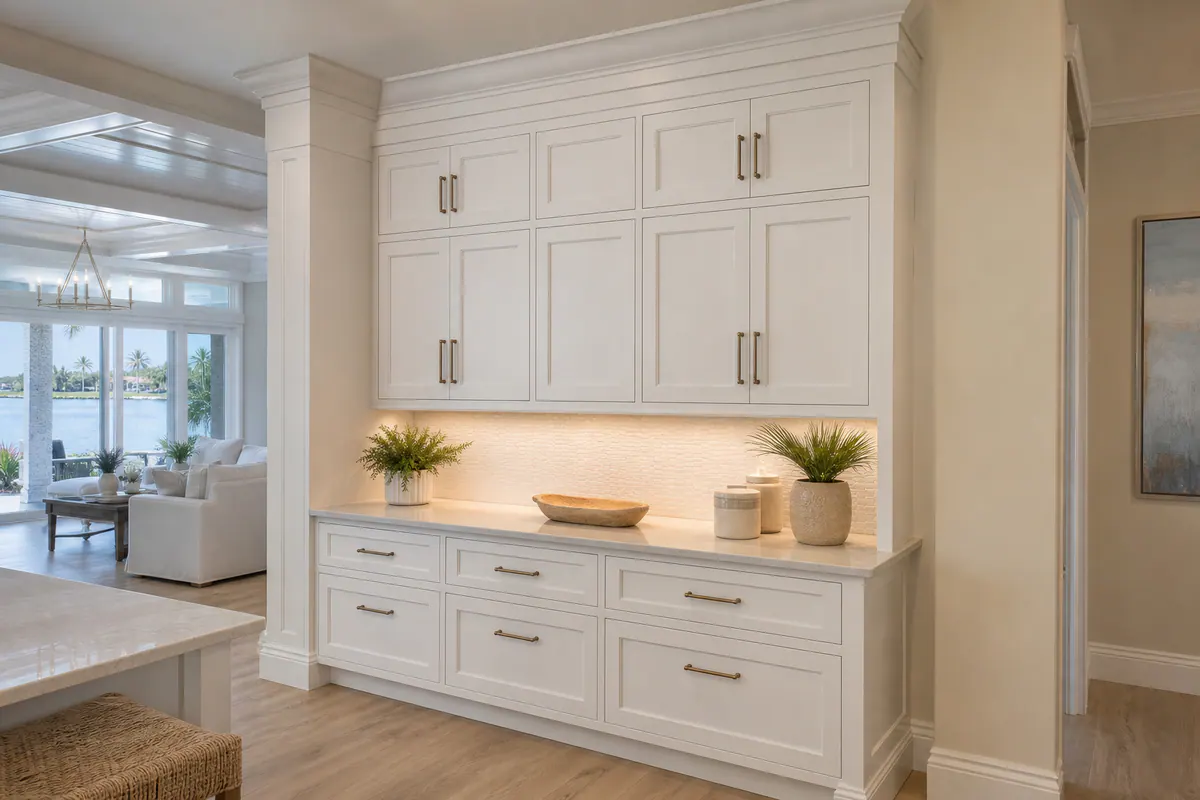
Cabinet and Built-In Trim: The Details That Make Cabinetry Look Intentional
Cabinetry can be well made and still look unfinished if its edges stop abruptly at the ceiling, wall, floor, or open end. Cabinet trim installation treats those edges as a connected finishing system: details are selected to create deliberate transitions, balance the cabinet's scale against the room, and make the completed unit feel placed rather than simply set in position.
Each piece has a distinct job. Crown molding finishes the top of uppers, tall cabinets, and built-ins where a stronger ceiling transition suits the room. Light rail runs beneath upper cabinets to give that exposed lower edge a clean termination and can help conceal under-cabinet lighting. Toe kick trim resolves the recessed base of lower cabinets; fillers and scribes handle the small allowances needed beside imperfect walls; and finished end panels keep exposed cabinet sides from reading as raw boxes. Built-in shelving trim can frame bookcases, entertainment centers, office storage, and mudroom units so they relate to nearby doors, baseboards, or crown.
Not every cabinet needs every detail. A short run beneath an open ceiling may call for a simple top finish rather than a large crown profile, while a wall-to-wall bookcase may need carefully fitted side treatment to avoid visible gaps. Oversized molding can make short cabinets feel top-heavy, and a profile that clashes with existing room trim can make a built-in feel separate from its surroundings. The strongest cabinet trim choices account for ceiling variation, uneven floors, cabinet alignment, lighting, and whether the final finish is painted or stained.
Cabinet Crown Molding and Upper-Cabinet Finishing
At the top of a cabinet run, the termination matters as much as the doors below it. Cabinet crown molding is most effective above upper cabinets, tall pantry cabinets, bookcases, and full-height built-ins that need a deliberate finish at the ceiling or a furniture-like cap.
Crown can serve three different visual purposes. It can close a modest, uneven-looking space between cabinetry and ceiling; echo the crown already used around the room; or create a stepped top edge that gives a freestanding-looking bookcase or entertainment center more presence. Those choices are related, but not interchangeable. A crown intended to meet the ceiling needs enough clearance and a consistent line across the cabinet run, while a furniture-style crown may sit below the ceiling as an intentional top cap.
Scale is the deciding factor. Taller cabinets can usually carry a deeper, more layered profile without looking crowded. On shorter upper cabinets, a broad crown can consume too much visible height and make the doors appear compressed. Simple shaker doors often suit a restrained cove, small stepped profile, or flat fascia; more traditional raised-panel doors can support a more shaped profile when the surrounding room trim carries the same visual weight.
A good upper cabinet finish also respects nearby architecture. Matching the room's profile exactly is not always necessary, but the cabinet crown should feel compatible in scale and formality. A slim, square-edged top treatment may be the better choice in a clean-lined room, and cabinets that stop well below a high or vaulted ceiling may look more honest without crown at all.
Cabinet molding installation depends on straight cabinet alignment before the trim goes on. Level runs, aligned returns at exposed ends, tight miters at corners, and clean transitions where molding approaches a wall keep the profile reading as one continuous detail. For painted cabinetry, neatly prepared joints create a smooth finished line; for stained work, grain direction and careful joinery become especially visible.
Light Rail Molding for Finished Undersides and Concealed Lighting
The underside of an upper cabinet is often seen at eye level from across the room, especially when task lighting is on. Light rail molding is the narrow trim installed along that lower front edge. It gives a shallow cabinet bottom a deliberate finished line instead of leaving the box construction and lighting hardware visually exposed.
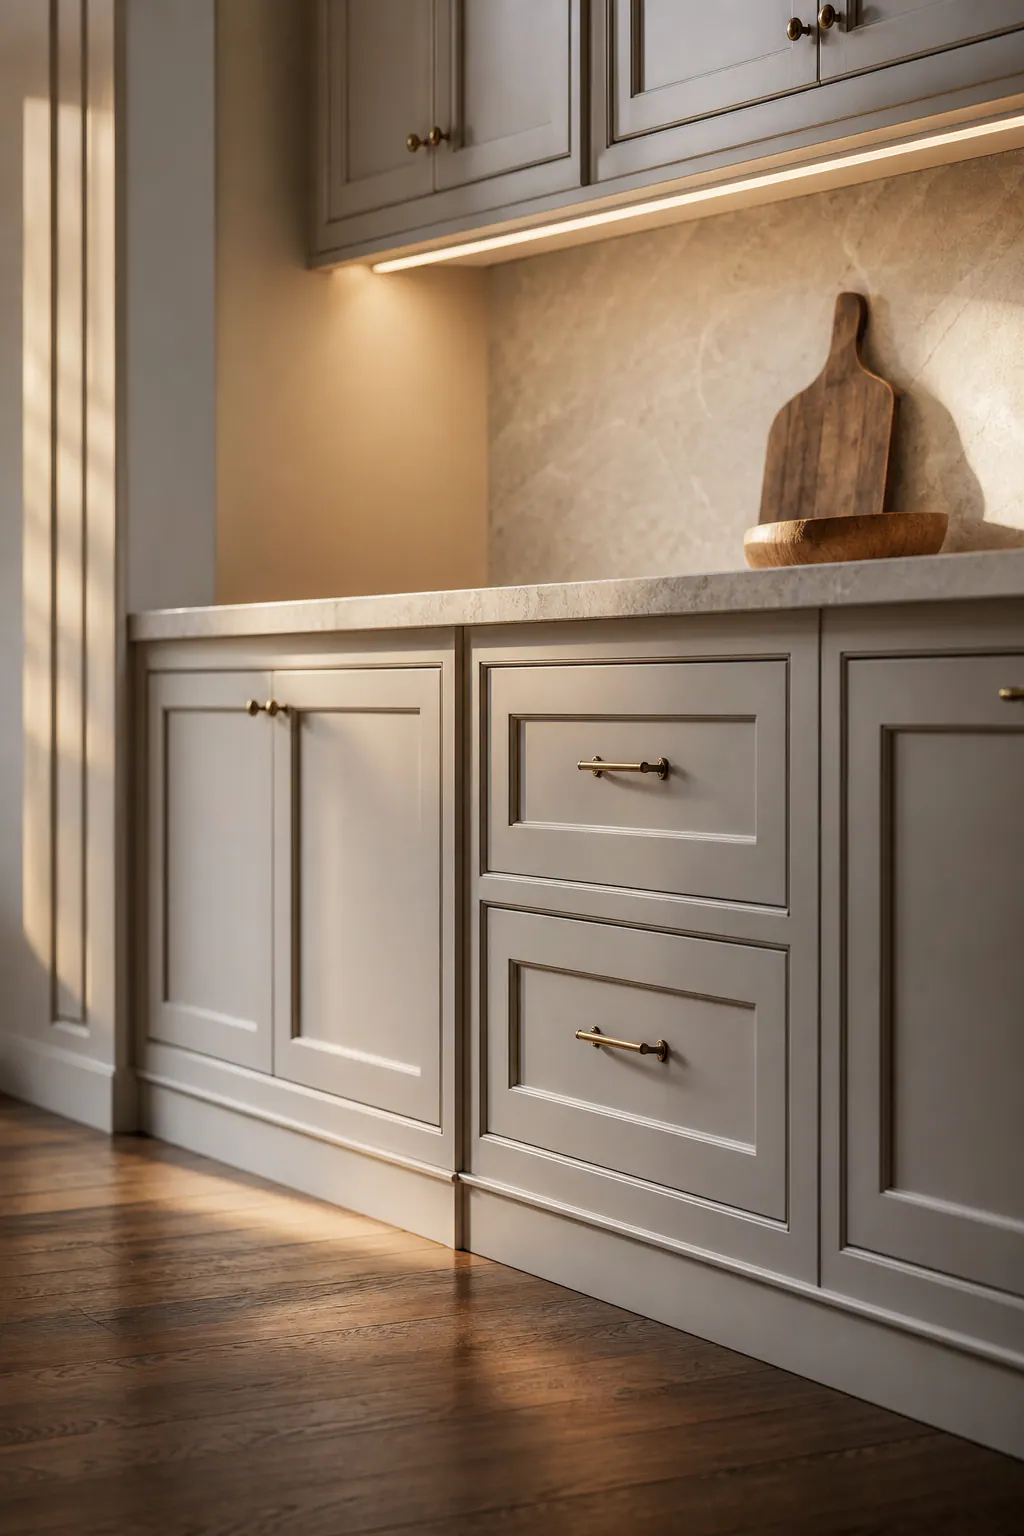
A properly sized rail can improve under-cabinet lighting concealment by blocking direct views of a slim fixture or LED channel from normal standing sightlines while leaving useful light aimed at the countertop. The depth is not chosen for appearance alone: it must extend far enough below and in front of the fixture to screen it, without becoming so deep that it casts an unwanted shadow or feels heavy beneath a short upper cabinet.
Light rail is different from a light valance. A rail is typically a restrained, consistent edge treatment that follows the full cabinet run. A valance is larger and more decorative, often with a shaped or scalloped lower edge, and can become a visible design feature in its own right. Clean-lined doors generally benefit from a simple square or small-profile rail; a more traditional kitchen may carry a shaped valance when its scale relates to the doors and surrounding trim.
Placement deserves a side-view review before the pieces are finished. The rail needs to clear door movement and hardware, align evenly across adjoining cabinets, and account for where the fixture sits beneath the cabinet. A rail that hides the fixture from one end of the run but leaves it visible from the kitchen entry, or drops lower than neighboring cabinet details, undercuts the finished effect it is meant to create.
Toe Kick Trim, Base Molding, and the Finished Cabinet Base
At floor level, the cabinet base has to work hard without calling attention to itself. Cabinet toe kick trim closes the recessed area beneath lower cabinets, creating a deliberate shadow line while leaving room for a person's feet when standing at the counter. It also gives the lowest exposed cabinet edge a finished surface rather than leaving a raw recess visible from across the room.
A toe kick is not the same thing as room baseboard. Base molding runs along the wall to finish the wall-to-floor joint; toe kick trim follows the cabinet run and stays recessed behind the cabinet faces. The profiles and paint color can relate, but extending a thick baseboard across a recessed cabinet base can reduce foot clearance and blur the clean reveal that makes the cabinets look properly set on the floor.
For a streamlined kitchen, cabinet toe kick trim is often finished to match the cabinet boxes or painted the same color as the doors, so the recess reads as a quiet continuous band. At an open end, the baseboard can terminate neatly against the cabinet side or return into an end panel instead of stopping with an awkward sliver of wall exposed. On an island, a consistent recessed base helps the unit appear grounded from every approach.
A furniture-style base is a different choice: rather than a deep recess, it uses a more visible plinth or shaped base to make a cabinet or built-in resemble a freestanding piece. This treatment suits select islands, bookcases, or traditional built-ins, but it needs enough visual weight to support the unit without making lower cabinets feel squat. Near floors, finish selection and tight alignment matter most; uneven flooring can make a straight trim line look noticeably uneven unless the base is fitted to follow the room.
Built-In Shelving Trim for Bookcases, Entertainment Centers, Offices, and Mudrooms
A bookcase or storage wall earns its built-in character at the edges: where shelves meet the face, where the unit ends at a wall, and where its top and base meet the surrounding architecture. Built-in shelving trim gives those transitions a hierarchy, so an office library, mudroom locker run, or living-room display wall reads as part of the room rather than a collection of cabinet boxes.
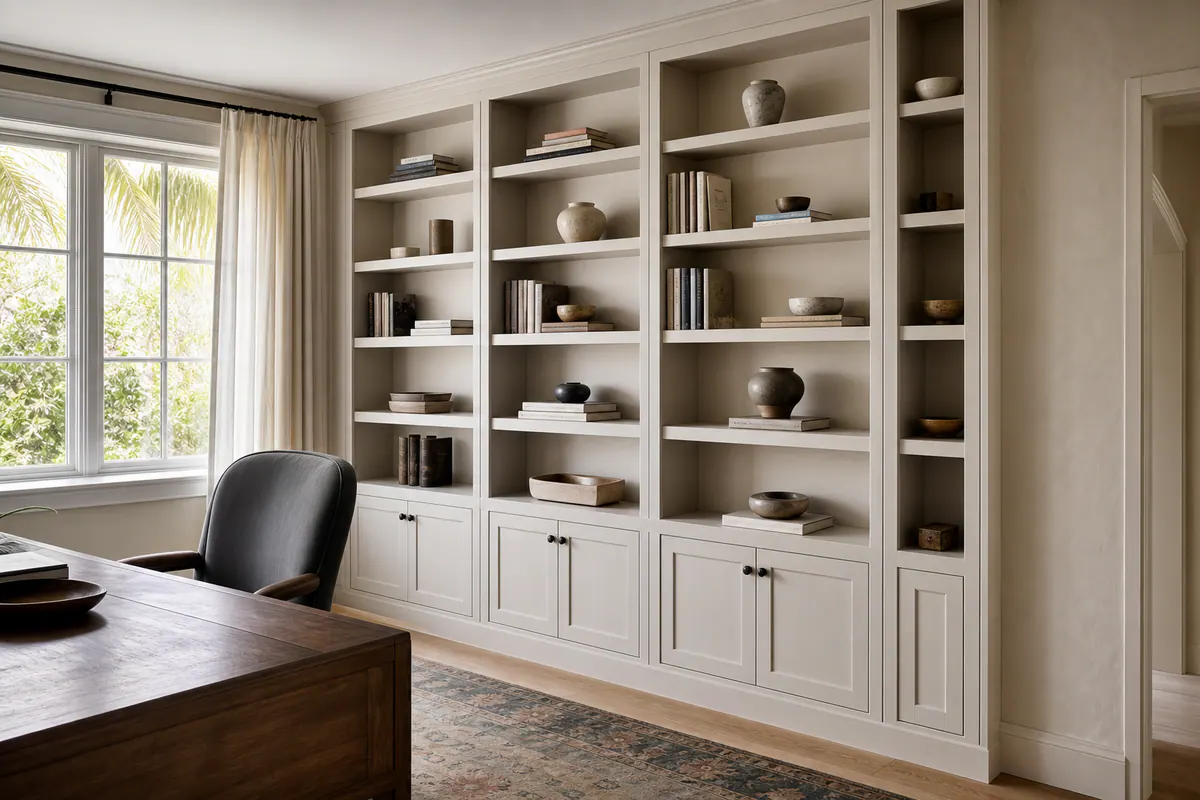
Face-frame trim creates the visible border around openings and cabinet fronts, while shelf nosing finishes the front edge of each shelf. Nosing adds a more substantial line to open shelves and protects the otherwise thin-looking edge; it can be simple and square in a contemporary office or more profiled for a traditional bookcase. On a wide shelving wall, keeping the nosing, face frames, and door rails visually consistent prevents the open and closed sections from looking like unrelated pieces.
At the perimeter, finished end panels cover exposed cabinet sides, and decorative panels add intentional detail where a side remains in view. A shallow bookcase beside a doorway may need only a clean painted end panel that aligns with the casing. A larger entertainment center can use panel treatment, a top cap, and a finished opening around the television or fireplace area to turn a necessary recess into a balanced focal point. Leaving these exposed sides raw or stopping trim short of the panel is a common signal that the unit was added after the room was finished.
Top treatment should follow the built-in's scale and the room's formality. A modest top cap, a flat, projecting finish piece, can give low or modern built-ins a crisp endpoint without visual bulk. Taller bookcases and formal office walls may carry crown that relates to nearby ceiling molding. Likewise, the base can continue the room's baseboard language or use a furniture-style plinth, provided its height and profile do not compete with the shelving above.
For mudrooms, built-in shelving trim often needs to organize several functions at once: open cubbies, bench storage, upper cabinets, and hooks. Clean face frames and panel transitions make those changing depths feel planned. Around a desk, trim can frame the work opening and align upper shelving with adjacent cabinets, leaving a comfortable visual boundary rather than a cramped, over-molded surround. Paint-ready joints, straight shelf lines, and profiles coordinated with nearby casing are what make the built-in shelving finish feel settled into the room.
Fillers, Scribe Molding, and End Panels for Clean Wall-to-Cabinet Fit
The last inch beside a wall can determine whether a cabinet run feels carefully fitted or visibly forced into place. In kitchens, offices, and mudrooms, walls may bow, corners may be out of square, and floors may change slightly across a long run. The finish details at those conditions need to preserve a straight-looking cabinet face without pretending the room itself is perfectly straight.
Filler strips are planned spaces and matching finish pieces at the side of a cabinet, most often where a door, drawer, pull, or appliance would otherwise crowd a wall. Their job is functional first: a cabinet door near a perpendicular wall needs room to open without striking casing or binding against the surface beside it. A properly proportioned filler keeps reveals around doors consistent and lets the cabinet fronts remain aligned; an unnecessarily wide strip reads as a conspicuous gap rather than an intentional transition.
Scribe molding handles a different condition. This narrow finishing piece is shaped to follow the actual contour of an uneven wall, closing the changing line between the wall and a cabinet side or built-in stile. The cabinet face stays level and visually straight while the scribed edge absorbs the wall's irregularity. A clean scribe is especially useful beside a tall pantry, floor-to-ceiling bookcase, or mudroom locker bank, where a dark, wandering wall gap would be easy to notice.
Finished end panels complete cabinet sides that remain exposed at the end of a run, beside an island, or at the open side of a built-in. They create a continuous finished surface that can align with nearby doors, face frames, or room trim instead of leaving the cabinet box construction in view. During cabinet trim installation, the useful checkpoints are even door and drawer reveals, uninterrupted sightlines across adjoining fronts, and tight transitions at walls and floors. Those small alignments are what keep the fit looking deliberate from both close up and across the room.
Professional Cabinet Trim Installation in Sarasota County
A trim plan starts with the room, not a profile sample. For cabinet trim Sarasota County projects, we assess cabinet dimensions, ceiling height, existing crown and baseboard, wall variation, floor changes, lighting placement, and the material being finished. Those observations determine whether a detail should quietly align with nearby molding or become a more visible architectural feature.
Coordinated profiles keep adjacent cabinet runs and built-ins from looking pieced together. Precise cuts, scribed edges, and secure attachment help maintain clean reveals through corners, ceilings, and exposed ends. Paint-grade trim allows seams and nail holes to be prepared for a smooth painted surface; stained work calls for especially careful joint placement and finish matching because the material remains visible. Cabinet trim installation can complete new cabinetry, give a finished built-in its final details, or selectively upgrade existing cabinets with crown, light rail, end-panel, or base refinements.
Plan the next step
Compare the broader Cabinet and Built-In Trim service.
When you are ready, request a free estimate with the rooms, trim goals, city, and available photos.
FAQs
What is cabinet crown molding, and does every cabinet need it?
Cabinet crown molding finishes the top of upper cabinets, tall pantry cabinets, bookcases, and built-ins with a deliberate ceiling transition or furniture-style cap. Not every cabinet needs it: short runs, modern cabinets, and units that stop far below high or vaulted ceilings may look better with a simple top finish or no crown.
What is light rail molding on kitchen cabinets?
Light rail molding is narrow trim installed along the lower front edge of upper cabinets. It creates a finished underside and helps conceal under-cabinet LED channels or slim fixtures while keeping useful task light directed onto the countertop.
What is the difference between toe kick trim and baseboard?
Toe kick trim finishes the recessed area beneath lower cabinets and preserves room for feet at the counter. Baseboard finishes the wall-to-floor joint, while toe kick trim follows the cabinet run behind the cabinet faces and should not be replaced with thick baseboard.
How do you finish the gap between built-ins and an uneven wall?
Use a filler strip when clearance is needed for cabinet doors, drawers, pulls, or appliances near a wall. Use narrow scribe molding when the wall is uneven, shaping it to the wall contour while keeping the cabinet face level and visually straight.
What trim should I choose to make stock cabinets or built-in bookcases look more custom?
Use finished end panels on exposed cabinet sides, face-frame trim around openings, and shelf nosing to give open shelves a more substantial edge. Choose crown for tall or formal built-ins, a modest top cap for low or modern units, and coordinate profiles with nearby crown, baseboards, and door casing.