
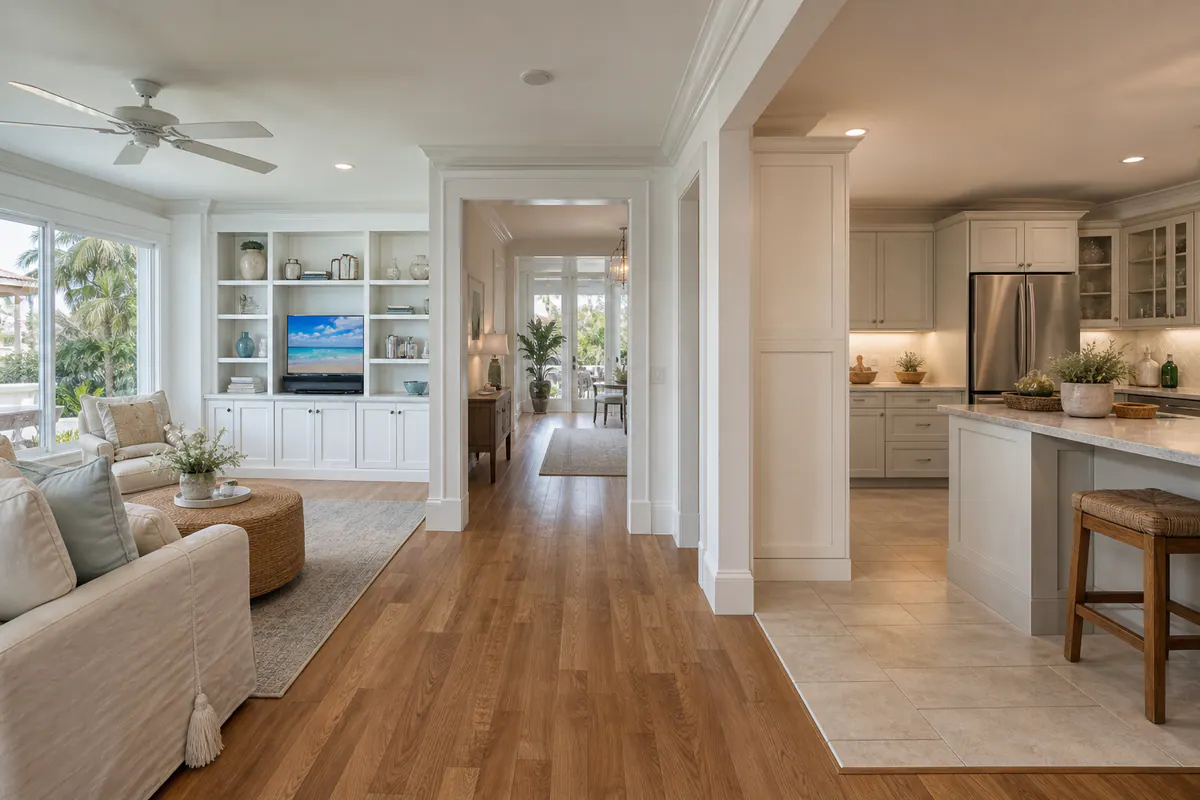
A remodel earns its finished look at the edges: where a new floor meets a wall, tile ends at a doorway, cabinetry meets drywall, or a replaced door sits within an older opening. A coordinated remodel trim package brings those edges together so the work reads as one intentional space rather than a collection of completed trades.
That scope can connect baseboards, door and window casing, shoe molding, transition pieces, cabinet fillers, and paint-ready detail work. Baseboard covers the perimeter gap at the floor; casing frames an opening and conceals the joint between the jamb and wall; transition trim gives two dissimilar surfaces a clean stopping point. Around a new interior door, properly fitted casing also finishes the opening while leaving the door free to swing and latch without rubbing.
In a kitchen, matching the baseboard and doorway casing to the adjoining living area can make new cabinets and flooring feel established rather than inserted. In a bath, crisp trim at the doorway and a deliberate termination where tile meets painted wall prevent small exposed edges from becoming the visual focus. Trim for remodels is therefore more than decoration: it is the coordinated finish that turns patched walls, changed floor heights, new openings, and fresh paint into a complete room.
What Is Included in a Remodel Trim Package?
The starting point is an on-site review of what the remodel has changed. Existing profiles, layers of old paint, wall damage behind removed trim, uneven openings, altered floor heights, moisture-prone areas, and the trim visible from adjoining rooms all affect the scope. Some projects call for careful interior trim replacement in one remodeled room; others look more cohesive when connected openings or an entire floor receive coordinated updates.
A remodel trim package is therefore a tailored finishing scope, not a fixed checklist. It can include selective removal of pieces that conflict with new work, or full removal when profiles, damage, or room-to-room continuity make patching a weak option, while protecting finished flooring, cabinetry, tile, and painted surfaces nearby.
- Baseboard and casing replacement: new baseboards at remodeled walls, plus door and window casing where old trim no longer fits the revised room or opening.
- Opening corrections: jamb extensions bring a door or window jamb flush with a thicker finished wall; returns neatly finish the exposed end of a trim run rather than leaving a raw cut edge.
- Floor-edge details: shoe molding or quarter round can cover a small perimeter gap where flooring meets baseboard. Shoe molding is typically slimmer and more flexible in appearance, while quarter round has a more pronounced rounded profile.
- Interior-door coordination: casing, jamb details, and transitions are aligned around retained or replaced doors so the openings read consistently.
- Optional upgrades: crown molding, panel-style wall details, or other decorative trim can extend the finish beyond the floor and openings when the room's proportions and style support it.
Final work includes fitting pieces to real wall conditions, filling fastener holes, caulking paint-grade joints, and leaving the trim paint-ready. An exact match to older profiles may require sourcing or custom milling; when that is impractical, a complementary replacement approach can create a more deliberate result than an almost-match.
Deciding What Trim to Remove, Replace, or Keep
The decision often becomes clear where the new work meets what was left behind. A thicker finished floor can leave a short baseboard looking undersized; drywall repairs or a widened opening can expose walls that the old casing no longer covers; and a replacement door may need jamb extensions that make its original trim arrangement impractical. New cabinets, backsplashes, and tile can also change where a baseboard or casing should stop, so retained pieces need to fit the revised layout rather than merely survive demolition.
Trim is a good candidate to keep when it can be removed without breaking apart, its profile remains consistent with nearby openings, and its surface can be repaired and refinished without carrying heavy paint buildup, moisture staining, or visible damage into the completed room. If demolition has split a long run, repeated paint layers have softened its profile, or bathroom moisture has swollen or deteriorated it, patching one small area may draw more attention than replacement.
- Selective replacement works when the remodeled room connects to a limited number of visible trim runs. For example, replacing a kitchen baseboard and its two doorway casings with the same profile used in the adjoining living area can create continuity without disturbing trim elsewhere.
- Room-by-room replacement suits a renovation that changes several walls, doors, or floor levels within one enclosed area. It gives the room a consistent baseboard and casing language, even if the rest of the home remains unchanged.
- A whole-home remodel trim package becomes more persuasive when connected rooms have noticeably different profiles, heights, paint histories, or door details. Repeating the same new trim across a floor level avoids the abrupt "old room/new room" break at open passages.
Mixing old and new trim can work when the profiles, thicknesses, and paint finish read as intentional matches. It becomes conspicuous when a nearly matched casing has a different edge detail or when new tall baseboards meet older, shorter runs in an open sightline. The practical goal is not automatic removal; it is choosing the smallest interior trim replacement scope that leaves transitions looking deliberate.
Selecting Profiles, Materials, and Proportions That Fit the Home
Profile selection begins with the visual scale already present in the home. Ceiling height, doorway width, window size, cabinet door style, wall paneling, and the trim visible through open passages all help set the right level of detail. Taller baseboards can give higher-ceilinged rooms a more grounded edge, while a wide casing can keep a substantial opening from looking under-framed. In a lower-ceilinged room or a clean contemporary remodel, a narrower profile may keep the perimeter from feeling overly busy.
Simple square-edge trim has flat faces and minimal ornament, making it a natural direction for streamlined cabinetry, modern doors, and restrained wall finishes. Craftsman-inspired trim generally uses flat stock with deliberate width and a more substantial header treatment at openings, giving doors and windows a clear architectural outline without ornate curves. Traditional selections introduce more contour through stepped casing, backbands, or layered crown combinations; they can support older architecture or a more formal interior, but need enough ceiling and opening scale for the extra layers to feel proportionate rather than crowded.
A custom trim package for remodeling can compare physical samples or profile boards against installed pieces before a selection is finalized. Paint buildup may hide an edge detail, damage may distort the remaining profile, and older trim may have been custom milled or discontinued. Rather than promise an exact duplicate, the assessment can identify whether sourcing, milling, or a coordinated replacement profile will create the more convincing result across the connected spaces.
Material choices also follow the room and finish plan. Solid wood may be selected where a particular grain, stain treatment, or custom profile matters. MDF offers a smooth paint-grade option for many interior applications, while bathroom selections deserve closer attention to direct exposure, humidity, paint system, and the condition of the wall and floor at installation. The practical takeaway is to choose the profile and material together: the trim should fit the home's character, the room's conditions, and the level of finish the remodel is intended to achieve.
How Trim Installation Is Sequenced With Flooring, Cabinets, Doors, Tile, and Paint
The order of finish work is set by the surfaces that determine its final fit. Demolition and drywall repair come first so repaired walls, patched corners, and altered openings can be measured honestly. Cabinet boxes, end panels, countertops, and tile then establish the fixed edges that baseboard, fillers, and casing must meet. Remodel finish carpentry is planned around those real dimensions rather than an assumed straight wall or standard opening.
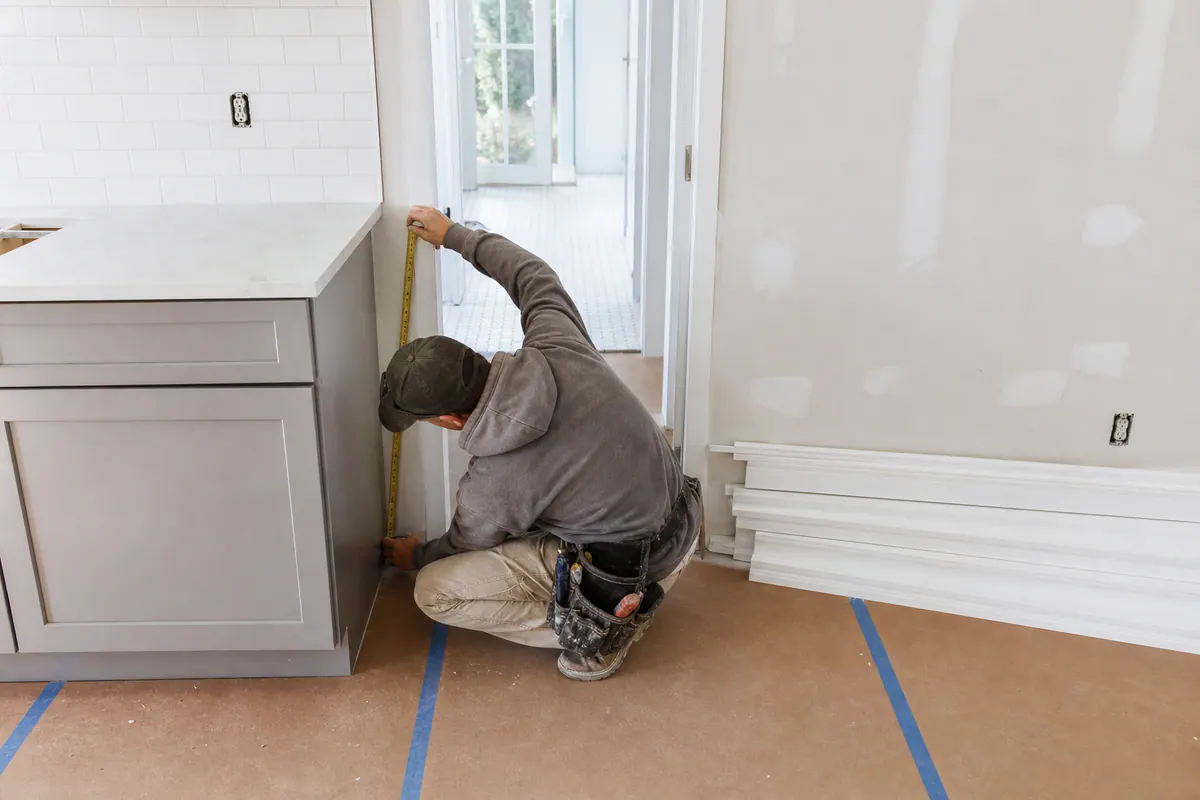
Flooring is a common scheduling hinge. Its finished thickness affects the gap beneath door slabs, the height and visual weight of baseboard, and whether shoe molding, a small flexible-looking trim at the baseboard's lower edge, will neatly cover a minor floor-to-wall variation. Installing baseboard after the finished floor is in place lets the run follow the actual perimeter. If flooring will be installed later, the trim plan needs an intentional allowance instead of a gap that becomes visible once the floor changes.
Doors deserve the same field check. Interior doors may go in before final casing, but jamb depth, door swing, clearance over the finished floor, and any jamb extensions need resolution before trim package installation begins. At a kitchen or bath, cabinet end panels and a tiled backsplash can dictate where a baseboard stops; a tile edge may need a clean termination rather than trim pressed against an uneven cut. Countertops can also change the final relationship between a wall return and cabinet-side detail.
Painting overlaps rather than simply ending the sequence. Walls may receive their main coats before trim is installed, while installed trim receives filled fastener holes, caulked paint-grade joints, and its finish coats afterward. Final touchups follow because fitting casing to an out-of-square opening, scribing a baseboard to a wall, or caulking a small joint can mark adjacent paint. The useful checkpoint is a coordinated schedule that leaves each trade enough finished information to create deliberate transitions, while preserving access for the last refinements.
The Finish-Carpentry Details That Separate Clean Trim Work From Quick Cover-Ups
Small inconsistencies become noticeable once the room is painted and furnished. Layout establishes straight visual lines across related openings, while a consistent reveal, the intentional narrow space between a door jamb and its casing, keeps each side looking balanced. At outside corners, clean miters should meet without an obvious open seam; at a baseboard end, a tight return turns the profile back to the wall instead of leaving a raw cut edge.
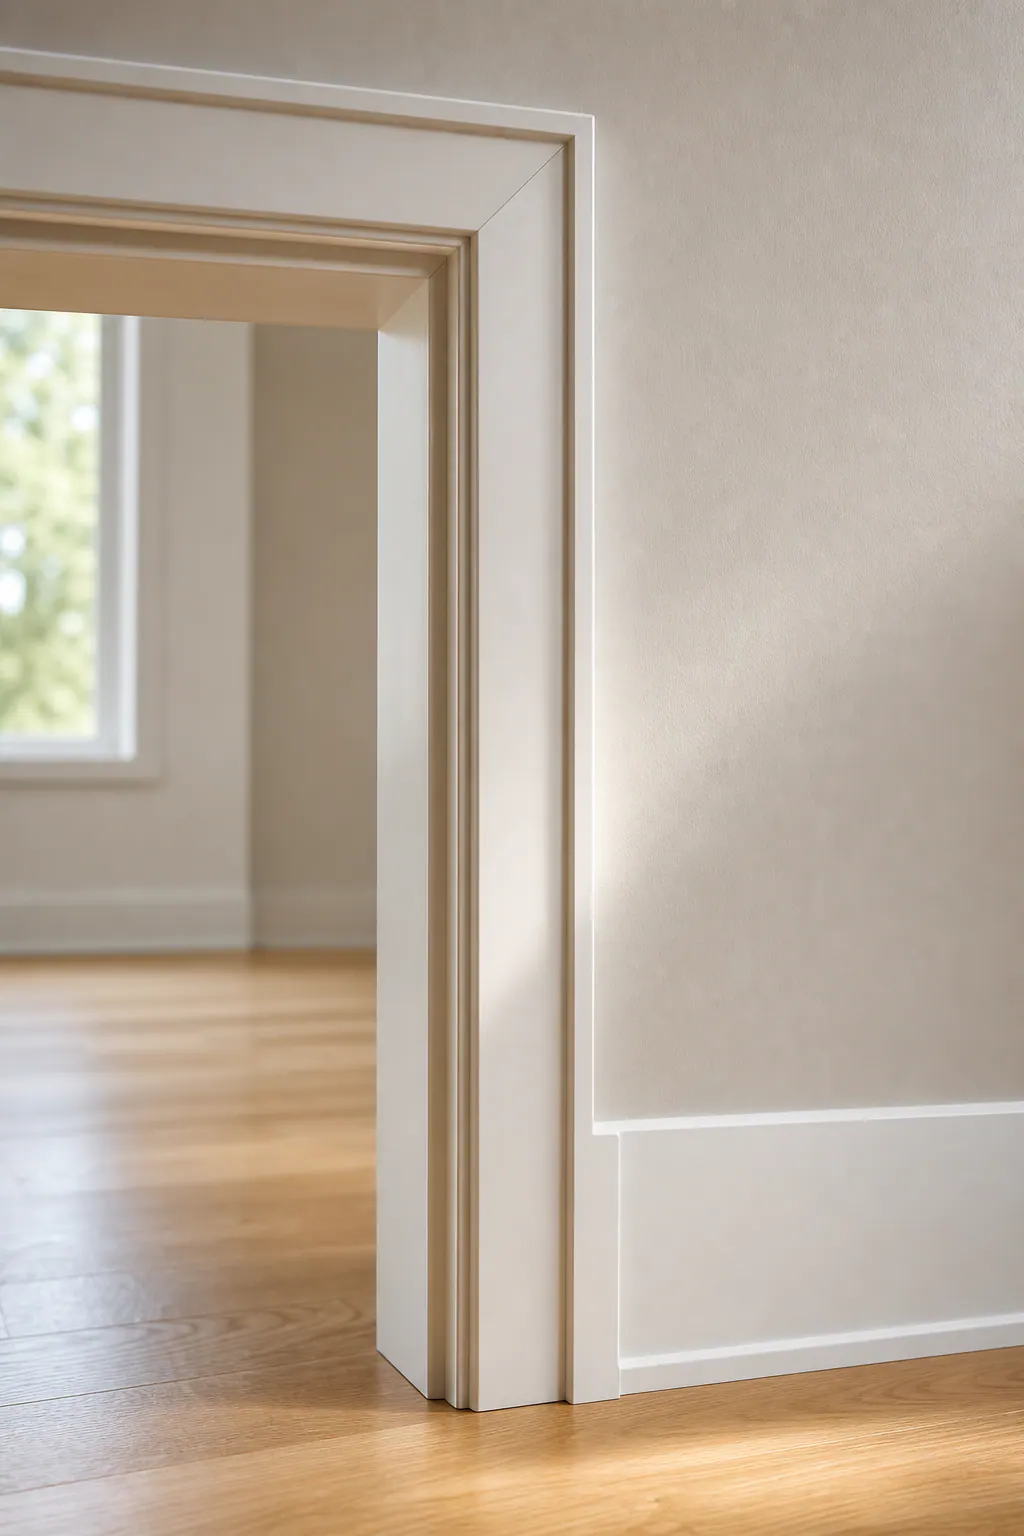
Existing homes rarely offer perfectly straight walls, level floors, or square openings. Pieces are field-fitted to the conditions in front of them: a scribed baseboard follows a wavering floor or wall, casing is adjusted so its lines remain aligned around an opening, and small gaps are managed deliberately rather than hidden by an oversized bead of caulk. Fasteners need placement that holds the trim securely without creating distracting surface damage or interfering with nearby cabinetry, door hardware, flooring, or finished wall surfaces.
The final pass makes remodel finish carpentry read as finished rather than merely installed. Fastener holes are filled, joints are sanded smooth, paint-grade seams receive controlled caulk lines, and transitions are reviewed for door clearance and clean contact with adjoining finishes. The goal is paint-ready trim with crisp edges, even spacing, and details that still function after doors swing, floors expand the visual perimeter, and the remodeled room is put back into daily use.
Plan a Trim Package That Completes Your Sarasota County Remodel
Before selections are locked in, put the whole visual path on the table: the trim already in the home, the new floors and wall finishes, openings into adjoining rooms, cabinet and door choices, and the order in which each finish will be installed. A good scope distinguishes a modest refresh, such as replacing baseboard only in a bedroom, from a more comprehensive update that carries matching casing through an open kitchen and living area.
For Sarasota County kitchen, bathroom, room-addition, and whole-home projects, a trim consultation can compare profile samples against existing pieces, identify transitions that need a deliberate stopping point, and establish which components are included: removal, new baseboard or casing, returns, paint-ready preparation, and final touchups. It also makes responsibilities between flooring, tile, painting, cabinetry, and trim work clear before the work reaches its finish stage.
Talk with our team about a remodel trim package tailored to your home, priorities, and site conditions. Together, we can develop a scope that supports continuity where it matters, handles practical transitions cleanly, and delivers the level of trim upgrade you want.
Plan the next step
Compare the broader Remodel Trim Packages service.
When you are ready, request a free estimate with the rooms, trim goals, city, and available photos.
FAQs
What is included in a remodel trim package?
A remodel trim package can include baseboards, door and window casing, shoe molding or quarter round, floor transitions, cabinet fillers, jamb extensions, returns, and paint-ready finishing. It also covers fitting trim to existing walls, filling fastener holes, caulking paint-grade joints, and final touchups.
Can I replace baseboards without replacing door and window casing?
Yes, selective baseboard replacement works when the new profile, height, thickness, and paint finish coordinate intentionally with the existing casing. It is most effective in a limited remodel area where open sightlines do not expose noticeably different trim styles.
Should trim be installed before or after flooring, cabinets, and paint?
Baseboard is typically installed after finished flooring so it follows the actual floor perimeter and covers the proper edge gap. Cabinets, tile, countertops, door jamb details, and drywall repairs should be resolved before final trim fitting, while trim is caulked and painted after installation.
What trim material is best for a bathroom remodel?
MDF provides a smooth paint-grade finish for many interior applications, while solid wood is useful when a specific grain, stain treatment, or custom profile is needed. In bathrooms, choose materials based on direct water exposure, humidity, the paint system, and the condition of the adjoining wall and floor.
How do I choose the right baseboard height and trim profile for my home?
Match trim scale to ceiling height, doorway width, window size, cabinetry, and the profiles visible through adjoining openings. Taller baseboards suit higher ceilings, narrow trim fits lower or contemporary rooms, square-edge profiles complement modern spaces, and layered traditional profiles need enough room to avoid looking crowded.