
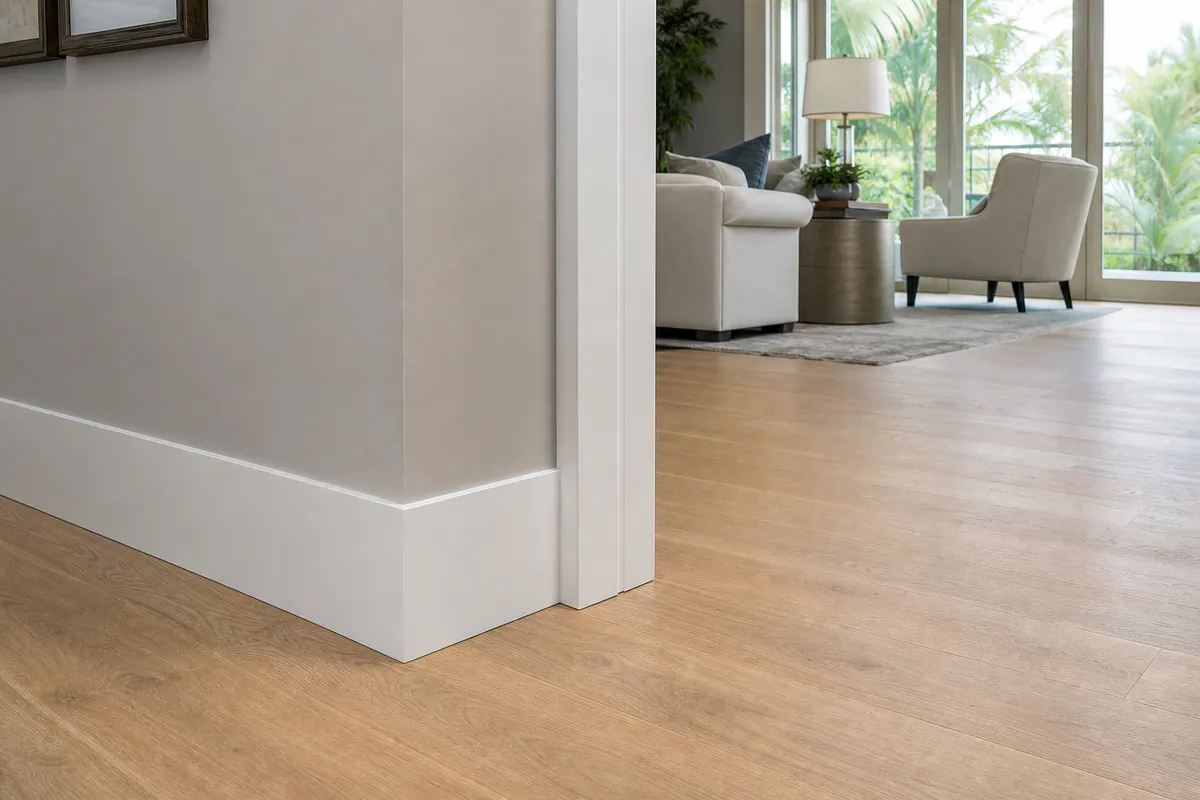
New baseboards are one of the fastest ways to make an otherwise updated Palmer Ranch room feel intentionally finished. Fresh flooring, painted walls, renovated cabinetry, and new doors can still look disconnected when a narrow strip of builder-grade trim remains at the perimeter, especially if it has chipped paint, swollen or damaged lower edges, awkward patches, or a profile that does not match additions made over time.
A polished baseboard installation in Palmer Ranch is more than replacing a short board with a taller one. The profile needs to suit the room; the material and finish need to support the planned look; and the trim must meet walls, flooring, door casing, and adjoining rooms with purpose. A taller board can add visual weight, but it is not automatically an upgrade if it crowds existing casing or simply masks an uneven transition.
Look for details you can see at a glance: consistent height around the room, corners that fit tightly rather than opening up, controlled contact along imperfect walls, neatly filled fastener holes, and restrained caulk lines that disappear under paint instead of creating a heavy seam. At door openings, the baseboard should resolve cleanly into the casing rather than ending in a random-looking gap.
Baseboards can refine cosmetic floor-edge gaps and minor wall irregularities, but they are not a cure for active moisture, deteriorated drywall, or significant flooring defects. Those conditions need attention before finish trim is installed, so the completed room has a sound surface beneath its clean final lines.
When Baseboard Replacement Is the Right Upgrade
A room-by-room mismatch is often the clearest reason to start over. For example, a remodeled kitchen may have crisp new flooring beside thin, rounded trim from the original build, while an adjacent room has a different height or a later addition ends with an unrelated profile. Replacing those inconsistent pieces creates one deliberate perimeter rather than a collection of past updates.
Baseboard replacement in Palmer Ranch also makes sense after flooring changes when the old boards were removed, cut short, damaged during removal, or no longer relate well to the new floor height. The goal is not to hide every gap with bulkier trim. It is to choose a proportion and transition that gives the floor edge a composed finish while keeping the line around the room visually consistent.
Not every blemish calls for new trim. A small paint chip, isolated nail hole, or shallow dent can often be filled, sanded, and repainted without disturbing an otherwise matching run. Replacement becomes the stronger choice when patches are numerous, lower edges are swollen or crumbling, boards have been repeatedly caulked into uneven shapes, or the existing profile cannot be carried cleanly through updated rooms and doorways.
Water-damaged trim deserves a different decision path. New baseboards can be installed after the leak, spill, or humidity-related condition has been resolved and the wall area is sound. If moisture remains active, drywall is loose, the floor is substantially out of level, or the bottom of the wall has deteriorated, trim would only cover a condition that still needs repair. Addressing that substrate work first gives new baseboards a stable, paint-ready foundation.
Selecting Baseboard Height and Profiles for a Cohesive Look
Profile selection is where a replacement begins to look designed for the room rather than simply newly installed. A square-edge profile has a flat face with crisp, minimal lines; it suits clean-lined interiors and lets door casing or wall color carry more of the visual detail. A colonial profile adds routed curves and stepped contours, creating a more traditional, decorative edge. Craftsman-style trim is typically plainer but more substantial, with broad flat surfaces and simple squared details that pair naturally with similarly straightforward casing.
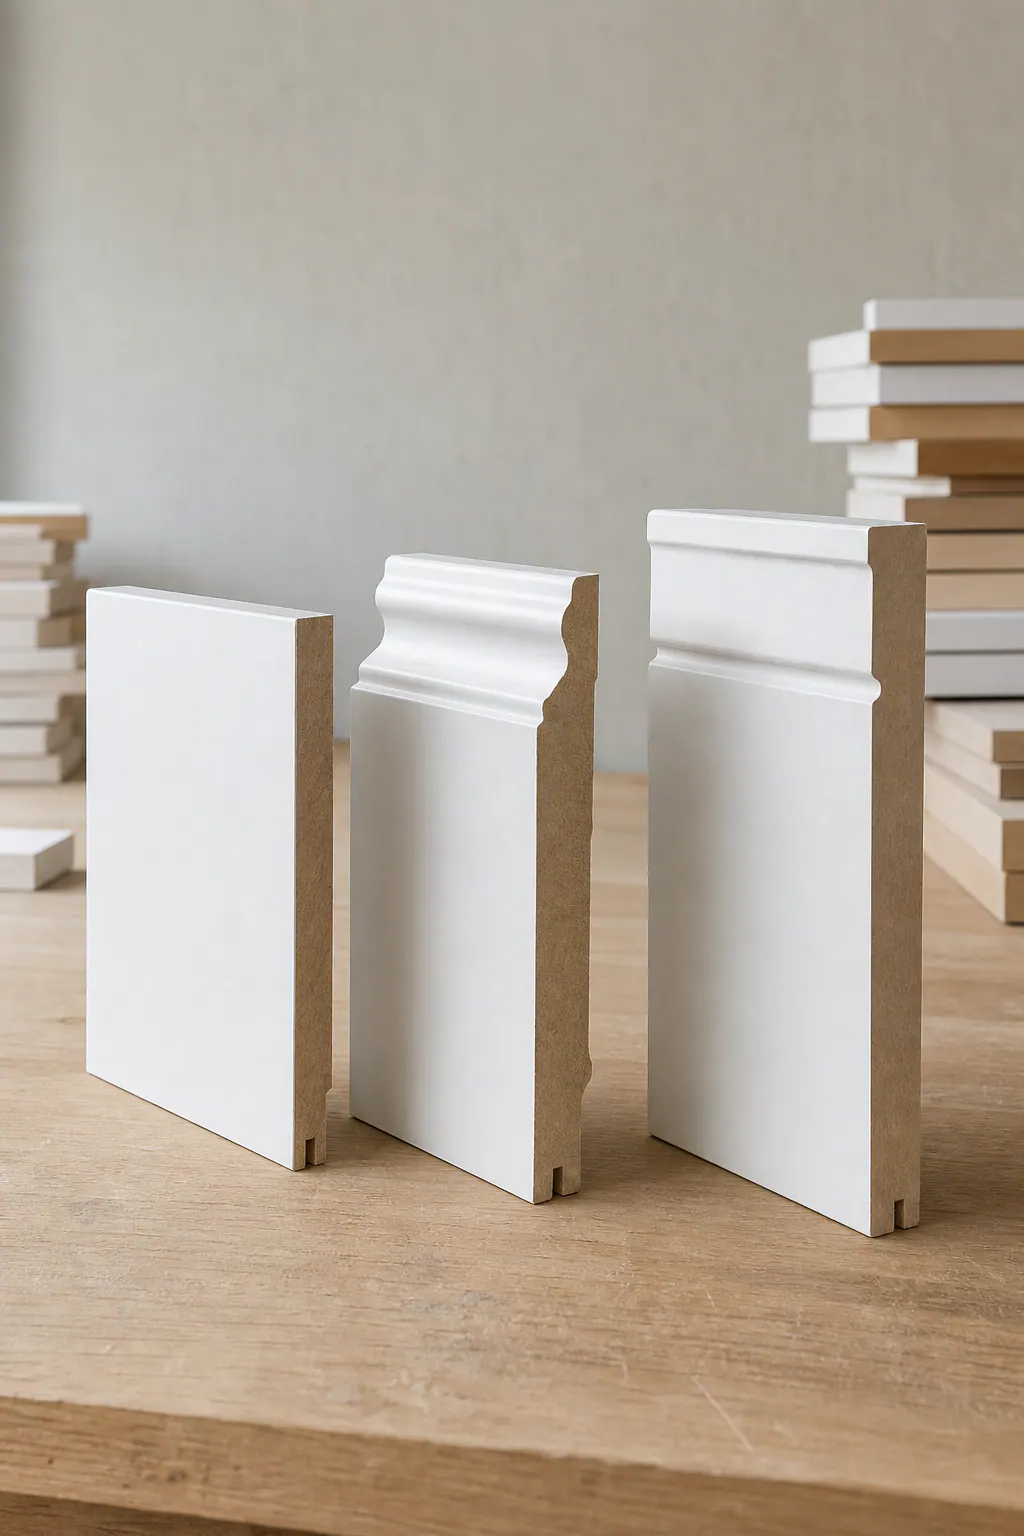
Height changes the visual weight of all three. Taller baseboards can give a room a more grounded, substantial perimeter, but height alone is not an upgrade. In a modest room with narrow door casing, an overly tall, ornate board can make the casing look undersized and the doorway feel accidental. A stronger approach is to choose a baseboard whose scale relates to the casing width, ceiling height, and the visual weight of the room's other fixed details.
For a more custom composition, a built-up baseboard combines a flat base board with base cap molding along its upper edge. The cap introduces a shadow line and layered detail without requiring one oversized, heavily shaped board. This option can be especially effective where existing casing already has depth, but it requires a consistent plan: the cap needs to terminate cleanly at doorways, wrap corners evenly, and continue at the same height through connected spaces.
At an open-plan transition, matching heights and compatible profiles usually read as intentional even when flooring changes between rooms. At a doorway, the baseboard should meet the casing with a deliberate return or clean termination, not a sliver of trim, a sudden height change, or a profile that visually collides with the casing. Looking at those junctions before installation helps Palmer Ranch homeowners choose trim that feels proportioned from room to room rather than selected one wall at a time.
Choosing the Right Baseboard Material for the Room and Finish Level
Material choice affects the finish long after the profile has been chosen. It determines how crisp the painted face can look, how forgiving the trim is around everyday contact, and whether the board suits the exposure in that particular room.
MDF baseboards have a dense, uniform face with no wood grain, which makes them a natural fit for a smooth, opaque painted look in dry living areas, bedrooms, and hallways. Their clean machined edges can suit simple square profiles and more detailed routed shapes alike. The tradeoff is at the lower edge: repeated moisture exposure can cause swelling, and a hard impact can crush an edge rather than leave a repairable grain dent. A clean paint result starts with protected cut ends and a floor area that is dry and sound.
Primed finger-joint pine is paint-grade wood made by joining short, clear sections into a longer board, then applying a factory primer. It offers a firmer wood edge for rooms that see more bumps from vacuums, furniture, or active households, while still accepting a painted finish. It can, however, show natural wood movement more readily than MDF; careful fastening, filled joints, and a controlled paint system matter if the goal is an even, uninterrupted line.
Solid wood trim is often chosen when its visible grain is part of the design, particularly for stain-grade work or a room with existing wood details worth matching. It can also be painted, but paint does not erase the material's tendency to expand and contract seasonally. That makes well-managed joints and realistic expectations around fine seams especially important on long runs and at corners.
PVC is a moisture-tolerant trim option for locations such as bathrooms, laundry areas, or other spaces where repeated dampness makes wood-based boards less appealing. It will not provide the same feel or grain character as wood, and its expansion needs to be considered in the layout. For a polished result, select it because the room exposure calls for it, not simply because it can cover an imperfect wall or floor edge.
For baseboard installation Palmer Ranch homeowners can judge the selection by the room's conditions first, then by the desired painted appearance. A smooth, paint-ready face, intact lower edges, and joints that remain visually controlled are stronger indicators of a good material fit than choosing one material for every room.
The Finish-Carpentry Details Behind Clean Baseboard Installation
A refined installation begins before the first new board is cut. A trim carpenter in Palmer Ranch can map each wall run, note doorways and interruptions, and remove old trim without needlessly tearing the drywall paper or damaging adjacent flooring. Any loose material, proud patches, or leftover adhesive at the wall edge should be addressed first; otherwise, even a straight new profile can telegraph the uneven surface behind it.
Layout is what keeps the room from looking as though every wall was treated separately. The top line should read as one intentional, consistent elevation around the room, while fastening points hold the board securely without a scattershot pattern of visible repairs. Where a floor dips or a wall bows, scribing means marking the actual contour onto the baseboard and carefully trimming it so the board follows the condition with controlled contact. It is a better solution than forcing a board into place or using a thick bead of caulk to hide a visibly wandering gap.
Corner treatment is especially easy to inspect. Inside corners may be coped, meaning one board is shaped to fit the face of the adjoining profile, or managed with a precise miter where the layout allows. Outside corners typically use miters that meet cleanly at the exposed edge. In either case, a strong result has aligned faces and a narrow, controlled seam, not a joint that opens, sits proud on one side, or is packed with caulk. At a termination that does not meet casing, an end return folds the profile back toward the wall, eliminating the raw cut end.
Finishing turns sound fitting into a paint-ready surface. Fastener holes and seams are filled, then sanded smooth so they do not appear as dots or ridges after paint. A restrained bead of paintable caulk can soften tiny wall-to-trim gaps and the upper edge; it should refine close work, not disguise poor cuts, major wall irregularities, or separated joints. Before paint, run a hand and a critical eye along the top line, corners, returns, and long faces: smooth transitions, flush joints, and cleanly sanded repairs are the details that keep new baseboards looking composed in daylight.
Coordinating Baseboards With Flooring, Door Casing, and Room Transitions
Flooring sets the lower boundary that the new trim has to finish. In most replacement projects, the floor goes in before the baseboards so the boards can cover the perimeter edge cleanly and sit at the finished floor height. Floating floors need a perimeter allowance to move as intended, so the baseboard should cover that edge without pinning the flooring down. The visible goal is simple: a deliberate shadow line or close floor-to-trim fit, rather than an exposed expansion space.
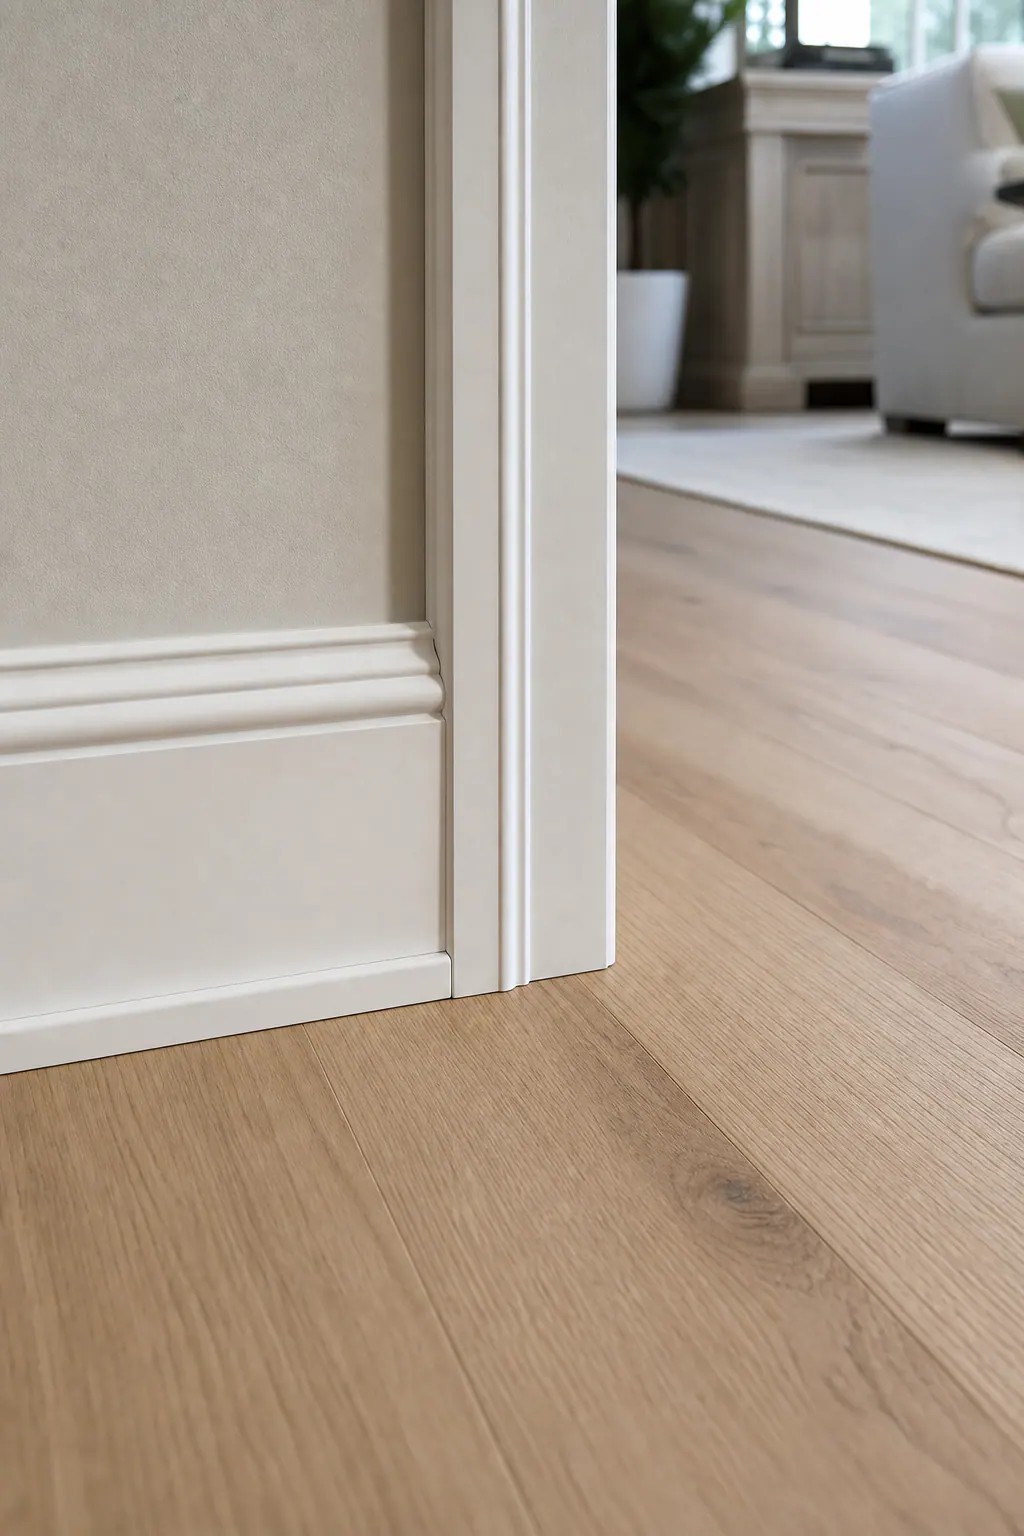
Added floor-edge molding is a choice, not a default correction. Shoe molding, often called base shoe, is a small, narrow profile that follows the floor at the baseboard; it can handle minor variation while keeping the main baseboard profile clean. Quarter round is similarly used at the floor edge but has a fuller rounded face, making it more noticeable. Either can be appropriate where a modest, consistent gap needs coverage, while no added molding often gives a cleaner contemporary result when the floor edge and baseboard fit closely.
A broad gap, a sharply sloping floor, or a change in floor elevation at an adjoining room is not automatically a molding problem. A narrow shoe line that remains even can look intentional; a tall strip that swells and narrows across one wall usually calls attention to the condition beneath it. The transition should be assessed so trim resolves a finish detail rather than disguising an installation issue.
Existing door casing also sets the visual rule. The baseboard can die neatly into the casing, return into the wall where casing is absent, or be selected at a height and thickness that meets the casing without an awkward notch or thin filler piece. At doorways between different floors, keeping the baseboard profile and height consistent lets the flooring transition do its own job, preserving a composed perimeter from room to room.
Planning a Professional Baseboard Project in Palmer Ranch
Before requesting a Palmer Ranch baseboard installation scope, make a short room-by-room plan. Note which spaces are included, photograph the flooring edges and door casing, and flag repaired drywall, staining, or moisture concerns that should be resolved first. Choose a profile and material direction rather than asking only for "taller trim"; the decision should reflect the casing, flooring, and painted finish you want to see throughout the connected rooms.
- Bring a sample, inspiration photo, or a clear description of the profile, and ask how it will meet existing casing and end at openings.
- Ask how inside corners, uneven floor lines, and any needed shoe molding will be handled. A specific plan is stronger than a promise to "caulk the gaps."
- Define the finish level: installed-only leaves paint preparation to others; filled and caulked includes fastener holes and controlled upper seams; paint-ready adds sanding and surface preparation for a smooth final coat.
A thoughtful trim carpenter should discuss these details before cutting boards, including where joints will fall and what the completed surfaces should look like. For baseboard replacement in Palmer Ranch, a defined finish standard gives you a practical way to compare proposals and inspect the work when it is complete.
Plan the next step
Compare the broader Baseboard Installation service.
Review the Palmer Ranch, FL service area for local planning context.
When you are ready, request a free estimate with the rooms, trim goals, city, and available photos.
FAQs
Should baseboards be replaced before or after new flooring?
Install new flooring before baseboards in most projects so the trim can cover the perimeter edge and sit at the finished floor height. For floating floors, the baseboard should cover the expansion gap without pinning the flooring in place.
What is the difference between MDF and wood baseboards?
MDF has a dense, grain-free face that produces a smooth painted finish in dry rooms, but its lower edge can swell with repeated moisture and crush from impacts. Primed finger-joint pine has firmer wood edges for higher-contact areas, while solid wood is better when visible grain or stain-grade matching is part of the design.
Do baseboards need shoe molding or quarter round?
Shoe molding or quarter round is only needed when a modest, consistent floor-edge gap requires coverage. Shoe molding is narrow and less noticeable, while quarter round has a fuller rounded face; neither should be used to disguise a broad gap, sharply sloping floor, or major installation defect.
How can I tell whether a trim carpenter does high-quality baseboard work?
Look for consistent baseboard height, tight corners, controlled contact along walls, smooth filled fastener holes, and thin caulk lines that disappear under paint. Quality work also includes coped or precisely mitered corners, clean end returns, flush joints, and sanded seams without thick caulk hiding poor cuts.
What is the best baseboard material for homes in Palmer Ranch?
Choose material based on room conditions and finish goals: MDF for smooth painted trim in dry living areas, finger-joint pine for firmer painted wood edges, solid wood for visible grain or stain-grade work, and PVC for bathrooms, laundry rooms, or repeatedly damp locations. Moisture damage, loose drywall, and deteriorated wall surfaces must be repaired before any new baseboard is installed.