
Cabinet and Built-In Trim That Makes Laurel Homes Look Finished
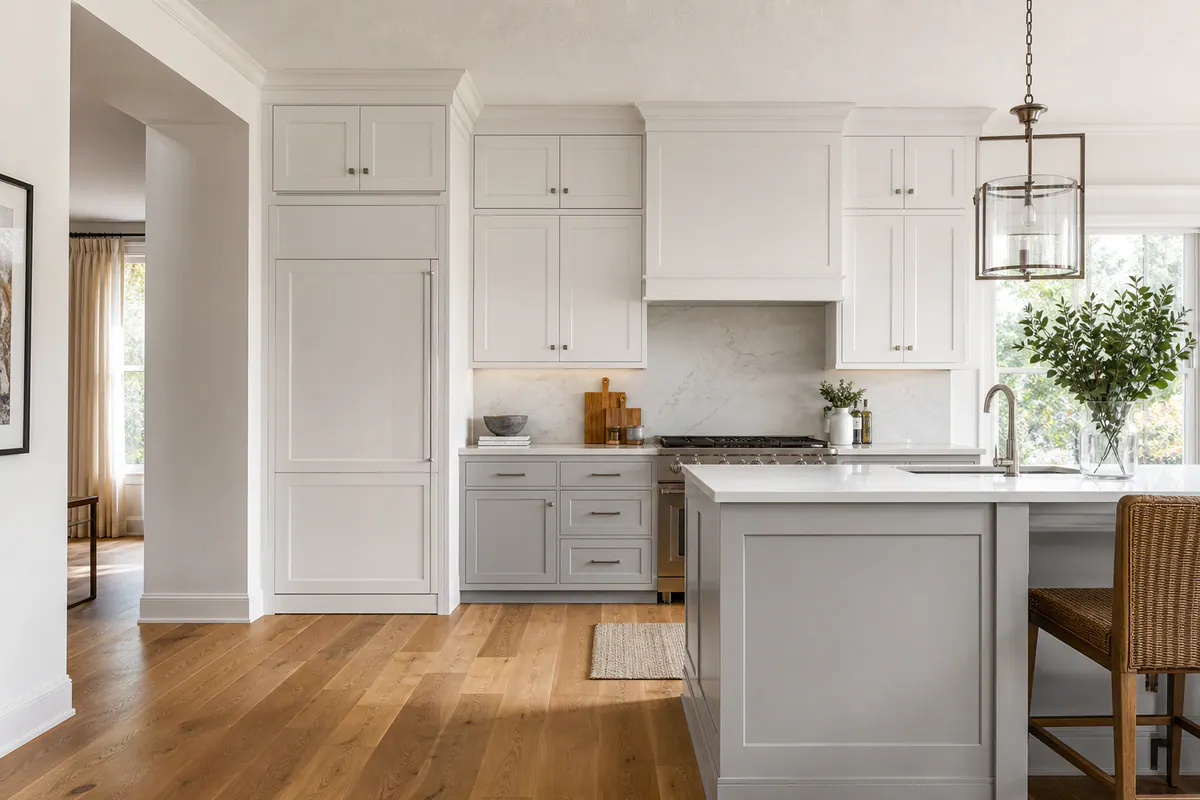
Cabinetry can be well made and still look unfinished if it stops short of the wall, ceiling, floor, or surrounding millwork. Cabinet trim in Laurel, FL is the finish-carpentry layer that turns those edges into deliberate transitions, helping a cabinet run or built-in shelving read as part of the room rather than an installed box.
Each detail has a distinct job. Crown molding finishes the top of upper cabinets; side panels cover exposed cabinet ends; toe kicks complete the recessed base at the floor; and shelf trim gives open bookcases or media units a more furniture-like face. A simple square profile can suit clean-lined cabinetry, while layered crown and base profiles can echo more traditional door casing or baseboards nearby.
The right approach starts with the room as it exists. Walls may not be perfectly straight, ceilings can vary in height, and floors can change the apparent level of a cabinet base. Trim can be fitted to those conditions so reveals stay consistent, profiles align, and wall connections look intentional rather than forced.
For built-in trim in Laurel, FL, color and finish matter just as much as profile. Paint-ready work means joints, nail holes, caulk lines, and sanding are prepared for paint; it does not mean the final paint coat is automatically included. Clean miters, neatly filled fasteners, and smooth transitions are the visible details that make the finished result feel integrated.
The Cabinet Trim Details That Solve Different Finish Problems
A trim plan becomes clearer when each piece is tied to the edge it needs to finish. Crown molding sits at the top of an upper cabinet or built-in, giving the installation a completed top line. A light rail mounts beneath upper cabinets to hide under-cabinet lighting hardware or soften the lower edge. Both are visible profile choices: a square edge keeps the look restrained, while a shaped or layered profile adds more formality.
- Filler strips occupy planned space between cabinetry and a wall or adjacent unit, allowing doors and drawers to operate without crowding the obstruction. Scribe molding is a narrower finishing piece fitted to follow an irregular wall, so the wall-side connection looks close and even rather than leaving a changing gap.
- Finished end panels cover the exposed side of a cabinet box, particularly at the end of a run, island, or open shelving return. Face-frame extensions bring the visible front edge outward where a cabinet needs to align with a deeper panel, wall treatment, or neighboring built-in component. The useful checkpoint is a consistent reveal: exposed margins should look intentional from one cabinet section to the next.
- Toe kicks finish the recessed area below base cabinets and conceal the cabinet support area. Base molding can then continue a built-in's lower edge into the room's baseboard language, creating a more furniture-like result.
- Shelf trim wraps or caps the front edge of open shelves, concealing sheet-good edges and giving bookcases or media cabinetry more visual weight. For cabinet molding in Laurel, FL, aligned profiles, clean corner joins, and neatly filled fasteners distinguish a deliberate detail from a piece added only to cover a gap.
These parts do not all need to appear on every project. Built-in cabinet trim works best when decorative profiles support the room's style while fit pieces, fillers, scribes, and panels, quietly solve the transitions that cabinetry alone cannot.
Cabinet Crown Molding, Light Rail, and Upper Cabinet Transitions
A cabinet-to-ceiling gap that changes from one end of the run to the other calls for a fitting decision before a profile is chosen. Cabinet crown molding in Laurel can visually connect cabinetry to the ceiling when the open space feels accidental or breaks up an otherwise tailored kitchen. It is most convincing when its scale suits the cabinet height, door style, and ceiling: a broad, layered profile can support tall cabinets and traditional doors, while a narrow crown or simple square top treatment is often a better fit for lower ceilings, flat-panel doors, or a more contemporary room.
Crown molding finishes the cabinet's upper edge; it should not be treated as a universal fix for a large or changing ceiling gap. Measure the cabinet-to-ceiling distance along the full run before selecting a profile. If the ceiling rises, falls, or waves across the wall, the top treatment may need a stepped buildup, a scribed connection, or a deliberate shadow line rather than forcing one rigid profile to follow an irregular surface.
Light rail solves a different visual problem below the upper cabinets. It creates a softer lower edge and can conceal the view of under-cabinet lighting from across the room. A rail should be deep enough to hide the lighting hardware without hanging so low that it crowds the backsplash or makes the uppers feel heavy.
For kitchen cabinet trim in Laurel, clean execution shows at the corners and transitions: crown profiles should meet at consistent heights, miters should close tightly where used, seams should fall in less conspicuous locations, and fastening marks should be neatly filled. A paint-ready installation also needs smooth sanding and controlled caulk lines, so the crown, cabinet faces, and adjoining trim read as one planned assembly rather than separate pieces.
Exposed Cabinet Sides, Filler Strips, and Scribing to Walls
An exposed cabinet end is often the first clue that a run was designed around boxes rather than the room. Finished side panels cover that visible cabinet side with a matching, furniture-like face; they suit an island end, a cabinet that stops in open view, or the outside edge of a built-in. Applied end-panel trim adds a frame, stile, or decorative profile over that panel when the surrounding doors and room millwork call for more depth. The useful distinction is simple: a plain finished panel keeps the elevation quiet, while an applied treatment makes the end read more like a finished piece of furniture.
At a wall, filler strips create the working space that the cabinet box cannot. A filler is a deliberately sized vertical piece between the cabinet and wall, casing, or appliance zone. Its width should be planned around the actual movement of doors, drawers, and pulls, not guessed after installation. For example, a door beside a perpendicular wall needs enough room to open without its handle striking drywall, while a drawer bank near an appliance needs clearance so the drawer front and appliance hardware do not compete for the same space.
Walls and corners rarely provide a perfectly straight reference line. Pushing a cabinet hard against a wavy or out-of-plumb wall can twist the alignment, change the reveal between doors, or leave an uneven gap that becomes more obvious after paint. Scribe molding, or a scribed filler edge, is trimmed to follow the wall's contour while the cabinet face remains straight and its reveal stays consistent. The result should be a close, even-looking wall line, not a broad caulk joint attempting to hide poor fit.
For cabinet trim in Laurel, FL, a close inspection should show panel edges aligned with nearby cabinet faces, filler widths that look intentional, and a wall transition that meets drywall or adjacent casing cleanly. Fasteners belong where they can be concealed or neatly filled, and paint-ready seams need sanding and restrained caulk so the end panel, filler, and cabinet read as one assembly.
Toe Kicks, Base Molding, and Clean Floor-Level Cabinet Transitions
The floor line can make an otherwise straight cabinet run look uneven. A standard recessed toe kick is the set-back panel beneath base cabinets: it creates foot room at the counter while closing off the cabinet bases from view. Across a run, the recess and its upper line should stay visually consistent. Before fitting it, the floor should be measured for dips, slopes, and changes where one flooring material meets another, so a narrow gap is not left to be hidden with excessive caulk.
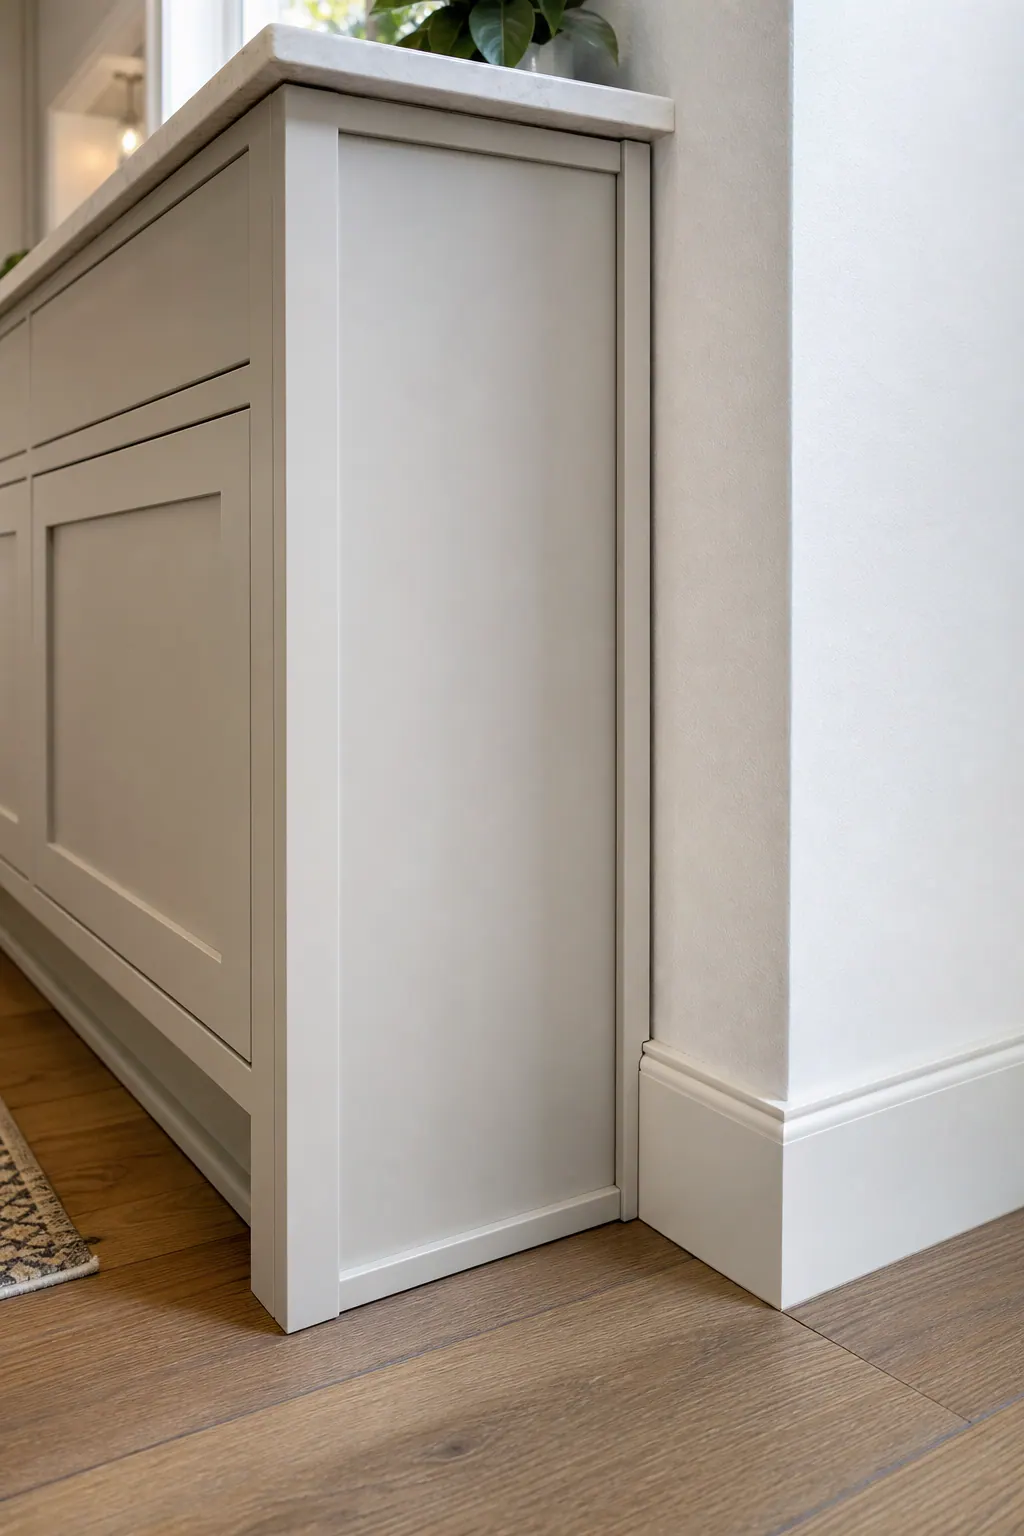
Decorative base molding serves a different purpose. Rather than sitting back beneath kitchen cabinets, it wraps the bottom of a bookcase, media wall, or other built-in to give it a furniture-like presence. It may continue the nearby baseboard profile when the heights and floor conditions allow, or it may step into a simpler, intentional transition at the built-in edge. The better choice is the one that makes the change look designed rather than forced.
At exposed ends, a fitted lower panel helps protect the cabinet base and keeps the finish from ending abruptly at the flooring. If shutoffs, wiring, or another access point falls behind a built-in, a removable or neatly serviceable section can be planned into the lower trim. Good cabinet trim in Laurel, FL shows straight profile lines, tight returns where molding ends, concealed or filled fasteners, and paint-ready sanding and caulk that do not blur the crisp edge between trim and floor.
Trim Details for Built-In Shelving, Bookcases, and Media Cabinets
A bookcase or media cabinet earns its built-in look at the front edges, where the shelving meets the room rather than simply filling a recess. A face frame creates the visible border around openings; its horizontal rails and vertical stiles establish a repeatable rhythm across shelves, doors, or equipment bays. Shelf-edge trim adds thickness to otherwise plain shelf fronts, while side returns turn the trim back toward the wall so its profile does not end abruptly. Consistent reveals around doors and openings, aligned stile widths, and filled fasteners help these details read as one composition.
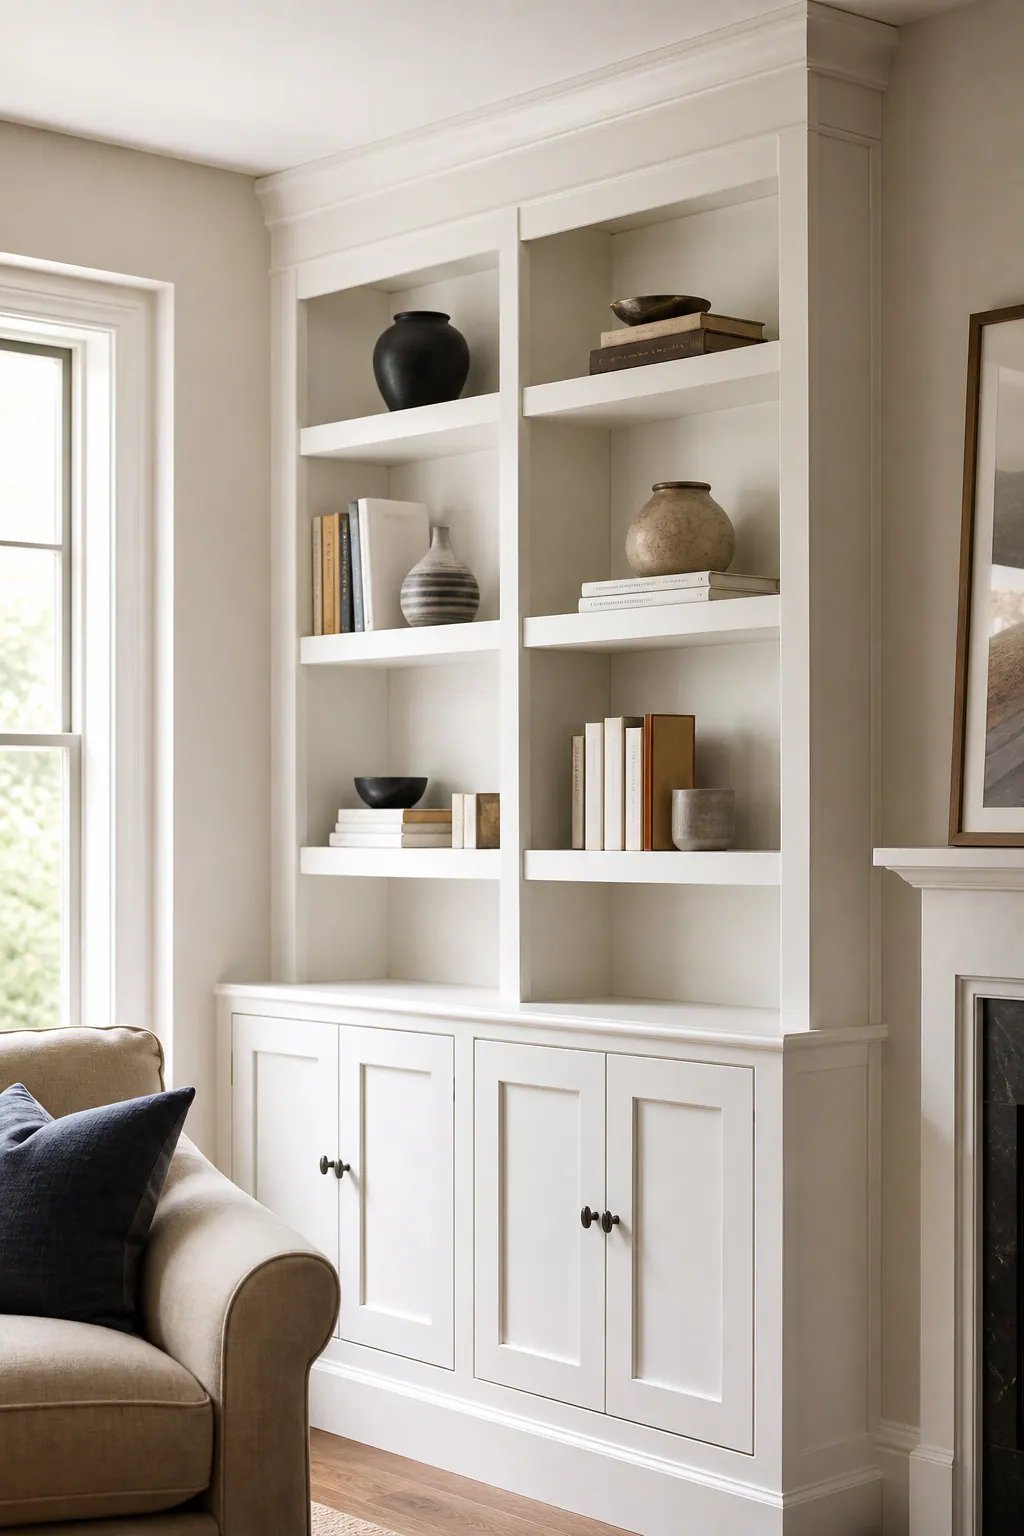
For a more traditional or formal room, crown at the top and base molding at the bottom can visually anchor a full-height built-in between the ceiling and floor. That approach is especially effective when the crown can relate to nearby ceiling trim and the base can meet existing baseboards at a deliberate height. A media wall with shallow cabinetry may use the same treatment, with a simple face frame keeping the screen area from feeling over-decorated.
In a modern room, custom shelving trim can be quieter: square-edged face frames, flush shelf fronts, and narrow side returns create clean shadow lines without layered molding. The important choice is proportion, not ornament. Door casing, window trim, and baseboards provide useful visual references; a built-in can match their profile, simplify it, or intentionally contrast it, but mismatched widths and abrupt height changes tend to look accidental. For built-in trim in Laurel, FL, secure backing and neatly scribed wall edges support the crisp, paint-ready finish that makes those room-specific decisions visible.
Materials, Fastening, and Paint-Ready Cabinet Trim Finishing
Material choice should follow the surface that will be seen and the finish that will cover it. Solid wood can suit stained details, narrow face-frame parts, or trim that needs to match wood cabinetry. Paint-grade MDF trim is a practical option for painted crown, base profiles, and shelf-edge details because it provides a smooth, uniform profile without grain telegraphing through the coating. Broad exposed cabinet sides usually call for sheet goods or a matching finished panel, so the panel face relates to the cabinet rather than looking like an added strip of molding.
Location changes the decision. Areas exposed to recurring moisture, such as near a sink or floor-level transitions, need material and edge treatment chosen with that exposure in mind. Wood can move as conditions change, so seams between separate pieces should be placed thoughtfully rather than treated as if paint will permanently erase every joint. A visible seam is less distracting when it follows a logical panel break or profile change than when it lands in the middle of a long, flat run.
For cabinet finishing in Laurel, FL, paint-ready cabinet trim begins before coating: pieces are dry-fitted to protect reveals and profile alignment, then fastened where nails can be concealed or neatly filled. Seams are treated, nail holes are filled in controlled passes, and caulk is reserved for stable wall-to-trim transitions rather than used to disguise poor fit. Sanding should leave panel edges, miters, and filled areas smooth to the touch; primer is applied where the selected paint system requires it. "Paint-ready" means prepared for painting, not that a final paint application is automatically part of the scope.
Planning Cabinet or Built-In Trim Work in Laurel, FL
Before fabrication, walk the room with a simple checklist: mark every exposed cabinet side, measure ceiling and floor variation, and decide whether new profiles should match existing casing and baseboards or complement them with a quieter square edge. Confirm whether the goal is paint-ready preparation or a stained finish, since that choice affects material and seam placement.
Also test the real operating space: appliance pullouts, door swings, drawer travel, outlets, and any access panels behind lower trim. A project-specific assessment for cabinet trim in Laurel, FL should put profiles, materials, transitions, finish readiness, and exclusions in writing rather than relying on fixed pricing, universal schedules, or assumptions hidden behind cabinetry.
Plan the next step
Compare the broader Cabinet and Built-In Trim service.
Review the Laurel, FL service area for local planning context.
When you are ready, request a free estimate with the rooms, trim goals, city, and available photos.
FAQs
What is the difference between cabinet crown molding and light rail molding?
Cabinet crown molding finishes the top edge of upper cabinets or built-ins and can visually connect them to the ceiling. Light rail mounts beneath upper cabinets to soften the lower edge and conceal under-cabinet lighting hardware.
Can trim be added to existing cabinets in Laurel, FL?
Yes, trim can be added to existing cabinets with crown molding, finished end panels, filler strips, toe kicks, base molding, or shelf-edge trim. The trim must be fitted to actual wall, ceiling, and floor conditions so cabinet reveals and transitions remain consistent.
How are cabinet trim gaps handled when walls are uneven?
Filler strips provide planned clearance between cabinets and walls so doors, drawers, and pulls can operate properly. Scribe molding or a scribed filler edge is trimmed to follow the wall contour while keeping the cabinet face straight, avoiding wide caulk-filled gaps.
What does paint-ready cabinet trim finishing include?
Paint-ready finishing includes dry-fitting trim, concealing or filling fasteners, treating seams, sanding filled areas smooth, and applying controlled caulk at stable wall-to-trim transitions. It prepares the trim for paint but does not automatically include the final paint coat.
Should built-in shelving have crown molding, base trim, or both?
Full-height built-ins can use both crown molding and base molding when those profiles relate cleanly to nearby ceiling trim and baseboards. Modern built-ins often use quieter square-edged face frames, flush shelf fronts, and narrow side returns instead of layered crown and base profiles.