
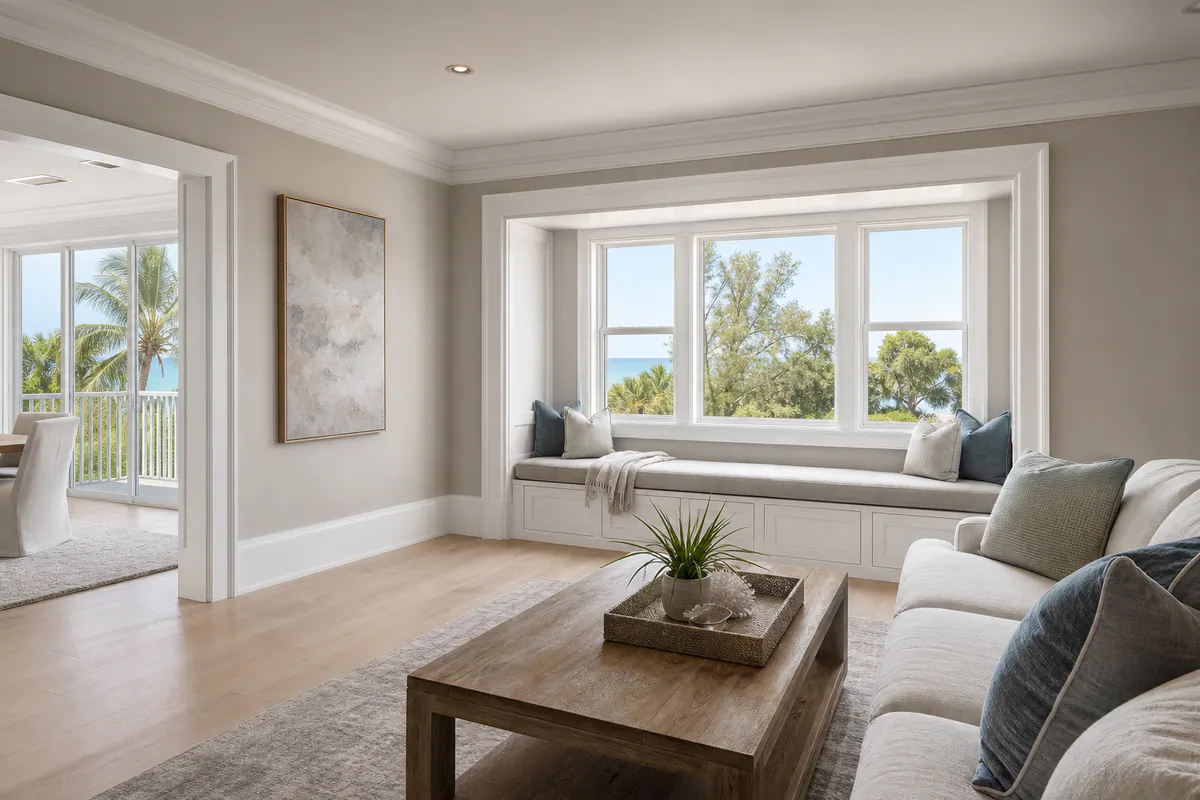
The details at the edges are what make a room's larger design feel resolved: a baseboard meeting the floor with a consistent reveal, casing framing an opening without awkward gaps, crown closing the wall-to-ceiling line, or a built-in aligning cleanly with adjacent trim. Custom finish carpentry turns these separate transitions into a coordinated visual system, so the home reads as intentional rather than assembled from unrelated surfaces.
In Longboat Key interiors, bright daylight and long open-plan sightlines make proportion easy to see. A narrow 2¼-inch casing can disappear around a wide opening beneath a 10-foot ceiling, while a heavy crown profile can make an 8-foot room feel compressed. Coastal interior trim should be selected around ceiling height, room scale, existing architectural cues, wall conditions, and the intended paint or stain finish. Humidity exposure also affects the material and installation conversation, including substrate stability, joint movement, and finish selection.
Custom trim frames and connects surfaces: baseboards, casings, and crown establish clean boundaries where planes meet. Profile matching recreates or closely coordinates an existing molding, such as matching a 5-inch baseboard in a renovated bedroom to the original hallway, so an update does not look patched in. Architectural millwork creates larger integrated features, including paneled walls, ceiling treatments, fireplace surrounds, and built-ins; it changes the room's composition rather than simply outlining it.
For custom finish carpentry Longboat Key homeowners can evaluate with confidence, ornament is only part of the picture. The following sections cover profile continuity, material choices, and visible workmanship signals: evenly sized reveals, tight coped or mitered joints, clean transitions at uneven walls, appropriately scaled trim, and smooth, finish-ready surfaces.
Where Custom Trim Adds Definition, Scale, and Better Transitions
A well-proportioned trim package gives each room a readable hierarchy. Baseboards establish a deliberate floor line and protect the visual edge where flooring meets wall; door and window casings give openings enough presence to hold their own in a larger room. Crown molding can soften or emphasize the ceiling perimeter, while a chair rail divides a tall wall horizontally and a picture rail creates a higher line for artwork or a two-tone paint treatment.
- Wall paneling adds depth across a broad surface, whether through simple applied boxes, vertical battens, or more tailored panel layouts. It works best when panel spacing relates to the wall width, openings, and furniture rather than stopping arbitrarily at corners.
- Reveal details use a deliberate narrow shadow gap in place of a projecting molding. They create a crisp separation at ceilings, baseboards, cabinetry, or feature walls and often suit a contemporary coastal interior better than layered ornament.
- Decorative transitions resolve changes that can otherwise look improvised: a cased opening between rooms, a returned baseboard at a cabinet, a transition at differing floor materials, or a molding that meets a beam or ceiling change. Clean alignment matters more than adding complexity.
Dimensions should be considered together. A substantial baseboard paired with very narrow casing can feel disconnected, just as deep custom crown molding can overwhelm a modest ceiling. In rooms with abundant glass, pale finishes, and uncluttered furnishings, a flatter casing profile, square base detail, or small reveal may preserve the architecture's calm better than elaborate molding. Conversely, a taller ceiling or more traditional interior may support wider casings, a built-up crown, or a chair rail with a more articulated profile.
Custom trim in Longboat Key works best as a system: related profiles, consistent thicknesses, aligned head heights, and a finish approach that carries from room to room. Selecting each piece independently can leave a home with competing visual weights. The stronger result is a coordinated set of decisions that makes openings, walls, ceilings, and floor lines feel intentionally connected.
Architectural Millwork for Walls, Ceilings, and Distinctive Interior Details
When the design needs to shape a whole plane rather than finish an edge, architectural millwork takes over. Trim frames openings and resolves transitions; architectural millwork creates a larger, integrated composition across a wall or ceiling. For architectural millwork Longboat Key homes can use to establish a focal point, the goal is not simply more detail, it is a layout that gives a room structure without competing with its light, views, or furnishings.
- Board-and-batten and paneled walls divide a broad wall into measured vertical or rectangular fields. They can give an entry, dining room, stair wall, or primary-bedroom focal wall more presence, but overly narrow panels or excessive rails can make a compact room feel busy.
- Wainscoting is a lower-wall treatment, often capped with a rail, that adds a durable-looking visual base beneath paint or wallcovering. It suits transitional and traditional rooms particularly well when its height relates to windowsills, doors, and nearby built-ins.
- Shiplap and tongue-and-groove use repeated boards to create a linear surface. Shiplap leaves a visible horizontal gap and reads more casual; tongue-and-groove interlocks for a more continuous board field. Either can bring texture to a ceiling or limited feature wall, while covering every surface can crowd an already detailed interior.
- Coffered ceilings and slatted treatments add depth overhead. Coffers create a gridded ceiling composition that benefits taller rooms and carefully centered lighting; slats introduce a finer linear rhythm that can define a media wall, entry ceiling, or contemporary feature zone.
Tailored reveal details offer the quieter end of custom millwork: narrow, intentional shadow lines that separate panels, ceilings, cabinetry, or wall planes without a projecting molding. They are especially effective in contemporary coastal interiors, where straight lines and restrained texture can hold their own beside expansive glazing. Traditional rooms may call for framed panels and more articulated layers; transitional spaces often combine simple panel proportions with a clean paint finish.
The visible standard is disciplined layout. Panel divisions should land intentionally around doors and windows, ceiling grids should be level and balanced around light fixtures, and slat spacing should not end in an awkward partial piece at a focal corner. HVAC grilles, access panels, speakers, and recessed lighting need a planned place within the composition rather than an afterthought cutout. Consistent paint or stain coverage, straight shadow lines, and clean integration at openings are what make Longboat Key finish carpentry read as designed rather than applied.
Profile Matching for Renovations, Additions, and Partial Interior Updates
A new doorway, built-in, or renovated room can expose a mismatch immediately when its surrounding trim comes from a different visual language. Profile matching is the measurement and coordination work used to carry established details into new work; it is more exacting than selecting a stock molding that merely looks close from across the room.
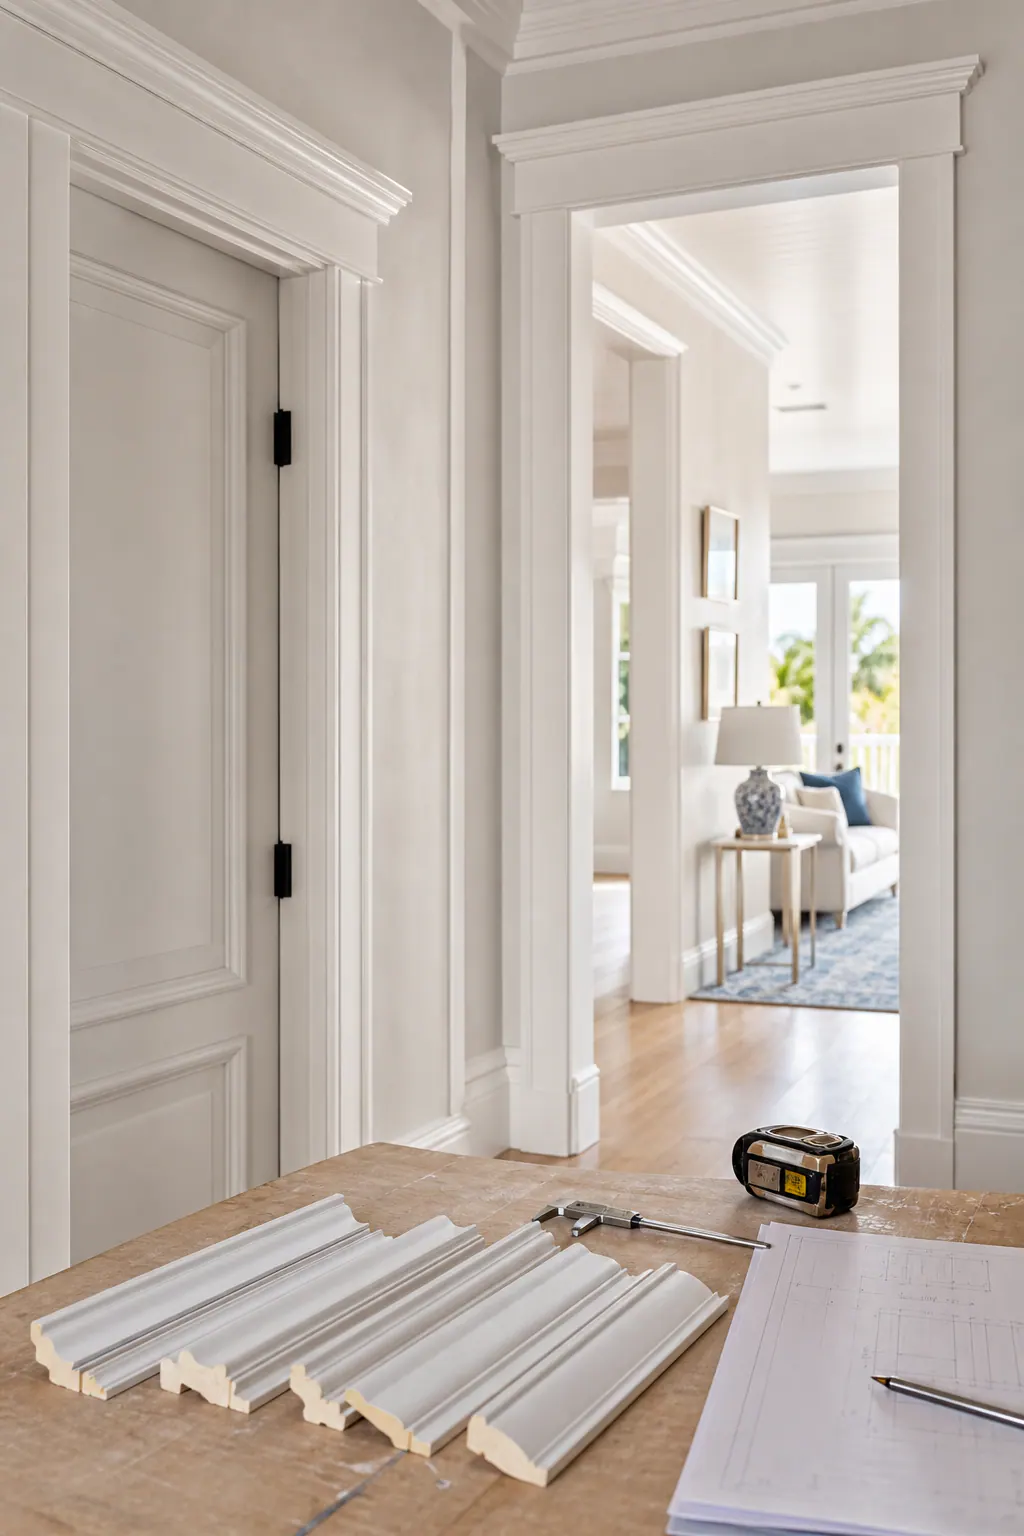
A finish carpenter in Longboat Key begins by recording the existing profile's face shape and width, material thickness, baseboard or casing projection, crown buildup, panel edges, and the depth of reveals where pieces meet. Paint layers matter too: decades of repainting can soften a crisp bead or add enough thickness to change how a new piece sits beside the old one. Those dimensions help determine whether the original can be reproduced, modified, or visually coordinated.
An exact match is most useful where old and new trim meet in the same sightline, for example, extending hallway baseboards into a remodeled bedroom or continuing casing around a newly widened opening. If a profile is discontinued, damaged, or part of several past renovations, a complementary profile can be the cleaner choice. It may retain the same overall height, projection, and visual weight while simplifying an outdated contour, rather than creating an almost-match that calls attention to itself.
Before fabrication, sample lengths or a small mockup make the decision tangible. Set against the existing wall, they reveal whether the new piece holds a consistent reveal, lands cleanly over an uneven older surface, and accepts the planned paint finish without a visible step. This is particularly valuable where an addition connects to rooms from different renovation eras: the goal may be seamless continuity in a public passage and a deliberately coordinated trim package within the updated room.
Choosing Paint-Grade, Stain-Grade, and Humidity-Aware Millwork Materials
Material should be chosen alongside the profile and finish, because the same casing can read very differently once it is painted, stained, or placed near a more exposed part of the home. A sample that looks acceptable in a shop can reveal softened edges, uneven grain, or a mismatched sheen when viewed against the room's walls and daylight.
Paint-grade millwork is selected for a smooth, uniform painted surface rather than for natural grain. MDF can produce crisp machined profiles and a consistent face for painted baseboards, casings, and panel components; its cut edges need careful sealing so they finish as cleanly as the face. Poplar is another common paint-grade choice when a carpenter wants workable solid-wood pieces, easier localized repair, or more flexibility for certain built-up details. Neither material is automatically right for every location: exposure, substrate conditions, and the coating specification matter.
Stain-grade woodwork is held to a different visual standard. The grain, color variation, knots, and board matching remain visible, so hardwood selection is part of the finished design rather than something paint will conceal. Solid hardwood can suit clear-finished caps, beams, feature walls, or built-ins where authentic grain is the point. Veneered sheet goods can provide a broad, more uniform wood face for panels and cabinetry components, but their edges require intentional treatment, such as solid-wood edging, veneer edge banding, or a designed reveal, rather than an unfinished plywood line.
For coastal interior trim, "humidity-aware" means matching the material to its actual setting instead of assuming one product solves every condition. Air-conditioning consistency, proximity to exterior doors or wet areas, installation against masonry or framing, room exposure, and the planned coating system can all affect how a detail should be built. A moisture-resistant panel product or composite option may make sense for a particular painted application, while a solid-wood detail may be preferable where stain quality or repairability is central.
Before fabrication, compare paint and stain samples under the home's actual lighting. Look for sharp profile edges, even sheen, intentional grain direction, sealed edges, and a written material schedule that identifies each location and finish. That discipline helps coastal interior trim look considered at installation and remain easier to maintain as the home is lived in.
How to Evaluate Finish Carpentry Workmanship Before You Commit
Close-up work tells the story more clearly than a wide room photograph. Look along baseboards, casing edges, crown lines, and panel grids from several angles: lines should read straight and remain consistent through a room, while casing widths, panel spacing, and shadow gaps should feel balanced rather than arbitrarily adjusted at the last corner.
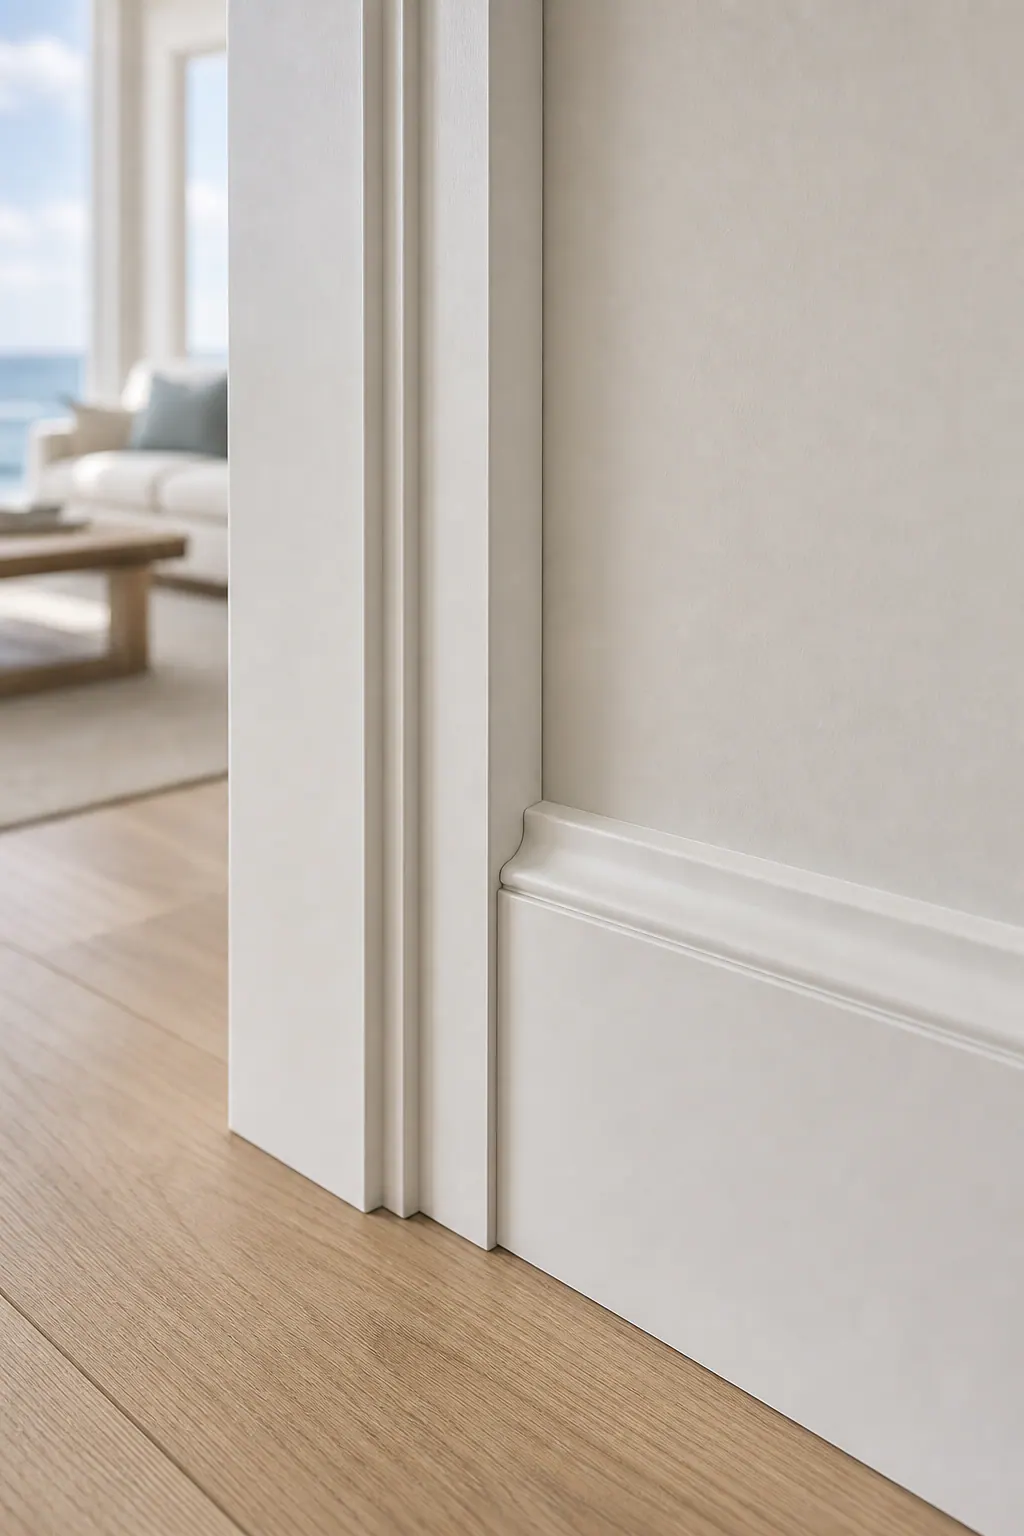
At joints, inspect both the fit and the visual continuity. A coped joint follows the contour of one molding into another and is often used at inside corners; a miter joins two angled cuts, commonly at outside corners or returns. Either should appear tight without conspicuous filler lines, open seams, or a profile that steps out of alignment. Reveals, the intentional narrow spaces around a door casing, panel, or built-in, should remain uniform. Where walls are out of square or uneven, good work resolves the transition with scribing, shimming, or a planned detail instead of forcing trim into a wavering line.
Surface preparation deserves the same scrutiny. Paint-ready work should have filled fastener holes, cleanly sanded joints, crisp edges, and smooth caulk lines without smeared residue. Stain-ready work should show deliberate grain direction, consistent color selection, and no sanding scratches or glue squeeze-out waiting to appear under finish. Transitions between trim, wall panels, and built-ins should sit flush or use a deliberate reveal, not a gap disguised as a design choice.
- Ask whether the team field-measures and marks layout lines before fabrication or installation, particularly for panel walls, ceiling details, and existing-house transitions.
- Request close-up portfolio images or a sample/mockup comparable in ceiling height, profile complexity, and paint or stain finish.
- Clarify who supplies drawings, who owns final layout decisions, and how changes are priced and approved once work begins.
- Ask how installation is sequenced with flooring, paint, cabinetry, and electrical work, and how nearby finished surfaces will be masked and protected.
- Establish who is responsible for final sanding, caulking, priming, staining, or painting, plus the pre-finish walk-through used to identify corrections.
Planning a Cohesive Custom Finish Carpentry Project in Longboat Key
A productive consultation starts by ranking the rooms and sightlines that will carry the most visual weight: for example, an entry-to-living-area view, a great-room ceiling, or a remodeled opening that meets original hallway casing. Existing architecture supplies the vocabulary, while room priority determines whether the key move is a wider casing, a matched crown buildup, a panel-wall layout, or a built-in surround. Paint or stain preference, ceiling height, wall condition, and adjacent renovation work then narrow the details into a coordinated package rather than isolated upgrades.
The sequence should be clear before materials are ordered: field-verify dimensions and existing conditions; select a new or matching profile; review material and finish samples; plan fabrication; install around related trades; then complete a final detail review before finish work. Field verification captures conditions a plan may miss, such as a ceiling that drops across a long wall, an out-of-plumb opening, or a baseboard transition at new flooring. The written scope should name each installation area, selected profile or millwork detail, material, and expected paint or stain finish.
- Bring inspiration images that identify the features you respond to, such as a flat-panel grid, substantial painted casing, or a stained slat wall, plus photos or sample pieces of trim to retain or match.
- Share room dimensions, ceiling heights, renovation drawings, and photos showing where cabinetry, flooring, lighting, or new openings meet the proposed work.
- Rank priorities by impact: a primary living space and entry may warrant custom millwork first, while bedrooms can use the same trim language with a simpler scope.
- Review portfolio examples by architectural style, room type, material, and paint-versus-stain finish so the reference is comparable to the intended installation.
For custom finish carpentry Longboat Key homeowners are considering, a project-specific assessment can turn those references into defined layout decisions, material options, and finish expectations before fabrication begins. An inquiry is a practical place to discuss the rooms, existing details, and level of refinement that matter most in your home.
Plan the next step
Compare the broader Custom Finish Carpentry service.
Review the Longboat Key, FL service area for local planning context.
When you are ready, request a free estimate with the rooms, trim goals, city, and available photos.
FAQs
What is included in custom finish carpentry for a Longboat Key home?
Custom finish carpentry includes baseboards, door and window casings, crown molding, chair rails, reveal details, decorative transitions, and built-ins. It can also include wall paneling, ceiling treatments, fireplace surrounds, and profile matching for renovation work.
What is the difference between custom trim and architectural millwork?
Custom trim finishes edges and transitions, including where floors meet walls, casings frame openings, and crown meets ceilings. Architectural millwork creates larger integrated compositions such as paneled walls, wainscoting, coffered ceilings, slatted features, and built-in surrounds.
Can a finish carpenter match existing crown molding or baseboard profiles?
Yes. Matching requires measuring the existing profile’s face shape, width, thickness, projection, crown buildup, panel edges, and reveal depth, including the effect of old paint layers. A close complementary profile may be a better choice than an almost-match when the original molding is discontinued or damaged.
What trim materials hold up best in coastal Florida interiors?
Paint-grade MDF provides crisp machined profiles and a uniform painted face, but its cut edges require careful sealing. Poplar offers workable solid-wood trim and localized repairability, while solid hardwood and veneered sheet goods are used where visible stain-grade grain is required; material choice should account for air-conditioning consistency, wet-area proximity, and exposure.
What should I look for when choosing a finish carpenter in Longboat Key?
Inspect close-up examples for consistent reveals, straight baseboard and crown lines, tight coped or mitered joints, balanced panel spacing, and smooth paint-ready or stain-ready surfaces. Ask whether the team field-measures layouts, provides samples or mockups, coordinates with flooring, paint, cabinetry, and electrical trades, and defines final finishing responsibilities in writing.