
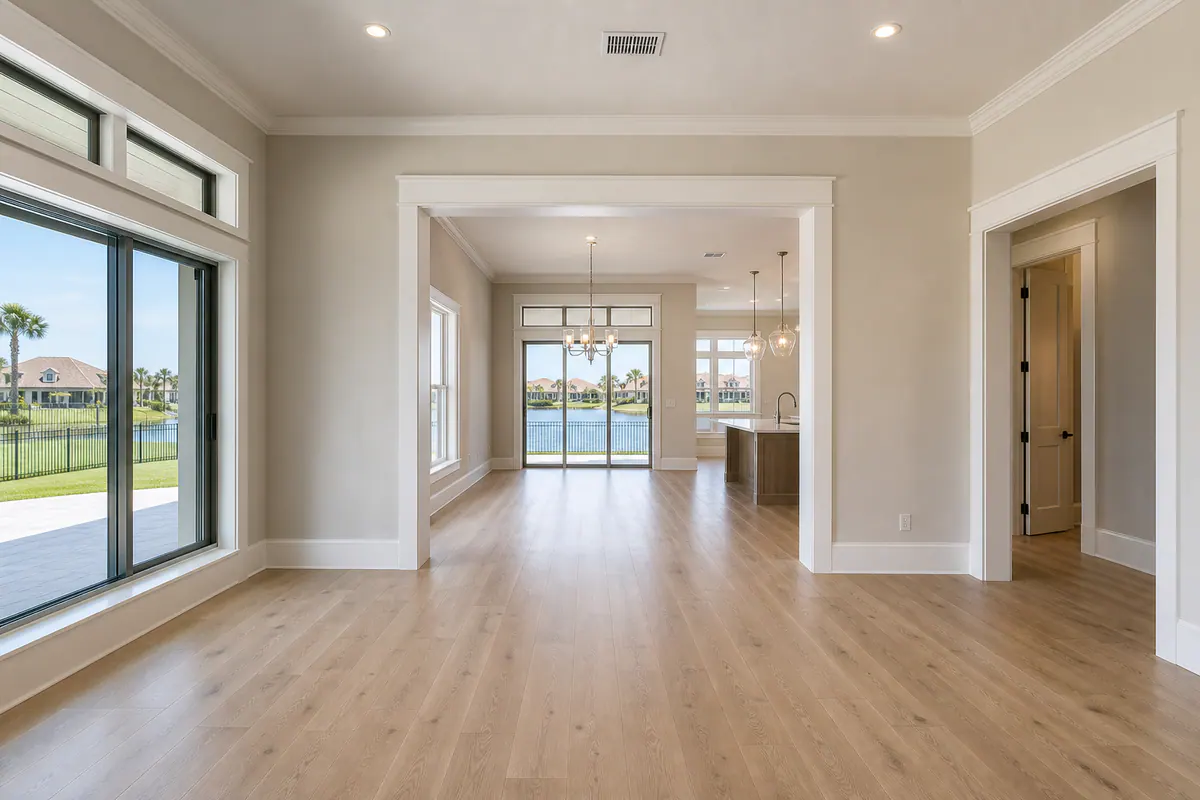
New Construction Trim Packages: A Coordinated Finish System for Lakewood Ranch Homes
For a new home, interior trim works best as one finish system rather than a menu of separate upgrades. Baseboards establish the line where wall meets floor; door and window casing frames the openings; crown, when used, completes the wall-to-ceiling transition. Their profiles, thicknesses, and visual weight should feel related from room to room. A tall, simple baseboard paired with narrow, highly detailed casing can look accidental even when each piece is neatly installed.
A coordinated package also includes the small details that make the larger pieces read as intentional: finished returns where molding stops, sensible transitions between rooms or flooring surfaces, aligned casing legs, and joints prepared for paint. Paint-grade trim is not "finished" just because it is on the wall. Before paint, look for smooth nail-hole filling, clean caulk-ready gaps, tight corners, and consistent spacing around doors and windows. Weak joints, unfinished ends, or mismatched profiles become more noticeable once a uniform paint color ties the room together.
For new construction trim Lakewood Ranch projects, the homeowner can define the desired look, while the builder or project manager coordinates scope and timing. The superintendent helps sequence the work around drywall, flooring, doors, cabinetry, and paint; the finish carpenter installs and refines the pieces; and the painter exposes whether preparation is truly complete. Whether trim is included in the original builder scope or added as an upgrade, a shared plan helps prevent piecemeal choices from becoming a visible punch-list problem.
Plan the Trim Scope Before Profiles Are Selected
Start with a room-by-room scope sheet, not a profile sample. Note each room's ceiling height, architectural feel, visible door and window openings, flooring edge, nearby cabinetry, and whether it is seen from an open living area. A modest casing that looks balanced in a secondary bedroom can look undersized around wide great-room openings, while elaborate crown or layered trim can feel crowded on lower ceilings. Carry one profile family through connected sightlines, then reserve changes for deliberate transition points rather than letting each room become its own upgrade decision.
A basic new build trim package in Lakewood Ranch commonly defines baseboard, door casing, window casing where applicable, and the finish at every exposed end. It should also state how trim meets flooring and cabinets. Shoe molding is a narrow flexible-looking strip that covers the floor-to-baseboard gap; quarter round performs a similar job with a rounded face. Either can be useful where flooring leaves a visible perimeter gap, but neither should be treated as a cure for uneven baseboard runs or poorly planned flooring transitions.
- Basic scope: consistent baseboard and casing, simple returns where a molding ends in open view, and a clear decision on shoe molding or quarter round.
- Enhanced scope: crown molding in selected shared spaces, jamb extensions that bring a door or window frame flush with a deeper wall, backband that adds a second framing layer around casing, and plinth blocks that create a deliberate base where casing meets baseboard.
Enhancements tend to earn their place at tall ceilings, substantial openings, formal focal rooms, or built-ins that need a stronger visual connection. They may feel excessive in compact rooms with plain doors or tight cabinet clearances. Plan cabinet-side baseboard cuts, island ends, tile transitions, and window-stool details before material is ordered. Decide early whether the finish is paint or stain: paint can unify mixed trim components, while stain makes grain, color matching, and joint placement far more visible. In baths, laundry areas, and other wet locations, identify the intended trim material and exposed edges within the scope rather than leaving that choice to a late substitution.
For a Lakewood Ranch builder trim package, mark each item as included, optional, or excluded and assign a priority: whole-home consistency, focal-room detail, or a targeted upgrade. That turns a vague allowance into a usable selection plan and keeps budget from being spent on decorative pieces before the necessary transitions and finished ends are accounted for.
Select Baseboards, Casing, Crown, and Materials That Work Together
Let the baseboard set the visual weight at floor level. In rooms with taller ceilings or broad openings, a deeper baseboard can keep the wall from looking bottom-heavy; in a smaller room, that same height may dominate the wall. The face matters as much as height: simple, squared baseboard profiles suit clean-lined casing, while a stepped or eased detail can carry through a more traditional profile family. A weak combination is a substantial baseboard beside thin, ornate casing that appears unrelated.
Door and window casing can match exactly when openings repeat through connected spaces, creating a calm, intentional rhythm. They can also coordinate rather than duplicate: use the same edge treatment or overall thickness while giving a prominent cased opening a wider face. An intentional difference needs a reason visible in the architecture, such as a built-in window seat or a large focal opening, not a random change from one room to the next. Keep casing legs aligned and sized so they meet the baseboard cleanly rather than ending in an awkward sliver.
Crown molding is most useful when the ceiling-to-wall transition needs more presence, particularly in a spacious main room or around a well-proportioned tray ceiling. On a low ceiling, a large layered crown can consume wall height and compete with cabinetry, beams, or detailed lighting. A restrained crown, or no crown, often gives a simpler room more room to breathe.
- Paint-grade MDF provides a smooth, uniform face for painted profiles and supports crisp detail, but exposed edges and wet-area use deserve deliberate material planning.
- Finger-jointed pine is a paint-grade wood option made from joined short lengths; it can suit straight painted runs, though the joints need careful preparation for an even finish.
- Solid wood suits projects that need wood's repairability or a more substantial carved detail. For stain, select boards with grain and color that belong together, because stain highlights variation, seams, and patching rather than hiding them.
For new construction trim Lakewood Ranch selections, view samples under the intended paint or stain and beside flooring, cabinet finishes, and door color. The goal is not the most decorative molding on its own, but components that hold the same visual language at every transition.
Coordinate Builder Scope, Trade Handoffs, and Installation Sequencing
Sequencing is where a well-chosen package either stays intact or becomes a collection of late fixes. Before finish carpentry begins, resolve bowed framing, uneven drywall edges, and rough window or door openings; trim can cover small paint-ready gaps, but it should not be asked to disguise a wall that visibly runs out of line. Doors should be hung so casing can establish an even reveal around the jamb, while cabinet, tile, and flooring selections should already define where baseboards stop, return, or meet another finished surface.
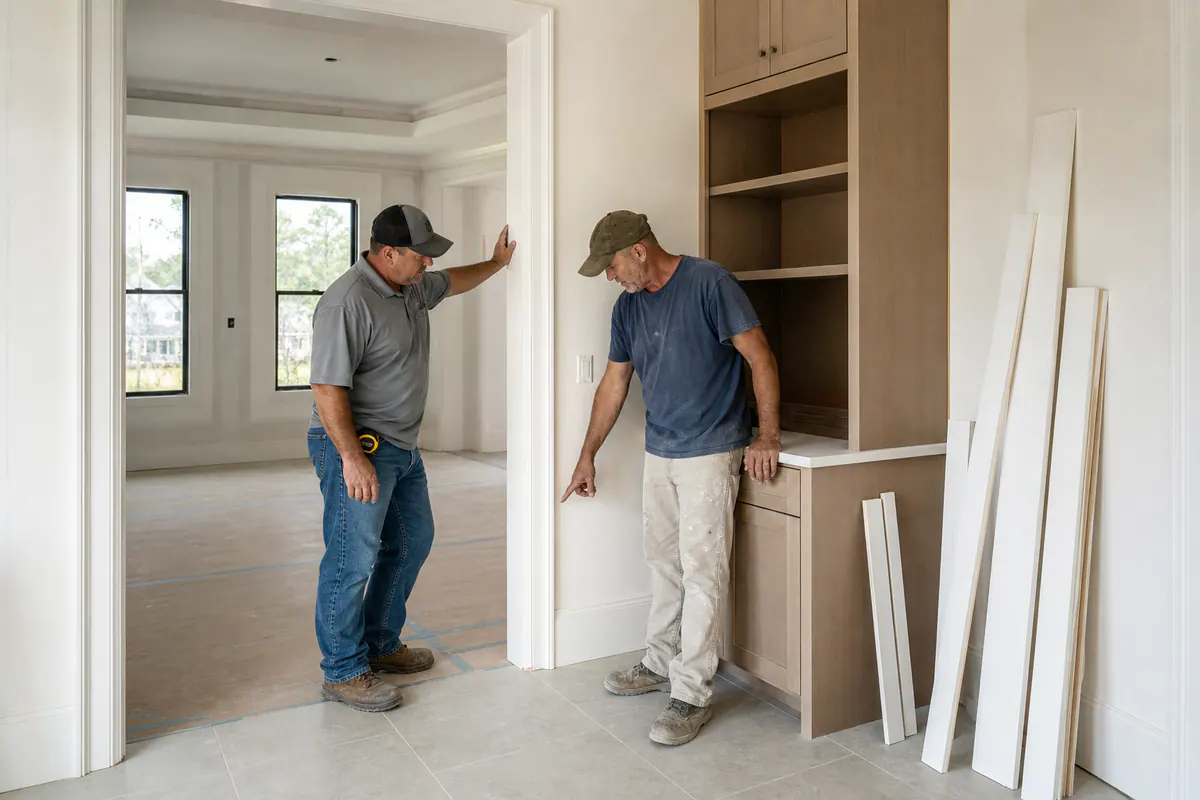
A practical order is drywall readiness, door hanging, major tile and cabinetry placement, then trim fitting before primer and final paint. Flooring timing is a decision point: installing baseboard after the finished floor can produce a cleaner floor-to-wall line, while installing it earlier may require the flooring crew to preserve the intended expansion space. Window-treatment planning also belongs here; wide casing, crown near a window, or a shallow wall return can limit where a rod, shade, or valance sits. Leave electrical plates off where possible while trim and paint are being finished, then reinstall them after touchups and final cleaning.
Builder-selected trim is part of the original scope: ask which profiles, materials, rooms, labor, and paint preparation are included. A post-closing upgrade is homeowner-directed work, which may require separate access approval, material delivery, scheduling around occupancy, and a clear boundary between the original builder's work and the added finish carpentry Lakewood Ranch scope.
- Who supplies each molding, and who owns shortages, damage, or profile mismatches?
- Who is authorized to alter existing baseboard, casing, paint, or flooring interfaces?
- Will a change order move related trades, or will the upgrade be scheduled after closing?
- Which party remains responsible for repairs where new work meets builder-installed finishes?
A warning sign of late coordination is trim arriving after flooring, cabinets, paint, and electrical trim are already complete, with no plan for transitions or touchups. Set those decisions before materials are cut, then reserve final cleaning until paint touchups and plate installation are complete.
Installation Details That Separate Finished Carpentry From Basic Molding Installation
Paint makes small fitting errors easier, not harder, to see. A strong installation begins with baseboard and crown that follow a straight visual line, even across long walls, and casing legs that land at the same height and sit evenly around each opening. The reveal, the narrow, intentional strip of jamb left visible inside casing, should be consistent on both sides and across the header. Uneven reveals, one casing leg held higher than the other, or baseboard that waves along the floor reads as rushed once the room is painted.
Joint treatment is equally visible. Coping shapes one inside-corner piece to the profile of the other, which can create a tighter-looking baseboard or crown corner when walls are not perfectly square. Outside corners and miter joints should meet cleanly at the face, without a dark line, crushed edge, or broad caulk bead trying to hide a gap. Caulk is useful for small paint-ready seams where trim meets wall; it should not be the structural answer to separated joints or poorly cut corners.
Look closely at endings and interfaces. Jamb extensions should meet the wall plane neatly so casing has a stable, even surface to cover. An exposed molding end needs an intentional return, a small finished piece that turns the profile back to the wall, instead of a raw square cut. At cabinets, tile, and flooring, baseboard should stop or transition deliberately rather than being awkwardly notched, forced against an obstacle, or left with an uneven void.
- Fasteners should hold trim flat without visible splits, proud nail heads, or rows of overfilled holes.
- Filled nail holes should be smooth and flush; lumpy filler and sanding scratches commonly remain noticeable under sheen.
- Run a sightline down long baseboards, crown, and casing edges. Strong finish carpentry in Lakewood Ranch looks aligned before paint, not merely improved by paint.
Run a Pre-Paint Trim Walkthrough and Resolve Punch-List Corrections
Schedule the walkthrough after trim is fitted and before final caulk, primer, and paint blur the evidence of a bad fit. A pre-paint trim walkthrough in Lakewood Ranch gives the homeowner, superintendent, and finish carpenter one clear view of the work: profile changes that do not belong, misaligned casing, open joints, dents, raw returns, or a baseboard transition that stops without a finished plan.

Walk the home in a repeatable order, one room at a time, then each opening within that room, rather than noting issues randomly. At the floor line, follow baseboards around every wall and inspect corners, cabinet ends, tile edges, stair landings, and flooring changes. At doors and windows, compare both casing legs, headers, reveals, outside corners, nail holes, and seams. Look upward for crown joints, corner alignment, and clean termination points. On stairs, inspect skirt-board connections, trim around posts, and any exposed end grain or damaged corners.
- List items that need correction before paint: a missing return, wrong profile, separated miter, cracked piece, uneven casing leg, exposed gap too large for a neat caulk line, or damaged molding.
- Separate those from final-finish touchups, such as a pinhole that needs a second fill, a thin caulk line, or a small paint blemish after the carpentry itself is sound.
- Photograph each item wide enough to show the room or opening, then close enough to show the defect. Label the location precisely, "guest bedroom, window left casing, lower outside corner", and state the expected result, such as "replace damaged section and create a tight painted joint."
A useful punch list describes the visible finish, not just the problem. "Fix baseboard" is vague; "align baseboard at hallway-to-tile transition, add finished return, and fill nail holes flush for paint" gives the team a shared target. That clarity makes Lakewood Ranch new construction trim corrections easier to revisit before final finishing.
Choose a Practical Trim Upgrade Path for a New Lakewood Ranch Home
The right upgrade path depends on where visual continuity matters most and when decisions can still be incorporated cleanly. A coordinated builder-selection package suits a whole-home plan: choose the baseboard, casing, optional crown, paint-grade material, and finishing scope together so connected rooms share the same scale. It is the clearest route when the team can establish profiles and transitions before installation begins.
A targeted upgrade concentrates the budget in high-visibility areas, such as the entry, main living space, primary suite, or a feature room, while secondary rooms retain a simpler related profile. The distinction should feel intentional: for example, wider casing and crown in a tall great room can work when nearby hallways still carry compatible baseboards and clean transition points.
Post-builder finish carpentry fits additions that are easier to judge after closing, including a feature wall, built-in surround, or upgraded crown in one finished room. It also requires a plan for paint matching, protecting completed floors, and tying new pieces into existing casing rather than layering on an unrelated detail.
- Define what is included, optional, and deferred.
- Assign responsibility for selections, material ordering, installation, and touchups.
- Compare samples beside floors, cabinets, doors, and wall color.
- Schedule the pre-paint inspection and close every listed correction before final finish.
For new construction trim Lakewood Ranch projects, the winning package is not necessarily the largest one. It is the one whose proportions, materials, sequence, and paint-ready inspection standard suit the specific home.
Plan the next step
Compare the broader New Construction Trim Packages service.
Review the Lakewood Ranch, FL service area for local planning context.
When you are ready, request a free estimate with the rooms, trim goals, city, and available photos.
FAQs
What is included in a new construction trim package in Lakewood Ranch?
A basic package typically includes consistent baseboards, door casing, window casing where applicable, finished returns at exposed molding ends, and a decision on shoe molding or quarter round. Enhanced packages may add crown molding, jamb extensions, backband, and plinth blocks.
What baseboard size works best in a new-build home?
Baseboard height should match the room’s ceiling height, wall scale, and nearby openings. Deeper baseboards work well with taller ceilings and broad openings, while oversized baseboard can dominate a smaller room.
Should door casing and baseboards use matching profiles?
Door casing and baseboards should use the same profile family and visual weight, even if they are not identical. A substantial baseboard paired with thin, ornate casing can look unrelated, while coordinated edge treatments and thicknesses create a consistent finish.
What should be on a new-build trim punch list before painting?
Check for missing returns, wrong profiles, separated miters, cracked molding, uneven casing legs, oversized gaps, damaged pieces, proud nail heads, and lumpy filler. Inspect consistent jamb reveals, straight baseboard and crown sightlines, clean corners, and deliberate transitions at cabinets, tile, and flooring.
Can a homeowner upgrade trim during or after the builder’s construction process?
Yes, builder-selected upgrades can be added during construction when profiles, materials, labor, and trade sequencing are defined before installation. Post-closing upgrades require separate access approval, material delivery, paint matching, floor protection, and clear responsibility where new trim meets builder-installed finishes.