
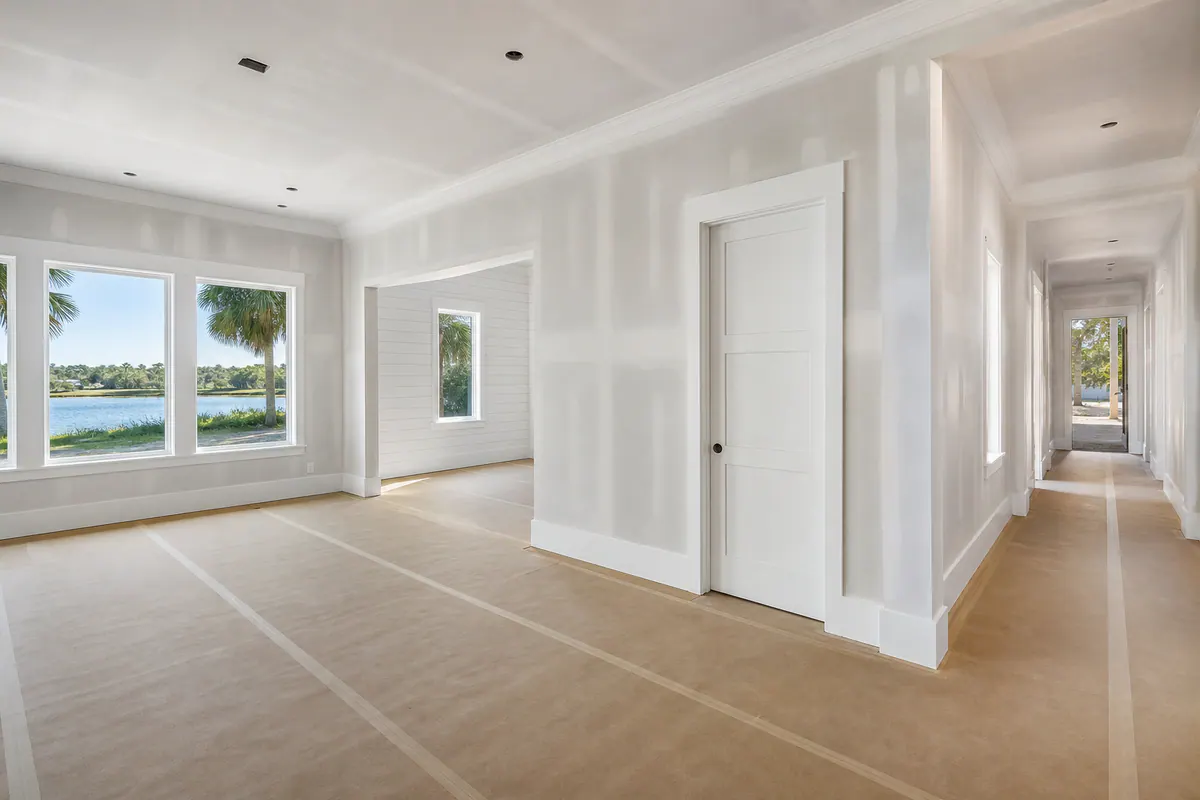
A cohesive new construction trim Laurel FL package starts with a room-by-room plan, not a last-minute list of moldings. Its purpose is to create an interior that feels intentional and is ready for paint: baseboards establish the wall-to-floor edge, casing frames door and window openings, and interior-door trim gives each opening a consistent visual boundary.
Core scope usually centers on baseboards and casing, while crown molding is an optional architectural upgrade that adds a finished line where wall meets ceiling. A simple, matching profile can suit a clean contemporary interior; taller or more detailed profiles create more visual weight. The important choice is consistency where rooms connect, while allowing purposeful changes in spaces such as a foyer, primary suite, or formal living area.
Before installation, define which rooms receive each element, how trim meets flooring, cabinets, tile, and door jambs, and what "paint-ready" includes. Clean signals include aligned casing, tight joints, even transitions, filled nail holes, and caulk reserved for small paint-prep gaps rather than concealing poor fit. A final finish-carpentry punch list should identify open miters, uneven reveals, damaged pieces, or missed caulking before paint makes corrections harder to see.
What a New Construction Trim Package Can Include
A room schedule turns broad trim selections into an installable scope. It identifies not only the profile chosen, but also where it stops, changes, or is intentionally omitted, important in closets, utility areas, garages, and secondary bedrooms as well as the more visible living spaces.
- Baseboards run along the wall-to-floor transition. They cover the perimeter edge and establish a continuous visual line around a room. Scope should address height, profile, returns at openings, and how baseboards end against cabinets, tile, stair trim, and built-ins.
- Door casing frames interior door openings, covering the joint between the jamb and drywall. A door casing installation in Laurel should specify the casing profile, the reveal, the narrow, consistent exposed edge of the jamb, and whether both sides of every doorway receive the same treatment. Closet, pantry, and pocket-door openings may need their own callout rather than an assumption.
- Window casing is selected around window openings when the design calls for a framed look. Some rooms may use casing at every window, while others rely on drywall returns or a simpler sill detail. The key is to account for window depth, sill treatment, and nearby backsplash, cabinetry, or wall finishes.
- Shoe molding or quarter round is the smaller trim installed at the baseboard's lower edge when needed to cover a narrow flooring-perimeter gap. It is not automatically required in every room; its use should follow the flooring plan and the desired appearance.
Interior-door details can also include matching jamb extensions, simple headers, or more decorative treatments at selected openings. Crown molding remains an upgrade rather than a default component, often reserved for an entry, great room, primary suite, or formal dining room where a stronger ceiling line supports the room's scale.
A uniform package gives the home a calm, connected look. A tiered package can give feature spaces added presence without carrying every upgraded detail into secondary rooms. Either approach works when the schedule makes the distinctions explicit before materials are cut and paint preparation begins.
Choosing Profiles, Materials, and the Right Level of Detail
Profile is the visual language of the package. A simple, squared or lightly eased baseboard and flat casing suit clean-lined doors and contemporary rooms without competing for attention. A built-up profile combines multiple pieces, such as a taller base with a cap detail or wider casing with a backband, to create more shadow lines and a more traditional, formal presence. Taller ceilings and larger common rooms can usually carry that added scale; in compact rooms or alongside sleek slab doors, the simpler option often looks more deliberate.
Material choice affects the finish plan as much as the initial look. MDF trim has a smooth, uniform face that works well for painted profiles and can be a practical choice where the material will remain dry. Primed finger-joint pine is paint-grade wood assembled from shorter pieces; it offers a wood substrate with a factory-primed surface, though joints and grain still need careful preparation for a smooth painted result. Solid wood is often selected when a stained finish will make grain and natural variation part of the design. Stain-grade work asks for more selective boards, closely matched pieces, and cleaner cuts because paint will not conceal variations or minor surface repairs.
For a new build trim package in Laurel, the best choice is not automatically the most ornate or the most expensive. Compare full-length samples beside the selected doors, flooring, cabinet finishes, and paint sheen. Glossier paint tends to make seams, nail filling, and uneven walls more noticeable, while a flatter finish is generally more forgiving visually. In bathrooms, laundry areas, and other moisture-prone locations, the trim material and the way it meets tile or flooring deserve a specific scope decision rather than an assumption.
Crown molding earns its place when a room benefits from a stronger wall-to-ceiling transition: an entry, great room, dining area, or primary suite with enough height and architectural detail to support it. It can feel oversized in lower-ceiling rooms, busy beside already detailed cabinetry, or out of character in a pared-back interior. A restrained baseboard-and-casing package can be the more cohesive choice when the home's doors, hardware, and finishes are intentionally simple.
Before material is ordered, view the proposed baseboard, casing, and crown together, not as isolated samples, and note where wall conditions, tile edges, cabinet ends, and door style may require a change in detail. That early comparison gives finish carpentry Laurel FL work a clearer target and reduces improvised profile changes once installation is underway.
Installation Sequencing, Flooring Coordination, and Clean Transitions
The installation calendar is where a coordinated trim plan becomes practical. Drywall should be finished enough to reveal wall flatness and corner conditions before trim begins; otherwise, casing and baseboard can follow a wave in the wall or leave uneven gaps. Interior doors and their jambs are typically set before casing, so the finish carpenter can establish even reveals, the narrow, intentional border between the jamb and casing, and make the trim sit consistently from opening to opening.
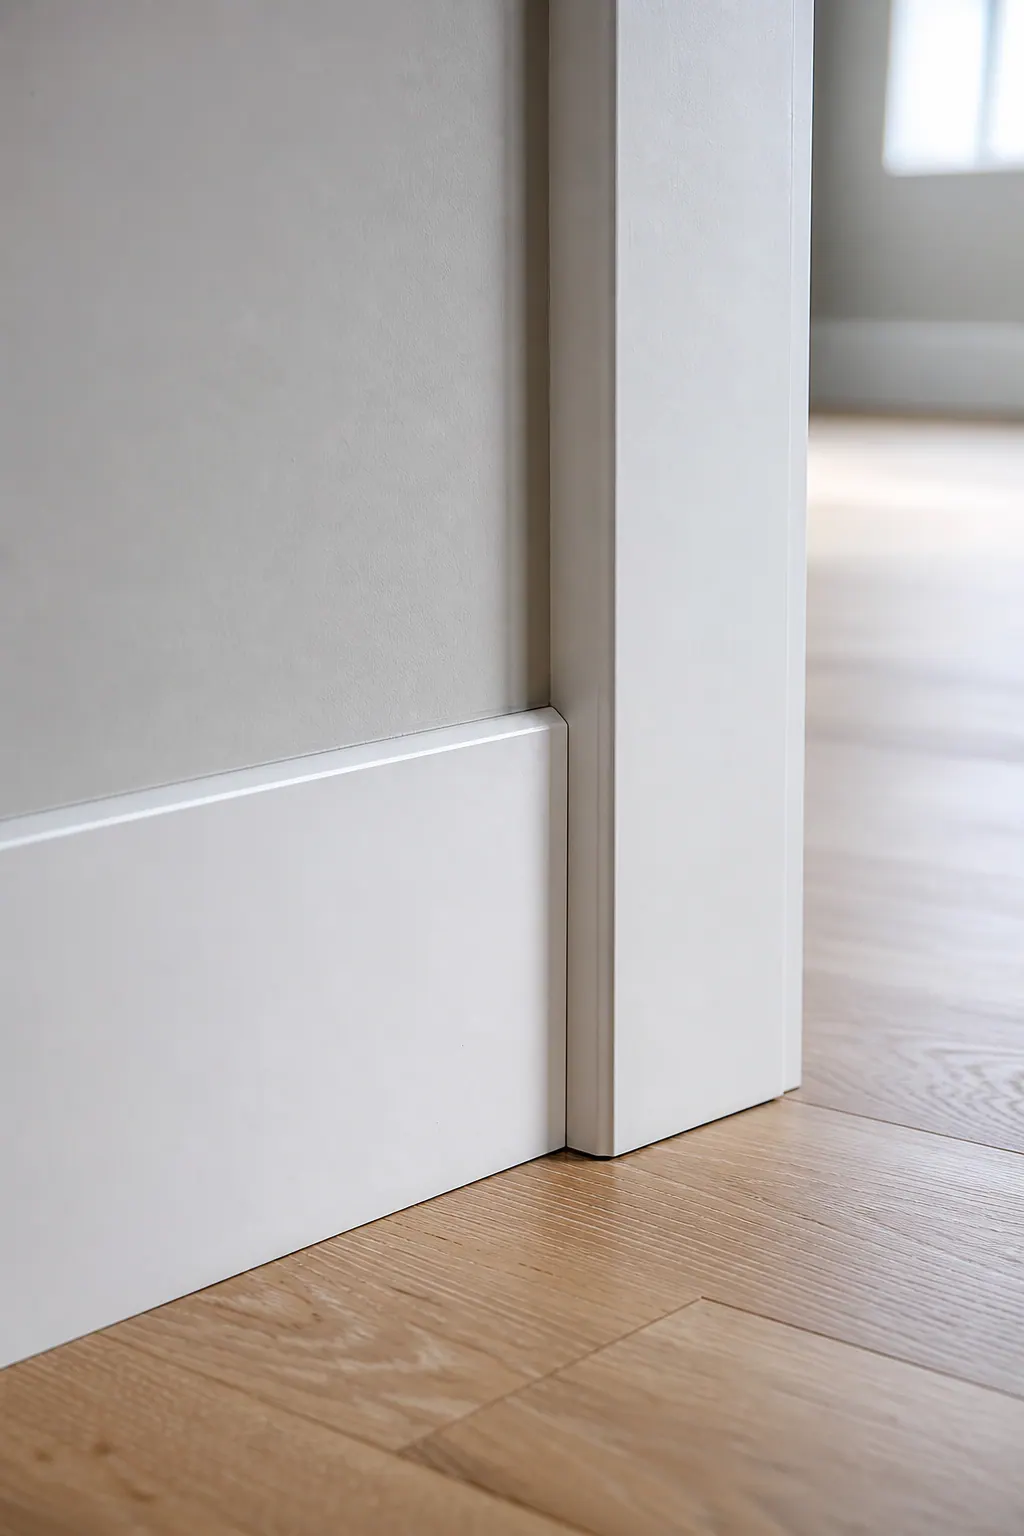
Baseboard timing is tied to the flooring plan. With finished hardwood, tile, or other fixed flooring in place, baseboards can be fit to the completed floor edge. Floating floors need room at the perimeter for their planned movement, so the flooring-to-baseboard detail must preserve that space rather than pinching the floor. In some scopes, baseboard goes on first and flooring is installed to it; in others, flooring precedes baseboard installation Laurel FL. The selected sequence should be decided jointly by the builder, flooring installer, and finish carpenter before either trade starts.
Shoe molding is a small, flexible-looking trim strip installed along the baseboard's bottom edge. It can cover a narrow, irregular floor-to-wall gap after flooring is installed without replacing the main baseboard; quarter round performs a similar function but has a more visibly rounded face. Either can be useful at an existing or uneven edge, but it should be an intentional finishing detail, not a way to disguise a poorly fitted baseboard or an oversized gap.
Transitions deserve a room-by-room look: tile may call for a clean baseboard termination at its edge, cabinetry may require a planned return or scribe at an exposed end, and stair skirts, treads, risers, and newel posts need their own meeting points. At doorways where flooring changes, the threshold detail, jamb cut, and casing alignment should read as one deliberate assembly. After trim is installed, small paint-prep gaps can be caulked, nail holes filled, and fit issues corrected during the punch list before primer and final paint make those details harder to assess.
What Clean Finish Carpentry Looks Like Before Paint
Before primer goes on, the trim should read as a set of straight, intentional lines rather than a collection of pieces. At each door or window, casing legs should appear even in height and sit at a consistent reveal from the jamb; the head casing should land cleanly on both legs. Along the floor, baseboard runs should hold their line and meet casing, stair parts, and other profile changes without an abrupt step or mismatched face.
Joint quality is especially visible in raking light. Outside miter joints, the angled cuts that create a corner, should close tightly and keep the profile aligned from one piece to the next. Inside corners may be mitered, but coping is often used for painted trim: one piece is cut to follow the contour of the adjoining profile, creating a more controlled meeting line. Neither approach excuses an open corner, a shifted detail, or a conspicuous gap. Pieces should also be securely fastened so joints and long runs remain settled while paint work proceeds.
Paint preparation should be restrained and purposeful. Nail holes need smooth, controlled filling that does not leave raised spots or broad patches, while caulk belongs in small, consistent paint-prep seams where trim meets a wall or jamb. Caulk can soften a fine line; it should not be asked to bridge oversized gaps, hide crooked casing, or disguise a poor transition between profiles. A paint coat can unify color and improve the finished appearance, but it tends to make irregular alignment and open joints easier, not harder, to notice. That is the practical standard to use when reviewing finish carpentry in a Laurel, FL new build before paint conceals the work.
Using a Pre-Paint Trim Walkthrough to Complete the Punch List
The last practical opportunity to see the trim without paint competing for attention is the pre-paint walkthrough. This room-by-room review turns a general concern into a usable finish carpentry punch-list: mark the exact location, describe the correction needed, and photograph the item before primer and final coats make a repair more disruptive.

- Look for missing baseboard, casing, crown, shoe molding, or small return pieces at exposed ends.
- Compare profiles from room to room, especially where upgraded trim begins or stops, and flag damaged, split, dented, or visibly mismatched material.
- Inspect corners and splices for open joints, shifted details, or gaps that read as more than a fine paint-prep seam.
- Review casing as a complete opening: legs should align, head pieces should sit squarely, and doors should open without trim contact.
- Follow baseboard along finished flooring, tile edges, thresholds, cabinets, and stairs for abrupt gaps, poorly planned stops, or inconsistent transitions.
- Check that nail holes are ready for controlled filling and sanding, and that caulk is reserved for narrow seams rather than broad fit problems.
A pre-paint trim walkthrough Laurel project should also assign the next steps. The builder, trim installer, and painter can establish who completes each correction and who handles filling, caulking, sanding, primer, and paint touch-ups. That coordination lets punch-list work occur before final paint where the schedule allows, instead of leaving a patched detail for an otherwise finished room.
Keep the list specific: "add return at pantry baseboard" is easier to close out than "fix trim." A final pass through the marked rooms after corrections helps distinguish completed repairs from items that still need paint-stage attention.
What Homeowners and Builders Should Clarify Before Trim Installation
The clearest way to avoid a late-stage "we assumed that was included" conversation is to approve a written room schedule before cutting begins. It should name the selected baseboard, casing, and crown profiles; the material for each; and whether the finish is paint-grade or stain-grade. Paint-grade trim is intended to be filled, caulked at fine seams, and painted, while stain-grade work leaves the wood's surface and joinery more exposed.
- Identify rooms receiving upgraded baseboard, wider casing, built-up details, or crown, along with every door and window that receives casing.
- Show crown locations on the plan, including where it stops at cabinets, beams, tray ceilings, or openings.
- Set the flooring approach: whether baseboard installs before or after finished flooring and whether shoe molding is included to cover a narrow floor-edge variation.
- Approve a physical sample or small mockup that places the proposed profiles, finish, door style, and flooring together.
- Assign caulking, nail-hole filling, sanding, primer, paint touch-ups, punch-list corrections, and final pre-paint approval to specific trades.
Those decisions give a new construction trim Laurel FL package a shared target: the installer knows what belongs in each room, the painter knows the expected prep level, and the walkthrough can focus on completing defined work rather than debating scope. Bring interior elevations, flooring selections, and approved samples into the project-specific discussion before installation starts.
Plan the next step
Compare the broader New Construction Trim Packages service.
Review the Laurel, FL service area for local planning context.
When you are ready, request a free estimate with the rooms, trim goals, city, and available photos.
FAQs
What is included in a new construction trim package in Laurel, FL?
A typical package includes baseboards, door casing, and sometimes window casing. Optional elements include shoe molding or quarter round, jamb extensions, decorative headers, and crown molding in selected rooms.
What is the difference between door casing and baseboard trim?
Door casing frames an interior door opening and covers the joint between the door jamb and drywall. Baseboard runs along the wall-to-floor edge, covering the perimeter transition and creating a continuous line around the room.
Should baseboards be installed before or after flooring in a new build?
The sequence depends on the flooring type and should be decided by the builder, flooring installer, and finish carpenter before work starts. Finished hardwood or tile can allow baseboards to be fit to the completed floor, while floating floors need a perimeter expansion gap that baseboards must not pinch.
What should be checked during a pre-paint trim walkthrough?
Check for missing trim pieces, open miter joints, uneven casing reveals, damaged material, inconsistent profiles, and abrupt baseboard transitions at flooring, tile, cabinets, stairs, and thresholds. Nail holes should be ready for controlled filling, and caulk should only fill narrow paint-prep seams rather than large gaps.
What trim material is best for painted new construction interiors?
MDF is a practical painted-trim choice in dry areas because it has a smooth, uniform face. Primed finger-joint pine is another paint-grade option, but its joints and grain need careful preparation for a smooth finish, especially with glossier paint.