
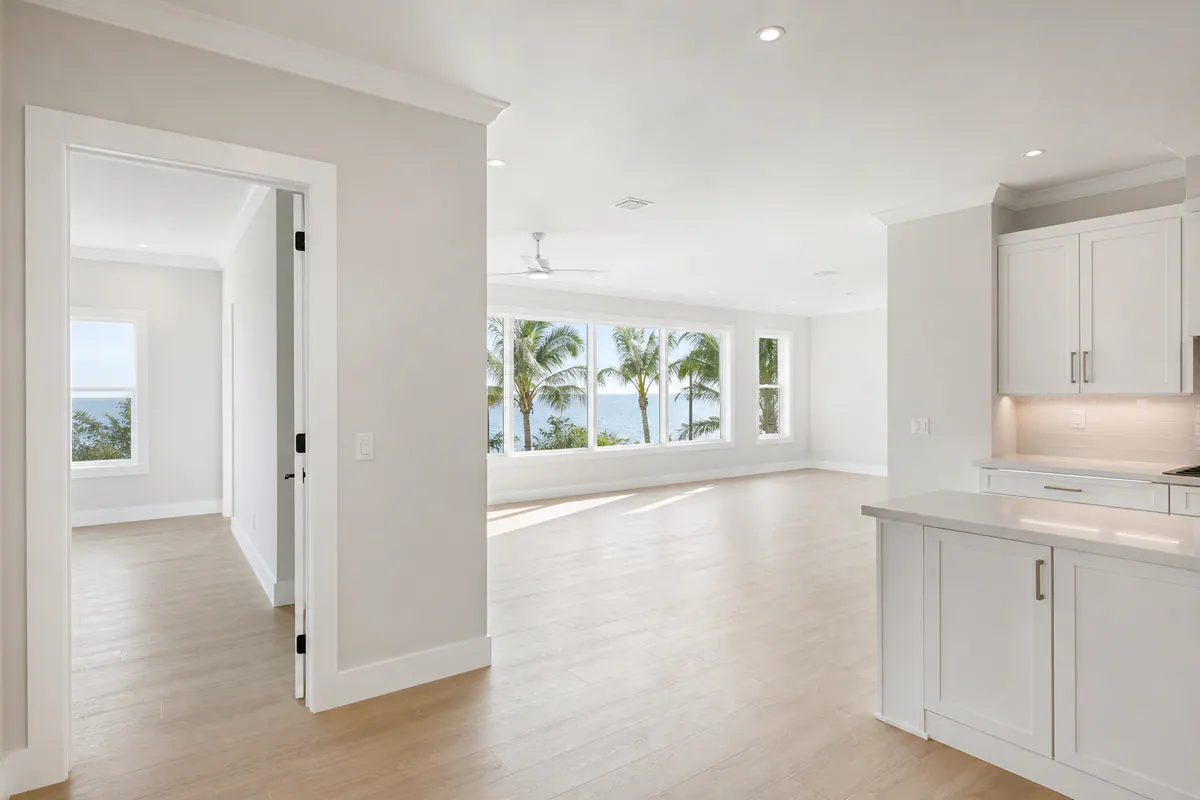
New Construction Trim Packages for Nokomis Homes
A coordinated trim package gives a new home one visual language instead of a room-by-room collection of unrelated finish details. For new construction trim in Nokomis, FL, the scope can identify baseboards, door and window casing, crown molding where it is specified, transitions, returns, and the preparation needed before paint. A single profile family and finish plan helps a casing line relate to the baseboard below it; a weak plan may leave mismatched widths, abrupt transitions, or visible gaps where flooring and trim meet.
This is initial finish carpentry, not remodel touch-up work. The installation phase places and secures the planned components after the surrounding openings and surfaces are ready. Pre-paint corrections address items that remain visible, such as inconsistent casing reveals, open miters, fastener holes, or uneven caulk lines. Final punch-list touch-ups address identified items after the broader interior has moved toward turnover.
For homeowners, builders, and project managers, a useful new build trim package in Nokomis starts with a written scope that separates included rooms and components from exclusions. It should also establish who coordinates trim with doors, drywall, cabinets, flooring, and paint. Before paint begins, the walkthrough can look for straight baseboard runs, aligned casing, tight joints, clean transitions, and every needed repair marked while it is still accessible.
What a Coordinated Trim Package Can Include
A room-by-room trim schedule turns the scope into visible decisions: profile, face width, material, finish, and location. It also prevents a formal living area from receiving the same treatment by default as a simple bedroom or utility space.
- Baseboards finish the wall-to-floor junction, cover the perimeter edge, and establish the visual scale at floor level. Taller, more detailed baseboards can suit higher ceilings or more formal rooms; a clean square-edge profile often fits a simpler interior. Baseboard installation in Nokomis should account for flooring thickness and planned transitions so the trim meets the finished floor without improvised gaps or overly heavy shoe molding.
- Door casing frames the opening and covers the joint between wall and jamb. Its width and profile should relate to the door style: a flat, wide casing can complement a shaker door, while a more contoured profile can support a traditional design. A door casing installation package should also identify whether every opening receives casing or whether selected openings use another treatment.
- Window casing gives windows the same finished edge and visual weight as doors, especially in rooms where the windows are a design feature. Window trim installation decisions depend on the jamb depth and wall condition; jamb extensions bring a recessed jamb flush with the wall plane before casing is applied.
- Crown molding bridges wall and ceiling, making it a deliberate choice for rooms where added formality or a stronger ceiling transition is wanted. Its scale should suit ceiling height and adjacent cabinetry. Crown that is substantial in one room but disappears into a thin baseboard and narrow casing elsewhere can make the profile family feel disconnected.
Smaller details deserve their own line items. Shoe molding and quarter round are narrow pieces at the baseboard's lower edge; they can finish an irregular flooring edge, but they are not automatic fixes for poor floor-to-wall planning. Drywall returns wrap the drywall edge into an opening without applied casing, creating a pared-back look. Reveals are intentional shadow gaps that separate surfaces or trim elements. Each changes the finished character of an opening, so a room with drywall returns should not accidentally receive casing at a similar opening elsewhere.
A useful package identifies these choices on elevations or by room, including where profiles stop, return, or change. The desired result is easy to read before paint: casing sits evenly around openings, baseboard transitions are purposeful, and optional details appear where the design calls for them rather than wherever a gap happens to be visible.
Choosing Trim Profiles and Materials for a Florida New Build
The profile choice sets the home's visual tone before a single length is cut. A simple square-edge profile has flat faces and crisp lines, making it a natural fit for clean, contemporary rooms. Colonial trim uses curved or stepped contours for a more traditional look. Craftsman-style trim relies on broad, flat stock with strong square edges and may use a cap detail at the header. Built-up trim combines separate pieces, such as a flat casing, backband, and cap, to create more depth and formality. The practical tradeoff is scale: more detail can enrich a foyer or main living area, while a restrained profile may sit more comfortably beside shaker doors, streamlined cabinetry, and simple ceiling lines.
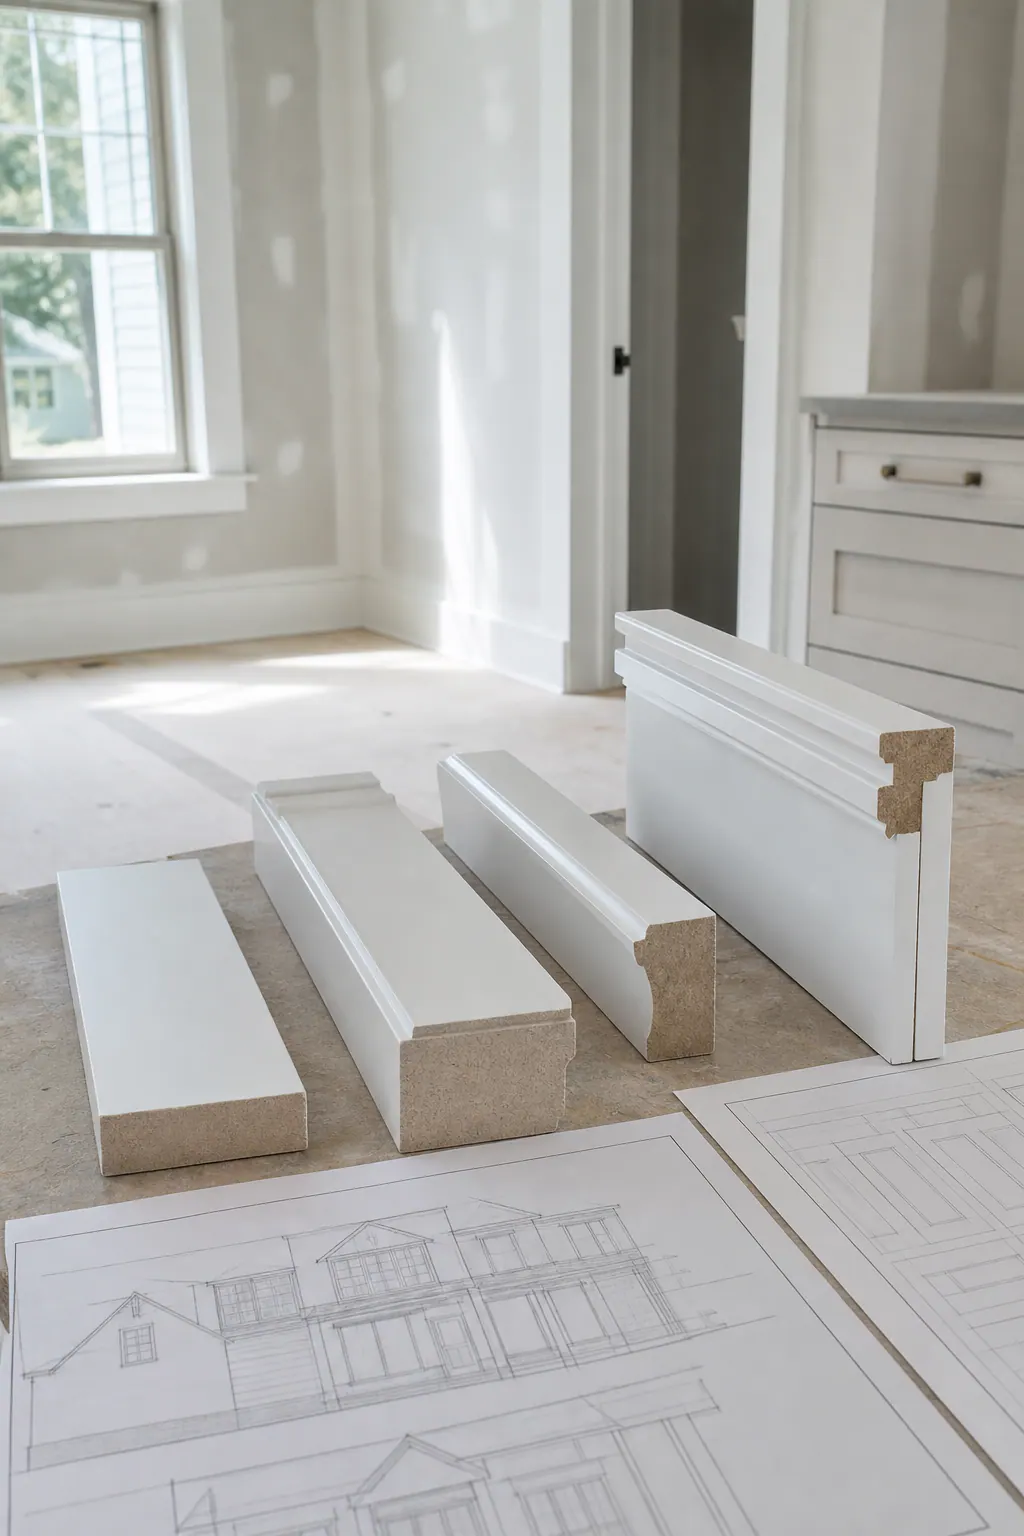
Finish intent should drive the material decision. Paint-grade trim is selected to be filled, caulked, and painted as a uniform surface, so its visual value comes from straight lines and a smooth painted finish rather than visible grain. Stain-grade trim leaves the wood character on display, which makes grain selection, color consistency, and joint placement part of the finished design. A trim package for a new build in Nokomis should identify stain-grade areas early; changing from paint to stain after installation can turn ordinary seams, filler, and mixed grain into visible issues.
- MDF is an engineered, paint-oriented option with a consistently smooth face and machined profile. It can suit detailed painted trim where a uniform surface is the priority, while rooms with moisture exposure or frequent hard impacts deserve a material and product selection made specifically for those conditions.
- Finger-jointed pine uses shorter wood pieces joined together and is commonly used for painted trim. It offers real-wood construction at a different budget point, but the joint pattern is intended to disappear under a properly prepared paint system rather than serve as a stain-grade feature.
- Poplar is a wood option often considered for paint-grade work and selected stain applications. Its practical value is the ability to use a solid wood piece where edges, returns, or locations likely to take knocks call for that approach; appearance samples should guide any visible finish decision.
Before installation, place sample lengths beside the doors, cabinet finish, flooring, and wall color. That small mockup can reveal a weak pairing, such as ornate casing against minimalist slab doors, or a baseboard height that feels undersized next to tall cabinetry. It also lets the team settle profile transitions and material changes before they become cut, fastened, and harder to revise in a new construction finish trim Nokomis project.
Coordinating Trim With Drywall, Doors, Cabinets, Flooring, and Paint
Sequencing is where a sound trim selection either stays clean or turns into avoidable rework. Before primary trim goes up, the team should look at the drywall plane and each opening: bowed wall edges, damaged corners, uneven jamb extensions, or an opening that has shifted out of square can leave casing with an inconsistent reveal, the narrow, intentional strip of jamb visible beside the casing. Door and window jambs need to project appropriately beyond the finished wall so casing can sit flat rather than being forced to bridge a recess or ride on a high spot.
Interior doors, cabinet layouts, appliance panels, and built-ins should be resolved before casing and baseboards are cut. A tall pantry cabinet set too close to an opening can block the casing path; a bench or media built-in can create a profile conflict if its toe-kick, end panel, and adjacent baseboard were not designed to meet. Good coordination identifies where trim dies into a cabinet, returns to the wall, or continues behind removable furniture. Weak signals include a casing narrowed on one side to clear a cabinet, baseboard abruptly stopping without a planned return, or door openings with visibly different reveals.
Baseboards and flooring require an agreed sequence, not a one-size-fits-all rule. With carpet, baseboard is often installed before the finished carpet so the flooring can tuck neatly below it. With floating flooring, the floor typically needs room to expand at walls; baseboard and, where planned, shoe molding can cover that perimeter allowance without pinning the floor. Shoe molding is the smaller trim piece installed at the baseboard-to-floor junction, useful when a consistent cover line is needed. Tile, glued-down flooring, and wood flooring can call for different elevation and transition decisions, so finished-floor heights should be known before baseboard placement is finalized.
For new construction trim in Nokomis, FL, the practical handoff is straightforward: install trim after adjacent work is ready to receive it, then prepare the assembly for paint without treating paint as a cure for layout problems. Before primers and finish coats conceal the work, confirm that casing is unobstructed, baseboard lines meet planned transitions, cabinet clearances remain usable, and intended gaps are covered by the selected detail rather than left as surprises.
Finish Carpentry Details That Support a Clean, Paint-Ready Result
The finish is judged in the lines and joints that remain visible after the room is painted. Baseboards should read as straight, continuous runs, even where a wall has a slight wave. Casing legs should land at the same height and hold a uniform reveal around the head and both sides of an opening. A reveal that narrows at one corner or casing that sits proud of its mate will still catch the eye under a smooth paint finish.
Corner treatment matters just as much. Outside corners typically use miter joints, where two angled ends meet; the faces and profile details should meet flush rather than leave an open V-shaped seam. Inside baseboard corners can be coped, meaning one profile is shaped to fit over the face of the adjoining piece. A properly fitted cope follows the molding's contours and gives the corner a more intentional appearance than a gap packed with caulk. Returns, the short pieces that turn an exposed trim end back toward the wall, should also be cleanly fitted so a profile does not appear abruptly cut off.
Fasteners need to hold trim securely without bruising the face or leaving conspicuous holes. Before paint, nail holes are filled, filled areas are sanded smooth, and damaged edges are repaired or replaced. Caulk belongs in narrow, controlled seams where trim meets the wall or jamb; it can soften a small paint-line shadow, but it should not become a substitute for a tight joint, a level run, or a matching profile transition.
When a wall is uneven or an opening is out of square, the answer is planned fitting: scribing, selective adjustment, or a defined repair before the paint crew starts. Improvised thick caulk beads, forced casing, and patch-heavy corners telegraph the underlying problem. For finish carpentry in Nokomis, FL, a paint-ready result means the trim has already been aligned, fitted, filled, sanded, and protected, not merely covered with paint.
Using a Pre-Paint Trim Walkthrough to Reduce Final Punch-List Issues
A pre-paint walkthrough creates a last clear view of the installation before primer and finish coats make small defects harder to isolate. For a new build trim package in Nokomis, walk each room with the trim schedule or elevations in hand rather than relying on memory.

- Compare the installed baseboard, casing, and any crown profile with the intended profile family. Flag an unexpected width, a profile change at an opening, or a missing transition.
- View every door and window from several steps back, then close up. Look for uneven casing alignment, inconsistent reveals, incomplete returns, damaged faces, open joints, and areas that need repair rather than a heavy caulk line.
- Follow baseboards continuously through corners, hallways, closets, and built-ins. At cabinets and flooring, look for planned clearances and clean stopping points, not pieces squeezed against panels or gaps left without an intended finish detail.
- At crown intersections, look for a consistent line at the ceiling and orderly inside, outside, and termination details.
Turn observations into a closeout list that separates installation corrections from normal paint-prep work such as filling, sanding, and fine caulking. Each item should name the room and wall or opening, include a photo, describe the correction, and assign the responsible trade. Reviewing door hardware, cabinetry, flooring, and trim interfaces together helps prevent one finishing step from obscuring another unresolved issue. A disciplined pre-paint trim walkthrough in Nokomis will not promise a punch-list-free turnover, but it gives the team a practical record for resolving visible items before final finishes go on.
Plan the Trim Scope Before Installation Begins
Before materials are released, bring the architectural plans, interior elevations, door and window schedules, finish selections, and flooring details into one trim-planning conversation. These references locate casing runs, show where baseboard stops at cabinet end panels or flooring transitions, and identify rooms receiving crown. A profile family might pair a flat, square-edge casing with a matching simple baseboard, while a built-up header belongs only where elevations call for it. Put each included room, return, transition, allowance, and exclusion in writing.
Set decision points around drywall readiness, jamb projections, cabinetry, flooring, trim, and paint. An unresolved cabinet end panel can leave no planned baseboard termination; flooring selected after baseboard installation can create an unplanned gap or force a patch. Schedule the pre-paint review as a defined handoff, using the room schedule to identify open joints, uneven reveals, filling, sanding, controlled caulk lines, and touch-ups before finish coats begin.
For new construction trim Nokomis FL projects, request a project-specific review of the drawings, finish schedule, site conditions, and installation sequence. That review establishes final quantities, material suitability, timing, installation details, and pricing for a coordinated, paint-ready, punch-list-ready closeout.
Plan the next step
Compare the broader New Construction Trim Packages service.
Review the Nokomis, FL service area for local planning context.
When you are ready, request a free estimate with the rooms, trim goals, city, and available photos.
FAQs
What is included in a new construction trim package in Nokomis, FL?
A coordinated trim package can include baseboards, door and window casing, crown molding, transitions, returns, shoe molding, drywall returns, and paint-prep repairs. The written scope should identify included rooms, profile, face width, material, finish, locations, allowances, and exclusions.
When should finish trim be installed in a new build?
Finish trim should be installed after drywall planes, wall corners, door and window jambs, cabinet layouts, and adjacent surfaces are ready. Finished-floor heights and flooring transitions should be known before baseboard placement is finalized.
What should be checked during a pre-paint trim walkthrough?
Check that baseboard, casing, and crown profiles match the room schedule, casing reveals are uniform, joints and returns are tight, and trim faces are undamaged. Follow baseboards through corners, closets, cabinets, and flooring transitions to find unplanned gaps, squeezed pieces, or abrupt stopping points.
Should MDF or wood be used for baseboards and casing in a Florida home?
MDF is a smooth, paint-oriented material suited to detailed painted trim, while moisture-exposed or high-impact locations need a product selected for those conditions. Finger-jointed pine is commonly used for painted trim, and poplar can be a solid-wood option for edges, returns, and areas likely to take knocks.
How do builders coordinate trim with cabinets, flooring, and paint?
Builders should resolve cabinet end panels, built-ins, appliance panels, door openings, and finished-floor heights before cutting casing and baseboards. The plan should specify whether trim dies into cabinetry, returns to the wall, or covers flooring expansion gaps, then require filling, sanding, and controlled caulking before paint.