
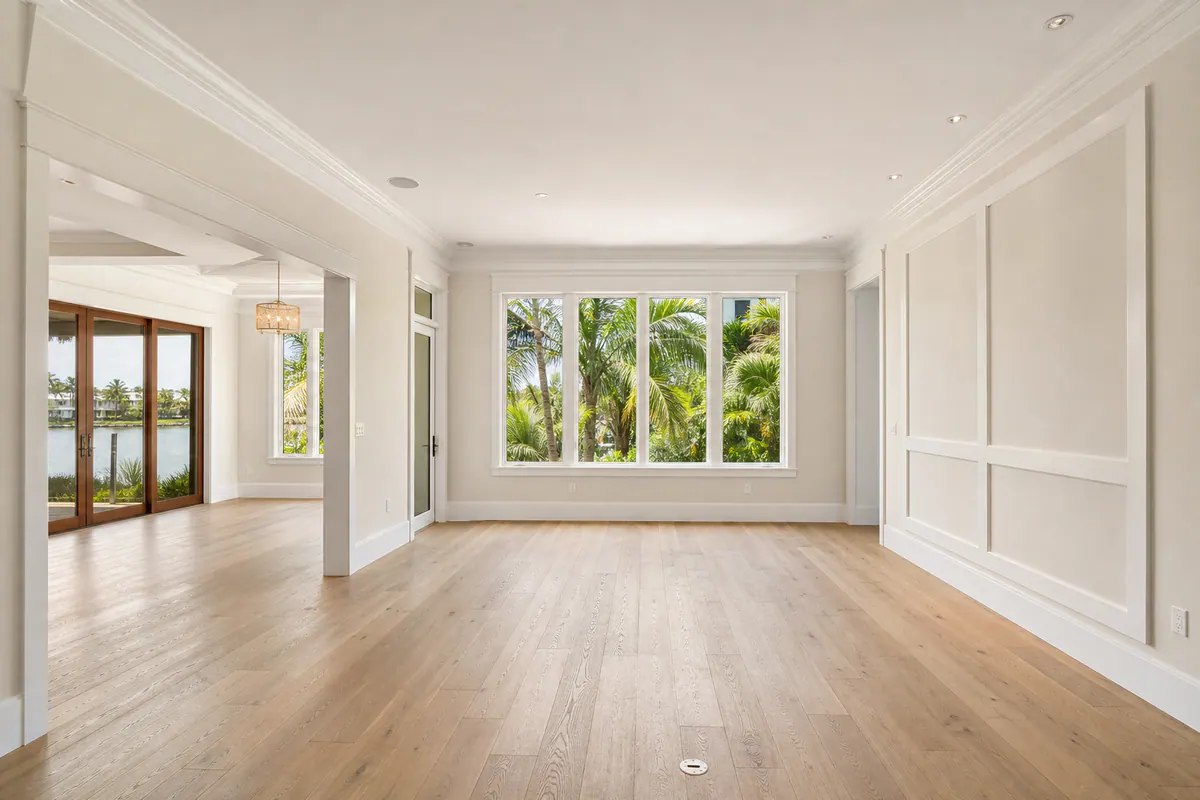
New Construction Trim Packages for Osprey Homes: A Coordinated Finish System
A new build trim package is the finish-carpentry plan that gives a home its completed edges, transitions, and visual rhythm, not a grab bag of moldings chosen after the walls are up. For homeowners, builders, and project managers planning new construction trim in Osprey, FL, the useful starting point is to define the intended look and the handoffs required to achieve it.
Early choices affect work downstream. Door style influences casing scale; ceiling height affects whether a simple base-and-casing combination feels balanced or calls for added detail; and paint versus stain changes the material and finishing approach. A painted package may prioritize smooth, consistent faces, while a stained wood package makes grain, color variation, and joinery more visible. Wall tile, built-ins, and flooring thickness also determine where trim begins, ends, or transitions.
Profile coordination is what makes separate components read as one system. For example, a substantial square-edged baseboard paired with narrow, ornate casing can look accidental, while related shapes and proportions create continuity from room to room. Material selection and installation timing matter just as much: final appearance depends on straight, ready substrates, allowance for normal material movement, careful painting, and clear coordination among drywall, flooring, door, and trim crews.
A planned new build trim package in Osprey gives those decisions a place to be made before finishing work compresses the schedule.
Define the Trim Scope Before Installation Begins
A room-by-room scope prevents small edge conditions from becoming last-minute decisions. A residential trim package in Osprey might cover every finished room, or it might reserve decorative work for public areas while keeping bedrooms and closets simpler. The point is to name each included component and the locations where it belongs.
- Baseboards and shoe molding: baseboard finishes the wall-to-floor edge; shoe molding is the smaller piece used at the baseboard's bottom edge where flooring calls for it.
- Door and window casing: casing frames openings, while returns finish an exposed trim edge where it stops against a wall or another surface. List cased openings separately from doors so they are not assumed.
- Crown, closet, and stair trim: crown finishes the wall-to-ceiling junction; closet trim may include door casing, shelving supports, or simple base; stair scope can identify skirt boards, handrails, newel posts, and balusters.
- Transitions and optional details: identify trim at tile edges, flooring changes, built-ins, and countertop ends, plus any feature-wall battens, wainscoting, or panel layouts.
Details that seem minor can change the work substantially. A vaulted ceiling may alter where crown begins or ends. An uneven opening may need a planned reveal rather than forcing casing to disguise a larger problem. Tile thickness affects whether baseboard, shoe molding, or a clean termination is intended.
The written scope for new construction trim Osprey FL projects should pair component names with a room schedule: profile and size, paint-grade or stain-grade expectation, and any exclusions. Paint-grade calls for a finish intended to be coated; stain-grade makes wood grain, color variation, and visible joinery part of the result. Include elevations or marked wall sketches for feature details, physical profile samples for approval, and finish notes that distinguish, for example, painted baseboards from stained stair parts.
It should also assign handoffs: who establishes final flooring and tile elevations, who resolves wall or opening irregularities before trim, and who protects completed work during painting. Clear ownership keeps interior trim installation aligned with the build rather than relying on assumptions at the finish line.
Build Profile Continuity Across Baseboards, Casings, and Crown
Trim reads as a single visual language when its scale and shapes relate from one edge of the room to the next. A taller baseboard can give a wall more visual weight, while a wider casing gives doors and windows a stronger frame. Crown molding, when included, should feel proportionate to both of them rather than appearing like a separate decorative idea at the ceiling.
For example, a clean-lined home with flat-panel doors may use square-edge or lightly eased trim profiles: a substantial flat baseboard, simple casing with a consistent reveal around the jamb, and modest crown or no crown at all. A more traditional door style can support shaped casing, a backband that adds a second layer outside the casing, and crown with a more pronounced curve. Neither direction is automatically better; the useful choice is the one that repeats the home's architectural character without competing with it.
- Scale openings to the room: narrow casing can look undersized around tall doors or wide cased openings, while overly wide or ornate casing may crowd a smaller room.
- Keep reveals deliberate: the reveal is the visible strip of jamb between the door or window frame and casing. Repeating its size makes openings look aligned and intentional.
- Match visual weight: a tall, detailed baseboard beside thin, plain casing can feel unrelated. Select trim profiles that share a similar level of thickness, edge detail, and formality.
- Use ceiling height as a guide: taller ceilings can carry a taller baseboard or more substantial crown molding; lower ceilings often benefit from simpler, less imposing profiles.
Room transitions do not require every space to be identical. Public rooms or a foyer may receive a stronger crown profile, built-up opening, or other focal detail, while secondary rooms stay simpler. The connection comes from retaining a shared casing family, baseboard edge shape, or consistent door treatment. Before finalizing an Osprey new construction trim package, place profile samples together and review their thickness, edge shape, backband relationship, reveals, and how each piece ends at corners and openings. A coordinated set looks purposeful; unrelated pieces can make even well-installed trim feel assembled room by room.
Choose Materials and Finish Levels for Each Location
Material choice changes both the appearance the painter is asked to create and the locations where trim makes the most sense. MDF trim is commonly selected for painted interior profiles because it presents a uniform, grain-free face. That makes it suited to a smooth, opaque paint treatment, but not to a stained look intended to show natural grain. Wood trim brings visible grain and variation, which can be a feature in a stain-grade package or a more traditional painted interior.

- MDF: a paint-grade option for clean, consistent-looking baseboards, casings, and molded details in dry interior spaces. Its edges and faces need thoughtful handling during installation and repair so dents, chips, or swelling-prone locations do not remain visible under paint.
- Wood: the natural choice when grain, color variation, and stain are part of the intended finish. It can also be painted, but a paint-grade wood installation and a stain-grade installation call for different expectations around grain selection, color matching, filling, and visible joints.
- PVC: a non-wood trim option often considered at moisture-exposed locations, such as exterior-adjacent details or wet-area transitions. Its finish, fastening approach, expansion considerations, and paint plan should be selected for that specific use rather than treated like an interchangeable interior molding.
Paint-grade means the completed appearance relies on primer, caulk, surface preparation, and paint to unify the assembly. Small nail holes and seams are generally prepared to disappear into the painted finish. Stain-grade leaves more of the material itself on display: grain direction, color consistency, miters, plugs, and transitions need a higher level of visual discipline because coating will not hide them in the same way.
Finish level also goes beyond material. A standard clean-lined installation may use straightforward single-piece baseboard and casing with neat, paint-ready joints. More detailed new construction finish carpentry can include stacked moldings, built-up crown assemblies, custom returns where trim terminates without a wall, and closely aligned visible joinery. Those upgrades add layers and shadow lines, but they also increase the number of intersections that must look intentional. Define whether the goal is simple painted continuity or furniture-like detail before the material and profile package are released.
Coordinate Trim Installation With Drywall, Flooring, Doors, and Paint
Trim is easiest to place when the surfaces and components it must meet have reached their intended condition. Before new home trim installation in Osprey begins, the builder, trim crew, flooring team, and painter should agree on the installation sequence and identify what will already be in place.
- Walls and openings: Drywall should be finished enough to reveal bows, uneven corners, and out-of-square door or window openings. Casing follows the jamb and wall face, so an opening that differs from the plan can change reveals, miters, or the amount of adjustment needed for a balanced appearance.
- Doors, windows, and built-ins: Confirm jamb position, hardware clearances, window depth, and the final location of cabinets or built-ins. A casing that crowds a cabinet side panel or conflicts with a window return needs a deliberate termination, not a field improvisation.
- Finished-floor heights: Baseboard placement depends on the final flooring assembly, not just the subfloor. Tile, hardwood, carpet, and transitions can sit at different elevations; the intended baseboard-to-tile relationship and any shoe molding should be decided before pieces are cut.
- Tile, counters, and HVAC: Note where baseboard stops at a tiled shower wall, where backsplash or countertop edges meet trim, and where registers, grilles, or access panels interrupt a wall. These interfaces need space and a clean visual endpoint.
Painter access is part of the handoff as well. The trim crew needs room to install, fill, and prepare joints; the painter needs clear access to prime, caulk, and coat the finished assembly. For new construction trim in Osprey, FL, a brief readiness review before installation helps expose changed floor heights, wall irregularities, or shifted openings while there is still time to adjust the approach rather than force a planned detail into an unplanned condition.
Use a Pre-Paint Trim Walkthrough to Catch Visible Details
Before primer and final paint make the assembly harder to evaluate, walk each finished room with the trim scope and plans in hand. A pre-paint trim walkthrough is a documented review of what is installed, what needs correction, and what belongs to another trade; it is not an assumption that caulk and paint will erase every uneven wall or substrate condition.

- Confirm the intended trim system: Compare baseboard, casing, crown, returns, and room transitions to the selected profiles. Look for an abrupt profile change or a missing planned piece, rather than judging each molding in isolation.
- Review installation details: Check that casing lines up consistently around doors and windows, transitions end deliberately, miters meet cleanly, fastener holes are filled, and no material is chipped, split, or otherwise damaged.
- Separate paint-prep from carpentry corrections: Mark joints and wall-to-trim edges that are ready for caulk and paint, then separately list loose pieces, open miters, inconsistent reveals, or incomplete rooms that require trim work first.
- Identify conditions needing follow-up: A gap caused by a bowed wall, shifted jamb, uneven drywall corner, or another trade's installation should be recorded as a coordination item. The builder can then decide whether the surrounding condition, the trim detail, or both need adjustment.
For a pre-paint trim walkthrough in Osprey, use numbered punch-list photos, marked floor plans, and a named owner for every item. That record gives the homeowner, superintendent, trim crew, and painter a shared closeout list before finish coats begin.
Add Feature Walls, Wainscoting, and Custom Paneling With a Clear Plan
Decorative details work best when they are drawn as part of the room rather than added to an empty wall at the end. A feature wall may use a single painted accent field, while wainscoting creates a lower-wall treatment and wall paneling adds a repeated grid or framed pattern. Each choice changes where the eye lands, so its rails, stiles, and outside edges should relate deliberately to door casing, window trim, and the room's intended furniture layout.
Decide where a detail starts and stops, whether it dies into a corner or wraps an opening, and whether the paneling and surrounding wall share one color or use a planned paint break. Outlets, switches, thermostats, windows, doors, and built-ins should be located on the elevation before panel spacing is set. A well-planned grid keeps those interruptions intentional; a weak one leaves a narrow, accidental-looking panel beside a device or opening. Field measurements and coordination with electrical, drywall, paint, and cabinetry work may still be needed as construction progresses.
For new construction trim packages in Osprey, FL, request a trim-package review or quote with:
- Floor plans or wall elevations, plus the rooms included.
- Inspiration photos and preferred profile direction.
- Selected doors, flooring, and paint-grade or stain-grade finish intent.
- The current construction stage and any known outlet, cabinetry, or furniture locations.
Plan the next step
Compare the broader New Construction Trim Packages service.
Review the Osprey, FL service area for local planning context.
When you are ready, request a free estimate with the rooms, trim goals, city, and available photos.
FAQs
What is included in a new construction trim package in Osprey, FL?
A new construction trim package can include baseboards, shoe molding, door and window casing, cased openings, crown molding, closet trim, and stair components such as skirt boards, handrails, newel posts, and balusters. It can also specify trim at tile edges, flooring transitions, built-ins, countertop ends, feature walls, wainscoting, and panel layouts.
When should trim profiles be selected for a new home build?
Trim profiles should be selected before finishing work compresses the construction schedule and before installation begins. Early selection lets the team coordinate door styles, ceiling heights, flooring and tile elevations, built-ins, and paint-grade or stain-grade finish requirements.
How do I keep baseboards, door casings, and crown molding consistent throughout a new build?
Choose profiles with related scale, thickness, edge detail, and formality, then use consistent casing reveals around door and window jambs. Review physical profile samples together, including their backband relationship, corner details, and how each piece terminates at openings and walls.
What should be checked before interior trim is painted?
Before paint, verify that baseboards, casing, crown, returns, and transitions match the selected profile system; miters meet cleanly; fastener holes are filled; and materials are not chipped or split. Separate paint-prep items such as caulking from carpentry corrections such as loose trim, open miters, inconsistent reveals, or incomplete rooms.
Should a new construction home use MDF, wood, or PVC trim?
Use MDF for smooth, uniform paint-grade trim in dry interior spaces, wood when visible grain and stain-grade finishing are desired, and PVC for moisture-exposed or exterior-adjacent details. MDF is not suited to stained finishes, while stain-grade wood requires more careful grain selection, color matching, visible joints, miters, and plugs.