
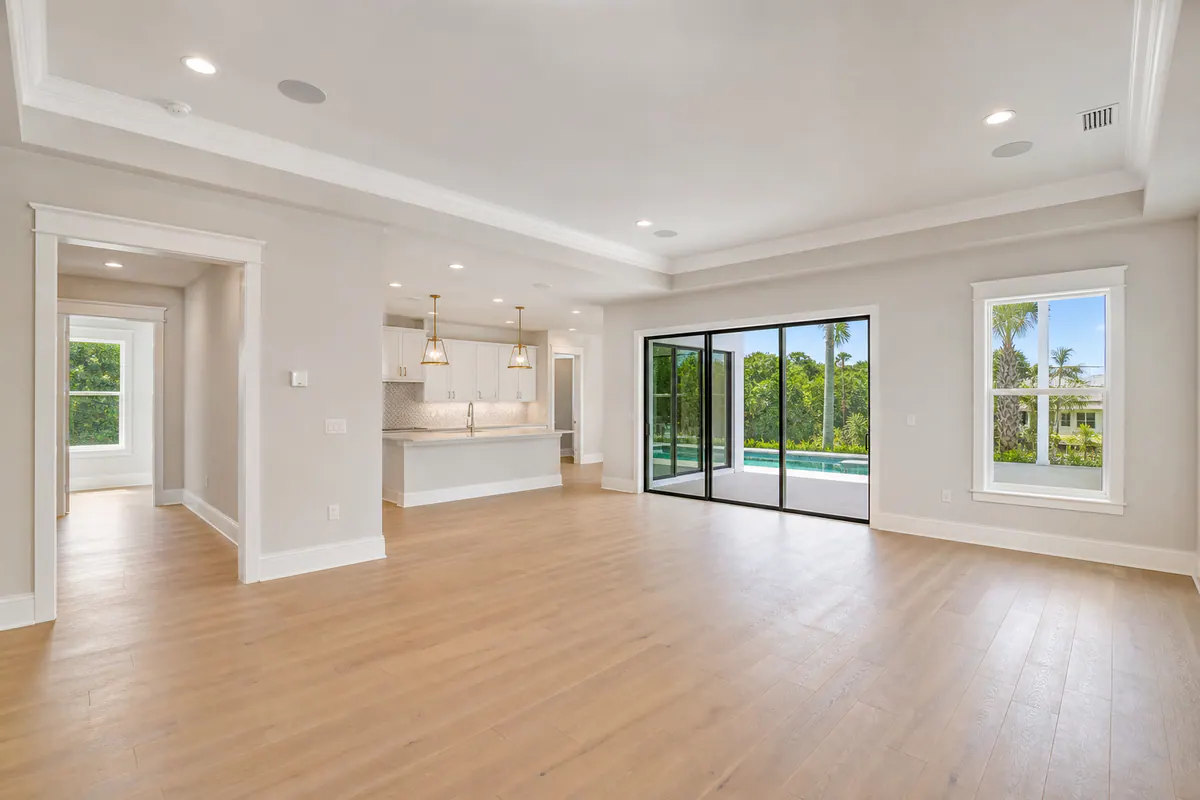
New Construction Trim Packages Designed for Venice, FL Homes
A coordinated trim package gives a new home a finished, deliberate look instead of a collection of unrelated moldings. For new construction trim in Venice, FL, that usually means planning baseboards, door and window casing, optional crown molding, and the small transition details as one paint-ready system before installation begins.
Those decisions change from house to house. A taller ceiling can carry a more substantial baseboard or casing, while a simpler profile may better suit a low, clean-lined room. In an open-plan layout, profile families need to flow across connected living, kitchen, and dining areas without creating abrupt visual breaks. Flooring thickness and transitions affect how baseboards meet finished surfaces; door style and wall conditions influence casing width, returns, and the look around openings.
Crown molding is an option, not a requirement. It can give a formal room or a well-proportioned ceiling line more definition, while omitting it may preserve the quieter look of a contemporary plan. The goal is not to add every available detail, but to select details that belong together.
Planning the package early also lets the finish carpentry fit the builder's sequence: confirm selections, install trim, review it before paint, and address visible punch-list items such as inconsistent joints, uneven reveals, missed caulk lines, or transitions that do not read cleanly from one room to the next.
Plan the Package Around the Home’s Scale, Style, and Finish Selections
The best starting point is not a catalog page; it is the house itself. Ceiling height, room size, interior door design, flooring, paint colors, and the intended architectural character all help set the visual weight of the trim. A taller great room may support a taller baseboard and wider casing, while a compact bedroom or clean-lined contemporary space can look more balanced with simpler, narrower shapes. The aim is proportion: trim should frame the room without looking lost against the walls or overly heavy around every opening.
Profile families matter as much as size. A profile family is the related set of shapes used across baseboards, casing, and any crown, perhaps square-edged and minimal, softly eased, or more layered and traditional. Repeating compatible details gives connected rooms a common visual language. For example, a simple flat-panel door often pairs naturally with restrained casing and clean baseboard profiles, while a more detailed door can carry a casing with an added backband or stepped edge. The reveal, the intentional narrow shadow line between casing and the door jamb or wall, also needs to look consistent, because uneven or changing reveals make otherwise similar openings read differently.
A strong new home trim package in Venice, FL considers flooring before baseboards are finalized. Tile, wood, carpet, and their transitions affect where trim lands, how its bottom edge reads, and whether a profile needs a clean return at a change in material. The paint plan matters, too: paint-grade trim can emphasize crisp profile lines and a unified wall-and-trim palette, while stained trim makes wood grain, color variation, and join placement more visible.
Weak planning usually shows up as unrelated choices: ornate casing beside plain modern baseboards, narrow trim that disappears in a high-ceilinged room, or an oversized profile crowding a modest hallway. Before selections are released, it helps to view the chosen baseboard, casing, door style, flooring samples, paint direction, and any crown detail together. That small comparison makes it easier to resolve proportions and transitions while changes are still straightforward.
Coordinate Baseboards, Door Casing, and Window Trim as One System
At the wall line, baseboard does more than cover the meeting point between wall and floor: it creates the continuous horizontal element that carries your eye through each room. Interior door trim establishes the vertical frame around openings, while window trim gives windows the same visual presence rather than leaving them as isolated details. These pieces should look related in weight. A taller, more substantial baseboard can support wider casing around doors and windows; a restrained baseboard generally looks better beside simpler, narrower casing. The goal is not identical profiles, but compatible edges, thicknesses, and visual scale.
Openings reveal whether that relationship was carried through carefully. Casing legs should land evenly at the floor and align from one side of a doorway to the other, with a consistent reveal around the jamb. At windows, the head casing, side pieces, and sill treatment need to read as a deliberate frame rather than a collection of separate cuts. Clean miter joints help shaped or picture-frame-style casing look crisp at corners. Where baseboards meet inside corners, a cope joint, one piece cut to fit the face of the other, can create a tighter-looking intersection than two simple angled cuts when walls are not perfectly square.
New construction baseboards in Venice, FL also need a plan for the places where a continuous run has to change direction or stop. Flooring changes may call for a clean termination or return so the baseboard does not appear abruptly cut off. Hallways and stair conditions deserve the same attention: a run should meet a skirt board, newel area, or adjacent casing in a way that looks intentional from normal viewing distance. Outside corners need tight, even miters with profiles that line up across the turn. An open corner joint, uneven casing leg, or profile that drifts at a transition remains noticeable even after paint.
Walls can introduce their own challenges. Slight bows, uneven drywall corners, and openings that are not perfectly uniform can make straight trim appear misaligned if each piece is forced into place without adjustment. Thoughtful door and window trim in Venice accounts for those conditions by preserving the visual lines that matter most: level head casing, matched reveals, aligned legs, and joints that meet cleanly. Before paint, these are the details worth viewing room by room, especially at connected hallways, repeated doors, flooring breaks, and outside corners.
Choose Crown Molding and Paint-Grade Materials for the Right Rooms
Crown molding earns its place when the ceiling-to-wall intersection needs more definition. It can give a living room, dining area, foyer, or taller primary suite a more finished transition, particularly when the home leans traditional or has layered ceiling details. In a low-ceiling bedroom, a compact hallway, or a clean-lined contemporary room, a simple wall-to-ceiling finish may look more comfortable and leave budget for more visible trim details. The useful test is whether the crown adds proportion and character, not simply whether every room can receive it.
Material selection should start with the intended finish. MDF trim is a smooth, uniform paint-grade option that suits crisp painted profiles and can make sense where a consistent, featureless painted surface is the goal. Finger-jointed pine is wood assembled from shorter joined lengths; it is also commonly chosen for painted work, but its wood grain and joint pattern call for finish expectations that match the selected product. Paint-grade trim is selected to be covered with paint, while stain-grade trim is chosen for an appearance where grain, color variation, and wood character remain visible. A painted sample board beside the selected wall color, and a stained sample beside flooring or cabinetry, makes that difference easier to judge before the package is released.
For a Florida new build, the room's exposure matters as much as the profile. Areas subject to humid air, routine steam, or possible wet use deserve a material conversation separate from dry bedrooms and living spaces, because movement and finish changes can become more noticeable at joints, seams, and caulk lines. Rather than treating MDF, finger-jointed pine, or stain-grade wood as universally best, match the product to the room, the paint or stain result, and the level of natural wood variation the design can accommodate.
Coordinate Finish Carpentry With the Builder Before Paint
A short scope meeting can prevent small trim decisions from turning into late-stage surprises. For finish carpentry in Venice, FL, that meeting should produce a trim schedule: the approved baseboard and casing profiles, material selections, rooms receiving crown, and any upgrades reserved for feature spaces such as a foyer, dining room, or primary suite. A strong schedule names locations, not just products. "Crown in main living areas" leaves room for interpretation; "crown at foyer, great room, and dining room; none in bedrooms or hall" gives the team a workable direction.

Use that conversation to walk through the details that meet the trim. Review each interior door style and whether casing changes at cased openings, pocket doors, or closets. Review finished-flooring locations as well: baseboard installation and the final visual gap can differ where tile, wood-look flooring, carpet, or transitions meet the wall. Identify any rooms where a wall treatment, fireplace surround, built-in, or taller ceiling changes the expected trim treatment, so those areas are not treated as afterthoughts.
Responsibilities should be equally plain. The builder, homeowner, finish carpenter, and paint team can decide who is handling installation, nail-hole filling, caulking, paint preparation, touch-ups, and corrections noted after review. Caulking closes small paintable gaps at trim-to-wall or trim-to-trim edges; it is different from correcting a visibly poor joint, uneven reveal, or unsuitable transition. Set the trim review at a builder-approved point after installation and before the paint process advances, with access and protection of completed finishes accounted for. That collaborative handoff makes a pre-paint trim walkthrough more focused and gives each trade a clear finish line.
Use a Pre-Paint Walkthrough to Catch Trim Corrections Early
Before primer goes on, walk the home slowly at standing height and from each doorway, the viewpoints where uneven lines and awkward joints are most noticeable after move-in. In a pre-paint trim walkthrough in Venice, compare every room with the approved trim schedule: molding shapes should match where planned, casing should sit evenly around doors and windows, and the reveal between jamb and casing should read as a deliberate, even border.

- Look along baseboard runs for open wall gaps, loose ends, abrupt profile changes, damaged faces, visible nail holes, and clean stops at flooring transitions.
- At doors and windows, inspect miter joints, aligned casing legs, consistent reveals, tight outside corners, and joints that appear stepped, split, or forced together.
- Follow crown through corners and room-to-room changes. Its lower edge and profile should continue cleanly, without distracting breaks, uneven returns, or mismatched pieces.
Not every mark belongs in the same category. Small nail holes, minor paintable gaps at the wall line, and routine caulk work are paint-prep items: they are filled or sealed to create a smooth painted finish. A wide joint, casing that reads out of line, an uneven reveal, a damaged molding face, or an outside corner that will remain visibly misaligned after paint is a finish-carpentry correction. That distinction keeps a trim punch-list from asking caulk or paint to disguise a problem that needs adjustment, replacement, or refitting.
Make each item actionable. Photograph it, name the room and location, describe the condition and requested correction, and assign the responsible trade. For example: "Primary bedroom, entry-side casing at closet door: right leg sits proud of the header; align joint before paint." A clear pre-paint trim walkthrough gives the builder, finish carpenter, and paint team one shared record and lets corrections be completed before finish paint makes them harder to evaluate.
Start With a Trim Package Review for Your Venice New Build
Bring the information that turns a general trim conversation into a workable scope: floor plans, ceiling heights, interior door selections, flooring details, paint or stain direction, and a few inspiration images that show the look you want.
For a new build trim package in Venice, the builder schedule helps place selection, installation, review, and paint-prep decisions in the right order. Existing punch-list notes are equally useful: they show whether the request is a full paint-ready package, a targeted correction list, or both.
Homeowners and builders can use an initial review to align approved selections with the home's actual rooms, transitions, and project scope. The result should be a tailored plan, not a one-size-fits-all set of moldings, and a clear path for final finish-carpentry corrections before the project moves forward.
Plan the next step
Compare the broader New Construction Trim Packages service.
Review the Venice, FL service area for local planning context.
When you are ready, request a free estimate with the rooms, trim goals, city, and available photos.
FAQs
What is included in a new construction trim package in Venice, FL?
A coordinated trim package typically includes baseboards, door and window casing, optional crown molding, and planned transition details. It should also specify profile families, materials, room locations, and paint or stain direction before installation begins.
How do I choose baseboard and casing sizes for a new build?
Match trim scale to ceiling height, room size, door style, and the home’s architectural character. Taller great rooms can support taller baseboards and wider casing, while compact or contemporary rooms generally look more balanced with simpler, narrower profiles.
What should be checked during a new construction trim punch-list walkthrough?
Check baseboard runs for gaps, damaged faces, visible nail holes, loose ends, and clean stops at flooring transitions. At doors and windows, inspect miter joints, aligned casing legs, consistent reveals, tight corners, and any joints that are split, stepped, or visibly out of line.
When should a pre-paint trim walkthrough happen?
Schedule the walkthrough after trim installation and before primer or finish paint advances. Review the home at standing height and from doorways, then document each correction with a photo, room location, requested fix, and responsible trade.
What trim material is best for paint-grade trim in a Florida new home?
MDF provides a smooth, uniform paint-grade surface for crisp painted profiles, while finger-jointed pine is also commonly used for painted trim but has visible wood grain and joint patterns. For humid, steamy, or potentially wet areas, choose materials based on room exposure because movement and finish changes can show at seams, joints, and caulk lines.