
What a Remodel Trim Package Can Include
A remodel trim package is a tailored finish-carpentry scope, not a pre-set box of materials. For remodel trim North Port FL projects, it may focus on replacing worn pieces, introducing a new profile in one renovated room, trimming out newly altered openings, or carrying one coordinated look through the home.
Baseboards cover the wall-to-floor transition; their height and shape influence whether a room feels understated or more formal. Door and window casing frames openings, while interior door trim can include the casing, header detail, and hardware-area finishing. Jamb work addresses the inside surfaces of an opening, which can need adjustment when a new door, wall finish, or opening depth changes.
Crown molding finishes the wall-to-ceiling line. Wall trim, chair rail, and panel molding add deliberate visual structure across a larger wall: chair rail creates a horizontal division, while panel molding forms framed patterns below or across it. Accent details can include simple block corners, built-up headers, or tailored transitions where trim meets cabinetry, tile, or an entry.
A kitchen package might concentrate on baseboards, pantry casing, and trim transitions around cabinets; a bathroom scope may address a new door opening and wall details; a full-home plan can align baseboards, casing, and interior doors from room to room. Materials, labor, finishing, inclusions, scheduling, and pricing should be defined around the actual rooms, wall conditions, and remodel sequence rather than assumed from a standard package.
Deciding What to Replace, Match, or Upgrade
The best starting point is a room-by-room condition and sightline review: which pieces are sound, which ones no longer fit the remodel, and which adjacent areas will remain visible from the updated space.

Retaining trim can make sense when it is straight, firmly attached, free of moisture damage, and proportionate to the doors and room. Matching that existing profile is often the cleanest route for a bedroom refresh or a single bathroom update that opens onto an unchanged hall. A matching approach carries the same casing width, baseboard height, edge shape, and paint appearance into the altered area so the new work does not read as a patch.
Trim replacement in North Port, FL becomes more persuasive when boards are swollen from water exposure, repeatedly painted to the point that crisp edges have disappeared, separated by persistent gaps, or pieced together with repairs that do not share the surrounding profile. New flooring can also expose a short baseboard edge or leave an awkward transition at the wall, while a widened, relocated, or newly installed door opening often calls for new jamb and casing work.
An upgrade takes a different path: rather than copying what is there, it deliberately establishes a new profile direction. This is usually stronger across connected rooms, such as an entry, living area, kitchen, and hall, where old narrow casing beside taller new baseboards would be easy to compare. Coordinating the visible area lets the scale of the casing, baseboards, interior doors, and nearby cabinet details feel chosen together.
Partial updates tend to look weak when one opening has broad, squared casing beside thin decorative trim, or when bright new semi-gloss trim meets older, duller painted boards nearby. During interior trim installation in North Port, FL, looking at samples against the retained doors, floors, and wall paint helps distinguish a convincing match from a contrast that deserves a more complete profile change.
Choosing Trim Profiles for the Home and Room
Profile choice becomes the next visible decision once the rooms that will change are clear. Square-edge, often craftsman-style, boards have a flat face and crisp 90-degree lines, so they give baseboards and casing a plain, framed appearance. They work well with slab or flat-panel doors and simple cabinet fronts. Eased-edge boards use a small rounded edge instead, softening the corner without adding a decorative pattern; that makes them a useful middle ground for rooms that need more warmth than sharp square stock provides.
Layering changes both scale and shadow. A stepped baseboard combines a taller flat board with a smaller cap or upper step, creating a horizontal reveal that carries more visual weight than one flat board. Colonial-style casing has routed curves or beads along its face, making a doorway more decorative. Detailed crown molding similarly stacks contours at the ceiling line, while picture-frame molding and board-and-batten divide a wall into deliberate panels. These options are not interchangeable: a baseboard frames the floor line, casing outlines an opening, crown emphasizes the ceiling, and wall trim turns a broad wall surface into a feature.
Modern rooms often lean toward flat square-edge stock; transitional spaces can pair simple boards with one restrained step; traditional rooms may suit colonial casing and layered crown; and a coastal-inspired direction often uses clean painted profiles with lighter visual weight. The strongest fit comes from the details already in view. Flat-panel kitchen cabinets and plain interior doors usually read more cohesively beside restrained casing than beside heavily ornamented profiles. Conversely, retained raised-panel doors, curved arch details, or existing decorative millwork can support a more shaped profile family.
Scale should follow the room rather than a single showroom sample. A taller ceiling or substantial doorway can carry wider casing, a taller baseboard, or crown with multiple contours; ornate crown in a low-ceiling bedroom can make the ceiling line feel crowded. Very short baseboards beside tall doors can look undersized, while three unrelated casing, baseboard, and crown profiles can compete across an open kitchen, entry, and living area. For finish carpentry North Port FL projects, placing sample lengths beside a door opening, cabinet run, and adjoining-room transition makes those proportion and sightline differences easier to judge before one profile family is selected.
Materials and Finishes for Living Areas, Kitchens, and Bathrooms
Material choice changes how a selected profile performs at its most visible points: the face, routed edge, miter, and cut end. Paint-grade poplar or finger-jointed wood can be filled, primed, and painted, while MDF has no grain pattern and provides an especially smooth painted face for baseboards, casing, and crown. MDF's cut edges need thorough sealing before paint, and wood may need knot blocking or grain preparation. In either material, nail holes, miter seams, dents, and wall-side gaps need filler, caulk, sanding, and touch-up so light does not catch a broken finish line.

Stain-grade wood is selected when the board itself is part of the design. Its grain direction, color variation, end grain at cuts, and nail-hole placement remain visible under stain and clear finish, unlike opaque painted trim. It can carry the character of wood interior doors, built-ins, flooring, or cabinetry, but species and stain samples should be viewed together: a pale, straight-grain casing can look disconnected beside heavily figured doors, and a warm red-brown floor can clash with a cool gray-brown trim stain. Repairs also differ; a filled spot can disappear under paint but may remain apparent in stained woodwork.
Bathrooms, laundry rooms, and kitchen-adjacent spaces need a material-and-finish decision tied to the exact exposure rather than a one-material rule for trim packages North Port FL homeowners consider. Baseboard near a vanity, dishwasher, laundry connection, or wet-floor transition is more vulnerable at its bottom edge and joints than crown molding across the room. A stronger detail uses suitable stock for that location, sealed cut ends, tightly closed miters, flexible paintable caulk at the wall edge, and a continuous primer-and-paint system. An unsealed raw cut, open joint, or failed caulk line gives moisture and routine cleaning a direct path into the trim detail.
For bathroom trim replacement North Port FL projects, painted casing and baseboards can connect a painted vanity, tile, and wall color without adding another competing wood tone. In a living room, stained casing may preserve the character of retained wood doors or window trim, while painted baseboards create a quieter boundary at the floor. Painted trim favors consistent color across new and existing components; stained trim favors visible grain and requires more deliberate board selection, cut placement, and finish matching. Product suitability depends on the location, exposure, finish system, and project details.
Room-by-Room Trim Upgrades During a Remodel
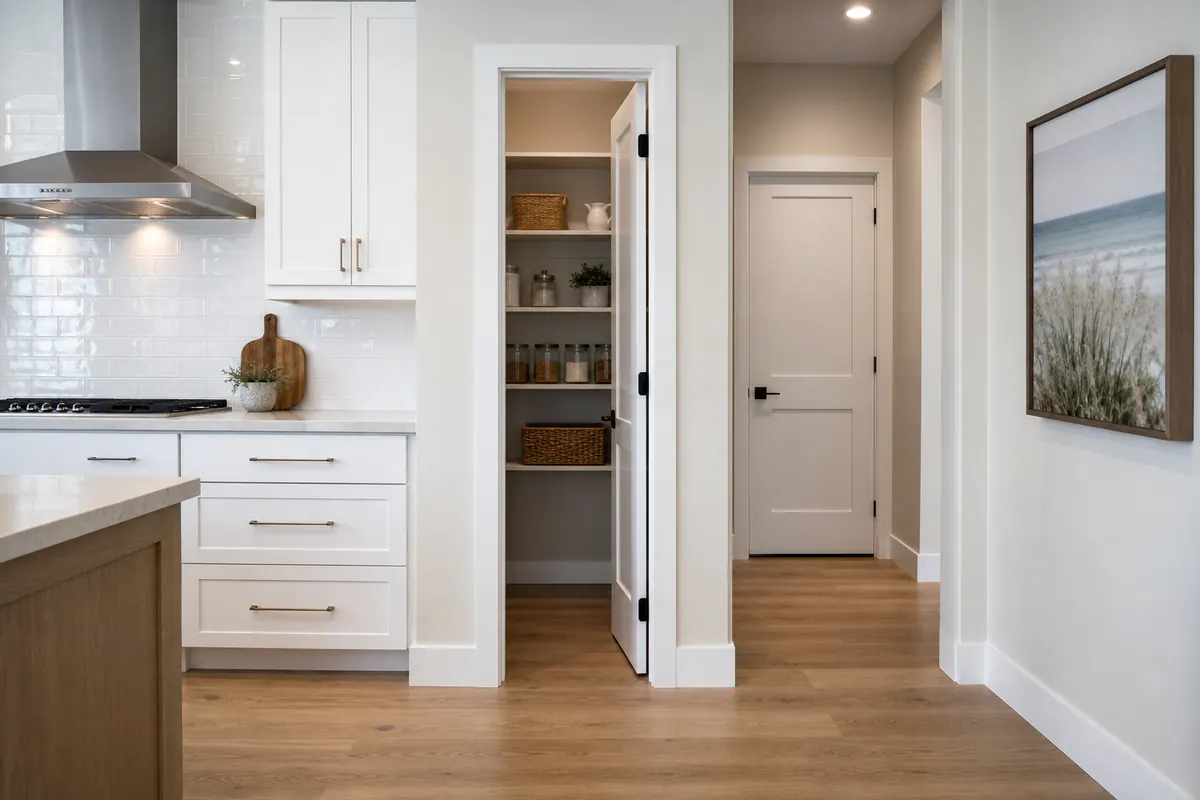
Each remodeled room has its own trim intersections, even when the home follows one overall profile direction. In a kitchen, baseboards need a deliberate stopping point at cabinet ends, islands, and appliance openings so they do not compete with the cabinet toe kick, the recessed space beneath lower cabinets. Pantry and nearby passage openings are natural places for casing that matches the home's interior doors, while the baseboard height should feel intentional beside the finished flooring rather than squeezed into a narrow leftover strip.
Bathrooms benefit from careful transitions more than extra ornament. Moisture-aware baseboards and well-finished casing can frame the room cleanly, but the important details are where tile meets painted wall, where flooring changes at the doorway, and where casing meets a tiled jamb or shower-adjacent wall. A neat, planned termination looks stronger than forcing one continuous piece of trim through a tile edge or an uneven wall condition.
Bedrooms and offices usually establish the everyday trim language: baseboards along open walls, casing around doors, and window casing where the window treatment will leave it visible. Optional wall trim, such as a simple picture-frame molding layout, can give an office a more tailored backdrop or add quiet character to a bedroom. It should be sized around furniture placement, outlets, windows, and ceiling height; thin panels crowded onto short walls tend to read as visual clutter instead of architecture.
Entries and living spaces can carry the more expressive details in a remodel trim package. Wider casing gives a main opening more presence, while crown molding defines the ceiling perimeter. Panel molding, chair rail, and shiplap-style accent walls each create a different effect: panel molding adds shallow, formal geometry; chair rail divides the wall horizontally; shiplap-style boards create linear texture. Using one or two of these moves at an appropriate scale helps public spaces feel finished without making every room compete for attention.
Coordinating Trim With Flooring, Cabinets, Doors, and Paint
The order of work is what keeps new trim from looking added on after the fact. Drywall repairs should be complete before casing and baseboards are fitted, while the finished flooring height determines where baseboards land and whether door casings need to be trimmed or jambs adjusted. Cabinets are typically set before nearby baseboard terminations are finalized, and countertop installation can establish the finished edge conditions around backsplashes, pantry openings, and adjacent wall details.
Interior doors deserve the same coordination. Hanging doors and setting jambs first gives casing a stable perimeter and helps maintain a consistent reveal, the narrow, even strip of jamb left visible beside the casing. This is a strong visual checkpoint: reveals should look uniform from one side of an opening to the other, miters should close cleanly at casing corners, and baseboards should meet inside corners with coped joints or be scribed to follow an uneven wall when needed. Remodel finish carpentry in North Port is often scheduled after the dusty work but before final paint touchups, though the exact sequence changes with the flooring, cabinet, and paint systems selected.
Quality is especially visible in the finishing pass. Trim should be securely attached, joints filled where appropriate, nail holes treated with wood filler, and small paintable wall-to-trim gaps neatly caulked before sanding and coating. Caulk softens a minor paint-grade seam; it should not be used to disguise a poor fit, open miter, or major wall irregularity. Planning this handoff between painters, flooring installers, cabinet crews, and finish carpenters helps trim replacement North Port FL projects achieve clean transitions rather than last-minute patches.
Permit scope should be addressed as part of the larger remodel plan. A cosmetic interior trim scope can be evaluated differently from work that also changes layout, structure, electrical wiring, plumbing, or door openings, so the requirements for the specific North Port project should be established before related work begins.
Planning a Cohesive North Port Remodel Trim Scope
Start the plan with a simple room map: list the kitchen, baths, bedrooms, office, entry, and any connecting hall where old and new work will meet. Mark each area as retain, replace, or upgrade. Retain trim that still supports the intended look; replace pieces that would make the renovated room feel mismatched; upgrade where a wider or more detailed profile is part of the design direction.
Then make the linked choices together. A simple painted profile can connect new doors, cabinets, flooring, and wall color with a calm, consistent edge. Stain-grade trim makes wood grain a visible feature, so it needs to relate convincingly to nearby doors or wood finishes. In bathrooms and other moisture-prone spaces, include the trim material and finish approach in the room plan rather than treating it as an afterthought.
Room-by-room trim packages North Port FL homeowners choose can make sense for a focused remodel, but record the baseboard height, casing width, profile shape, paint color or stain sample, and every stopping or transition point. That reference keeps a later bedroom or hall update from becoming an awkward near-match. A whole-home scope offers immediate consistency; phased work preserves a roadmap toward it. Discuss the rooms, retained materials, sightlines, and desired level of detail with a qualified remodel finish-carpentry provider before finalizing the scope.
Plan the next step
Compare the broader Remodel Trim Packages service.
Review the North Port, FL service area for local planning context.
When you are ready, request a free estimate with the rooms, trim goals, city, and available photos.
FAQs
What is included in a remodel trim package in North Port, FL?
A remodel trim package can include baseboards, door and window casing, jamb adjustments, interior door trim, crown molding, chair rail, panel molding, and custom transitions near cabinets, tile, or entries. The exact scope is tailored to the rooms, wall conditions, remodel sequence, materials, finishing needs, and desired profile.
Can new door casing and baseboards be matched to existing trim?
Yes, new trim can be matched by carrying over the existing casing width, baseboard height, edge shape, and paint appearance. Matching works best when retained trim is straight, firmly attached, free of moisture damage, and proportionate to the doors and room.
What trim profile works best for a modern home remodel?
Modern remodels typically use flat, square-edge trim with crisp 90-degree lines, especially alongside slab or flat-panel doors and simple cabinet fronts. Use wider casing or taller baseboards only where ceiling height and doorway scale can support them without making the room feel crowded.
What trim materials work best in Florida bathrooms and humid areas?
Paint-grade poplar, finger-jointed wood, or MDF can work when the material suits the location and all cut edges, miters, and joints are sealed. In bathrooms, laundry rooms, and kitchen-adjacent areas, baseboards near vanities, dishwashers, and wet-floor transitions need sealed cut ends, paintable caulk, primer, and a continuous paint system.
Should trim be installed before or after new flooring and cabinets?
Drywall repairs should be complete before baseboards and casing are installed, while finished flooring height determines where baseboards land and whether jambs or casings need adjustment. Cabinets should be set before nearby baseboard stopping points are finalized, and doors and jambs should be installed before casing so reveals remain even.