

What a Remodel Trim Package Includes for a Sarasota Home
Start by deciding which details must carry from one renovated room into the next: the baseboard height, casing width, reveal at doors and windows, and paint finish. A trim package turns those decisions into one defined scope rather than leaving each molding or opening to be handled separately.
For remodel trim Sarasota FL projects, the core scope often includes removal and disposal of outdated trim; new baseboards; door and window casings; and, where the design calls for it, crown molding, wall panel details, shoe molding, or quarter round. Baseboards finish the wall-to-floor transition. Shoe molding and quarter round are smaller pieces that cover a narrow gap at that transition, while casings create the finished border around openings. Crown molding finishes the wall-to-ceiling line and can change how formal or scaled a room feels.
- Specify what is included by room: linear trim, openings, accent walls, demolition, and installation.
- Identify separately priced work early, such as substantial wall repair after removal, specialty built-up details, or custom-milled pieces.
- Coordinate paint-ready prep: fastening, filling, sanding, caulking, and a clear handoff for priming and finish paint.
A package approach prevents pieced-together results. For example, a tall new baseboard beside retained narrow door casing can make an opening look undersized; mismatched casing reveals or paint sheens can do the same. Room count, ceiling heights, opening sizes, flooring changes, and the condition of retained trim help define the scope for trim packages Sarasota FL before installation begins.
It also gives flooring, drywall, door, cabinet, and painting work a shared finish-work plan, so the final details support one another instead of competing.
Assessing Existing Trim and Removing Outdated Material
Before a single piece comes off, the existing trim needs a close room-by-room read. Measurements capture the face width, thickness, edge shape, and how far casing projects beyond a door or window jamb. Jamb depth matters because a new casing must meet the opening cleanly; a deeper wall finish or a changed door can alter that relationship. Damage, heavy paint buildup, separated joints, and prior patchwork also help determine whether a section is worth retaining or whether connected pieces should be replaced together.
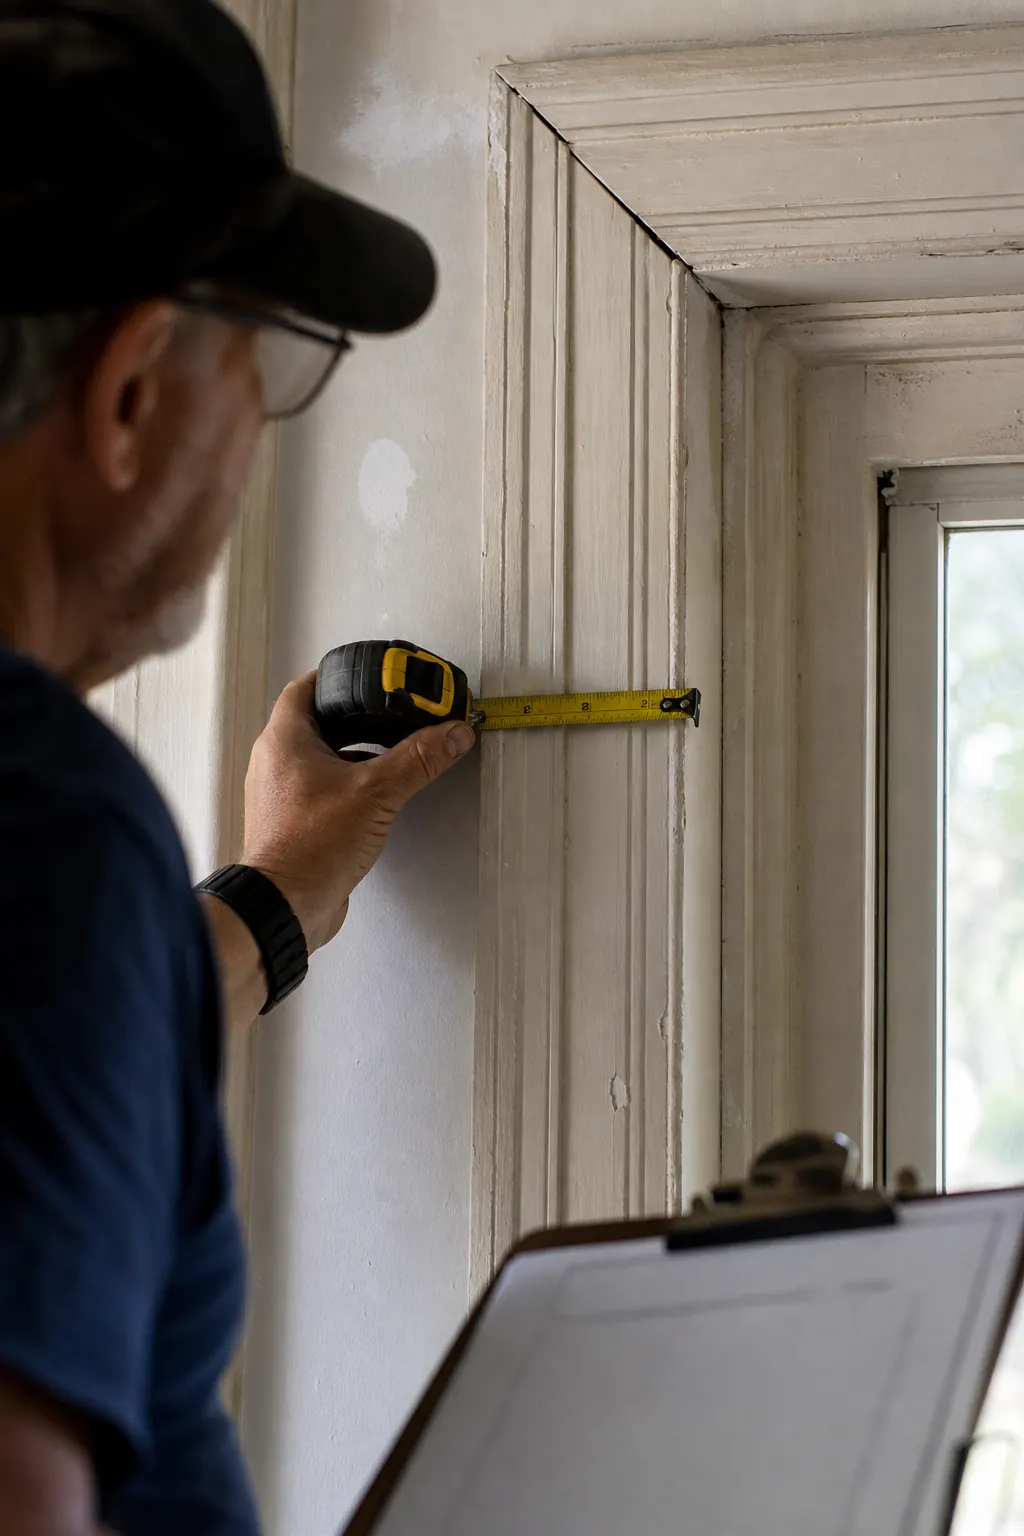
Trim replacement in Sarasota, FL often reveals more than the visible molding. Fragile drywall paper, plaster-like wall texture, layered paint, construction adhesive, and old repairs can all make a previously simple wall line uneven once the trim is gone. Homeowners should allow for concealed gaps, nail or screw holes, paint ridges, and small areas of damaged wall surface rather than expecting demolition to leave a paint-ready edge.
- Paint lines are scored first to separate the trim from the wall finish as cleanly as practical.
- Broad pry protection spreads pressure across the wall while trim is eased away instead of pulled abruptly.
- Remaining fasteners are removed or set, then damaged paper, holes, and irregular surfaces are patched and smoothed before replacement pieces are fitted.
A lone retained baseboard can be a weak choice when its profile, paint buildup, or height differs noticeably from adjacent replacement trim. The same applies when one original casing meets new casing at a corner or opening and exposes mismatched edges. For baseboard replacement Sarasota homeowners can keep sound, visually compatible areas, but replacing the connected run is often the cleaner design decision when transitions would otherwise call attention to themselves.
Selecting Profiles, Scale, and Materials for Replacement Trim
Scale is what keeps new trim from looking pasted onto the room. Lower ceilings usually suit a restrained crown profile, or no crown at all, while taller, more formal rooms can carry a deeper crown or a built-up detail. Baseboard height should relate to the wall area and nearby door casings: a simple, moderately tall base with clean square-edge casing reads contemporary, whereas a layered base and stepped casing can support a more traditional interior.
Profile samples make this decision tangible. Set baseboard, casing, and crown samples together against the actual wall color, texture, doors, and flooring. A wide casing needs enough flat wall beside the jamb to show its face cleanly; on a tight opening, it can crowd the corner or leave an awkwardly narrow strip of wall. Likewise, ornate crown in a low-ceiling room or a very tall baseboard paired with narrow, plain casing can make the details feel out of proportion.
- For a clean-lined update: square-edge or lightly eased baseboards, flat-stock-style casing, and minimal crown create a compatible set with fewer visual transitions.
- For a traditional room: a shaped base profile, wider casing with a backband or layered edge, and proportionate crown can create a more finished hierarchy without making every wall overly decorative.
- For an accent: chair rail, picture-frame molding, or a paneled wall works best when it has a clear purpose and aligns with doors, windows, or furniture zones rather than stopping arbitrarily on the wall.
Material choice affects both the profile options and the maintenance plan. Primed MDF offers a smooth, paint-ready face and is often practical for crisp, consistent painted profiles and long interior runs. Paint-grade wood can be a useful choice where a piece needs greater resistance to everyday knocks, where a detailed profile is desired, or where the installation calls for more adaptable fitting. Neither option is automatically right throughout a home: interior moisture exposure, impact-prone locations, unsealed cuts, and the intended paint finish all affect the selection.
For interior trim installation Sarasota homeowners can narrow the package by choosing the visual direction first, then reviewing samples at full size in each room. That prevents crown molding installation Sarasota projects from becoming an isolated upgrade that conflicts with the baseboards and casings below it.
Matching Existing Casings, Baseboards, and Architectural Details
The decision is not simply whether the new molding looks similar. It is whether the retained and replacement pieces will read as one continuous detail at doorways, corners, and room transitions. A true profile reproduction follows the existing shape closely; a close visual match preserves the overall width and character but may differ in small contours; a coordinated update intentionally changes the trim system and uses a planned break between old and new.
For door casing replacement Sarasota projects, a field sample is more useful than a quick photo. A tracing captures the curved or stepped face of the molding, while measurements record face width, thickness, backband, and reveal, the exposed strip of jamb between the casing and the opening. Those details determine whether new casing lands in the same place and carries the same visual weight as the original. Window trim replacement Sarasota work follows the same logic, especially where sill, apron, and casing pieces meet.
Paint can make two otherwise similar pieces look noticeably different. Compare physical samples beside the retained trim, including sheen and undertone: a fresh bright-white satin can stand apart from an older warm-white semi-gloss even when the profile is close. Heavy paint layers can soften sharp edges, while age, wood movement, chips, repairs, and a switch from wood to MDF can keep an apparent match from becoming an exact one.
Stock profiles are often the straightforward route when the needed shape is currently available. When a distinctive profile is unavailable, custom trim carpentry Sarasota homeowners may consider custom milling: reproducing a shape from a sample. That route can make sense for a visible retained feature or a limited transition, but it adds scope and may not erase differences caused by old paint or worn material. In other rooms, a deliberate update, such as replacing all connected casing around an opening, usually creates a cleaner result than forcing near-matching pieces together.
Coordinating Trim Installation With Floors, Drywall, Doors, Cabinets, and Other Trades
Sequencing is where a well-chosen trim plan either comes together cleanly or starts accumulating visible compromises. Confirm the finished floor elevation before baseboards go on: tile, hardwood, engineered flooring, underlayment, and transitions can all change the height at the wall. Installing baseboards too early can leave an unwanted gap or force an awkward trim adjustment later. Shoe molding or quarter round is a small flexible-looking piece at the baseboard's bottom edge; it can cover a modest floor-to-wall gap, but it should not be treated as a fix for an unfinished flooring decision.
Door casings belong after the door unit, jamb extensions, and any window-jamb work are settled. A jamb extension brings a recessed jamb flush with the finished wall plane; until it is resolved, the casing has no reliable surface to meet. Drywall patches, corner repairs, and final wall texture should also be complete before Sarasota remodel trim installation. Otherwise, new work may have to be removed or heavily caulked to accommodate a wall correction that should have happened first.
- Before trim: complete demolition, correct framing or wall problems, finish drywall repairs and texture, set doors and windows, and establish final floor heights.
- Before final fitting at a feature wall: set cabinets, countertops, tile edges, and built-ins that meet or interrupt the trim. Their finished faces determine where baseboards stop, return, or die into a panel.
- After trim: the painter handles the final surface work and touch-ups after other trades have finished their potentially damaging work nearby.
Field fitting keeps joints from advertising uneven conditions. A miter joint joins two angled cuts, commonly at an outside corner. A coped joint shapes one baseboard end to fit over the face of the adjoining piece, which can keep an inside corner tighter when walls are not perfectly square. Scribing means trimming an edge to follow a bowed wall or uneven floor; shims can bring a piece into a consistent plane where the wall dips. Forcing a straight board against a crooked surface may create open joints, waviness, or excessive caulk lines instead of a crisp result.
Clear handoffs matter: the flooring installer establishes the finished floor, the cabinet installer sets the fixed components, the drywall trade leaves sound wall surfaces, and the finish carpenter fits the visible transitions around them. That coordination lets trim serve as a precise finish detail rather than a cover for work that remains unresolved.
Paint-Ready Trim Finishing: Caulking, Filling, Sanding, and Final Review
The last details are what make separate boards read as one painted trim system. Fasteners should sit below the face of the molding, with their holes filled and sanded smooth; corners and scarf joints should be refined so they do not telegraph through the finish. Cut ends, especially where raw material is exposed, may need spot sealing or priming before paint so the final sheen stays even.
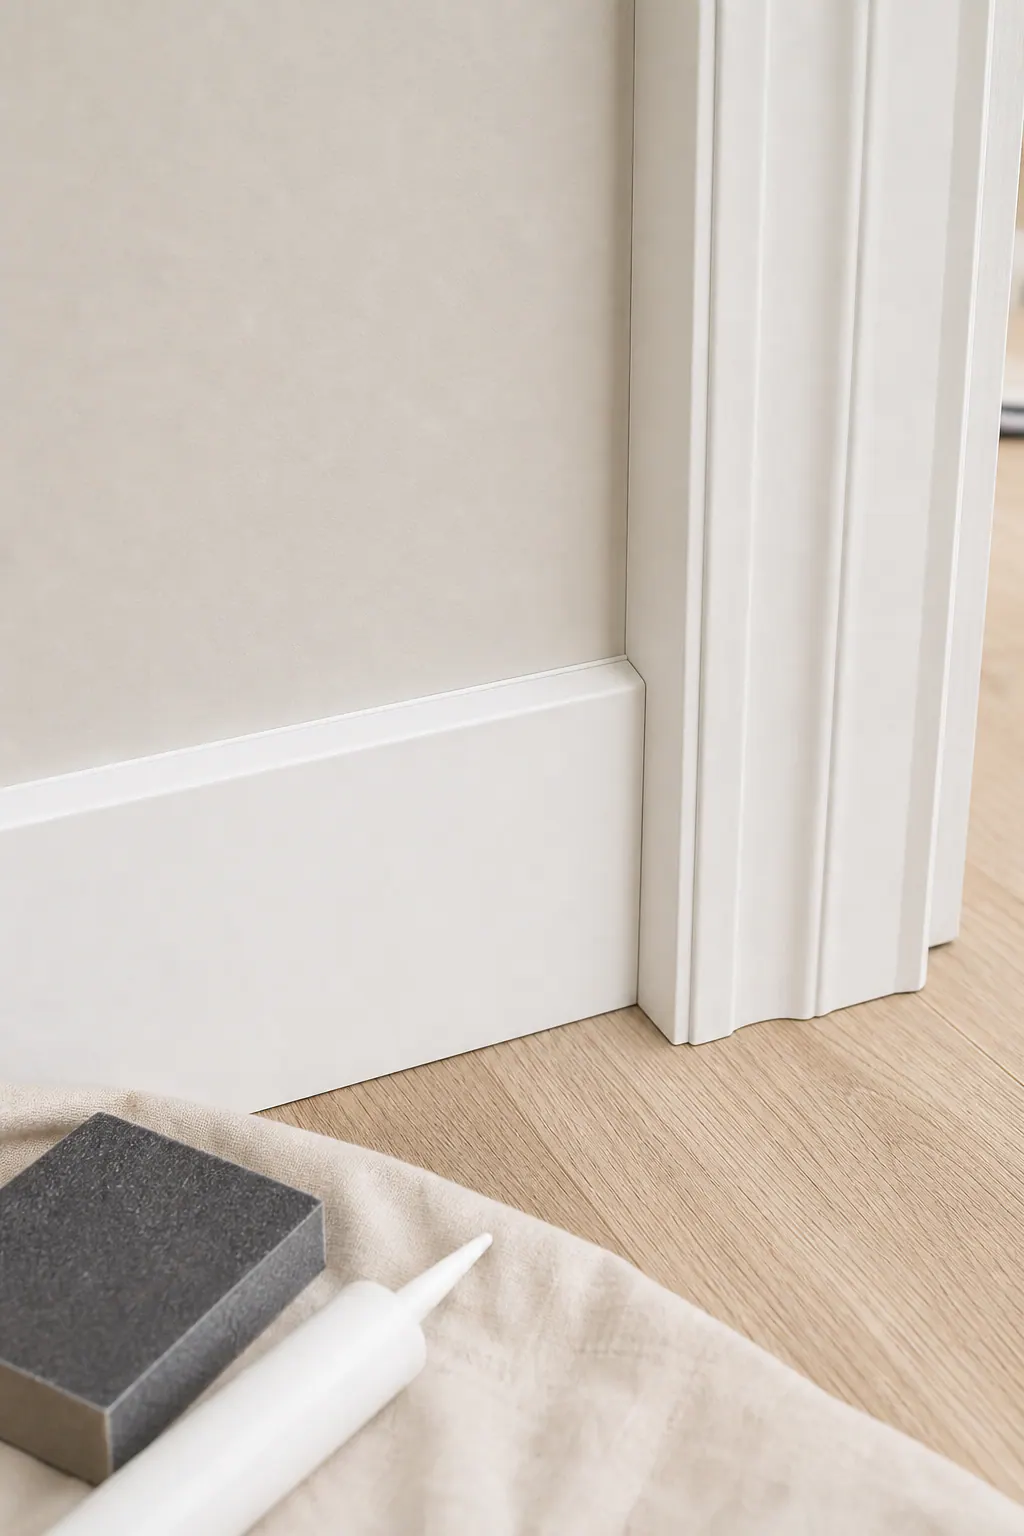
Caulk has a narrow but important job. A thin, paintable gap between trim and a slightly irregular wall can be caulked to create a clean edge. An open miter, separated casing joint, bowed board, or noticeably uneven reveal is different: those are fitting issues that should be corrected mechanically, not buried under a wide bead of caulk. Good finish work preserves intentional shadow lines at panel details and transitions rather than filling every recess until the profile loses definition.
- Look across the surface: no proud fasteners, rough filler, dents, chipped edges, or sanding scratches should remain visible.
- Inspect joints and reveals: casing legs, baseboard runs, corners, and returns should appear consistently aligned before paint makes them more noticeable.
- Review exposed cuts: raw or fuzzy cut ends should be addressed before the finish coats go on.
For remodel finish carpentry Sarasota projects, the written scope should identify who handles caulking, spot priming, sanding between coats, and final paint touch-ups. The finish carpenter may deliver a paint-ready installation, while the painter completes preparation and coating, or the responsibilities may be shared. Defining that handoff before painting gives homeowners a useful final-review point and avoids assuming that an unfinished detail belongs to the other trade.
Planning a Sarasota Remodel Trim Package With Fewer Surprises
Before scheduling installation, turn the rooms into a field list: note each door, window, closet opening, baseboard run, and transition into an unremodeled area. Photograph any casing, crown, return, or panel detail that will stay, ideally with a tape measure showing its face width and profile depth. That record helps distinguish a stock-profile replacement from custom milling, which reproduces a distinctive retained shape.
- Set one visual standard: choose the baseboard and casing profiles, material, paint color, and sheen as a group. For example, a new square-edge casing beside an ornate retained casing signals an intentional update only when the transition is planned.
- Set installation conditions: record the finished floor height at each room, whether doors and cabinets are installed, where drywall patches are expected, and whether the carpenter or painter handles final prep and coating.
- Set scope boundaries: separate removal and disposal, material supply, installation, wall repair, paint-ready finishing, painting, and custom milling in the estimate. An allowance identifies work that may be needed after trim removal, such as patching damaged wall areas or producing a nonstock profile.
Use before-and-after review points to compare profile consistency, door and floor transitions, and the completed painted edge. For trim packages Sarasota FL homeowners, this level of planning brings trim replacement, architectural continuity, and trade handoffs into one finish-work plan instead of a chain of last-minute decisions.
Plan the next step
Compare the broader Remodel Trim Packages service.
Review the Sarasota, FL service area for local planning context.
When you are ready, request a free estimate with the rooms, trim goals, city, and available photos.
FAQs
What is included in a remodel trim package in Sarasota, FL?
A remodel trim package commonly includes removal and disposal of old trim, new baseboards, door and window casings, and installation. Depending on the design, it can also include crown molding, wall panels, shoe molding, or quarter round, plus paint-ready filling, sanding, and caulking.
How is old trim removed without damaging drywall?
Paint lines are scored first, then broad pry protection is used to spread pressure across the wall while trim is eased away. Remaining fasteners are removed or set, and damaged drywall paper, holes, paint ridges, and uneven areas are patched before new trim is fitted.
Should trim be installed before or after new flooring?
Baseboards should be installed after the finished floor elevation is confirmed because tile, hardwood, engineered flooring, underlayment, and transitions affect the wall-to-floor height. Shoe molding or quarter round can cover a modest gap, but it should not compensate for an unresolved flooring height.
Can new baseboards and door casings match existing trim?
New trim can be matched through a true profile reproduction, a close visual match, or a planned transition to an updated trim system. Accurate matching requires a field sample or tracing, plus measurements for face width, thickness, backband, and jamb reveal.
Is MDF or wood better for interior remodel trim in Florida?
Primed MDF provides a smooth, consistent paint-ready surface for long interior runs and crisp painted profiles. Paint-grade wood is better suited to impact-prone locations, detailed profiles, or areas requiring more adaptable fitting, while moisture exposure and unsealed cuts should be considered for either material.