

Coordinated Trim Packages for Venice, FL Remodels
A coordinated trim package treats finish carpentry as part of the remodel plan, not a last-minute way to cover gaps. It brings baseboards, door and window casing, flooring transitions, molding details, and paint lines into one visual system.
For a kitchen opening into a living area, matching casing widths and baseboard height can carry the eye from new cabinets to the existing room. In a bathroom, clean trim around a replaced door, new drywall, and changed flooring height helps the finished space look intentional. Bedrooms and entries benefit from the same approach: the trim establishes a consistent edge where walls, openings, and floors meet.
Baseboards protect and finish the wall-to-floor joint; casing frames doors and windows; transition pieces resolve a change between flooring surfaces or heights; and crown or decorative wall molding adds definition at ceilings or across wall areas. Paint preparation ties those pieces together by making joints, nail fills, and caulked edges read as one finished detail rather than separate installations.
Strong remodel trim Venice FL planning starts while drywall, doors, cabinets, and flooring are still being coordinated. A good signal is knowing the final floor height before setting baseboard details. A weak signal is selecting new molding after cabinets, flooring, and paint are complete, when mismatched profiles or awkward gaps may be harder to resolve. The right trim packages in Venice, FL reflect the rooms being remodeled and the details worth carrying through the rest of the home.
What a Remodel Trim Package Can Include
A useful trim scope separates the pieces needed to close out altered surfaces from the details chosen to add character. The essentials usually include baseboards along remodeled wall runs, door casing around new or reset doors, window casing where windows are being reframed or replaced, and transition-related finishing pieces at changes in flooring, thresholds, stair edges, or cabinet-to-floor conditions.
- Baseboards create a finished lower edge at the wall. Shoe molding or quarter round is a smaller piece set at the baseboard's bottom edge; it can help follow minor floor variation without changing the main baseboard profile.
- Door and window casing establishes a consistent border around openings. Keeping its width and profile aligned across a connected kitchen, hallway, or living room is often more noticeable than adding extra ornament.
- Crown molding finishes the wall-to-ceiling line, while wall trim adds intentional division across a wall. Chair rail sits at a horizontal break; wainscoting covers or frames the lower wall area; and panel molding creates applied rectangular or geometric wall patterns.
Those wall and ceiling treatments are architectural upgrades, not automatic requirements. A simple package, one baseboard profile, clean casing, and necessary floor transitions, often suits low ceilings, contemporary cabinets, small baths, or a remodel limited to one room. A mid-level package may add crown in primary living spaces, while a more detailed package can pair wainscoting or panel molding with a traditional entry, dining room, or formal living area.
For interior trim installation in Venice, FL, the strongest scope identifies each component by room rather than assuming every molding belongs everywhere. Layered decorative molding can make sense when it echoes existing details and has enough uninterrupted wall area to read clearly. It can feel crowded when placed beside busy tile, heavily styled cabinetry, short ceilings, or narrow passages. Clear room-by-room choices keep trim packages Venice FL focused on the finish the remodel actually needs.
Selecting Profiles, Materials, and Details That Fit the Remodel
The profile should look at home beside the features that will remain, not in isolation. Hold profile boards against existing doors, cabinet faces, flooring samples, and window trim. A clean square or lightly eased-edge profile keeps attention on flat-panel doors and streamlined cabinetry, making it a natural fit for contemporary or relaxed coastal rooms. Stepped, colonial, or built-up profiles introduce shadow lines and more visual formality; they tend to suit traditional doors, taller ceilings, and interiors that already have layered architectural detail.
Scale matters as much as style. A narrow casing may feel appropriate in a small bath or bedroom, while a broader casing can give an entry or open living area more presence. When several connected rooms are being remodeled, repeat the same casing family and baseboard relationship so the home reads as one update. For a single-room project, the key question is whether the new profile should quietly blend with adjacent spaces or deliberately establish a new room-specific look.
- Paint-grade wood and MDF trim support an opaque painted finish. They allow the profile, joint work, and paint color to carry the design rather than visible grain; the choice can hinge on the selected profile, desired finish quality, and the conditions in each room.
- Stain-grade wood is appropriate when visible grain is part of the design. Its species, color variation, and relationship to wood doors, beams, or cabinetry should be considered together, because a close stain match is not the same as a matching profile.
- PVC or another moisture-conscious option can be considered for selected bathroom trim locations. Exposure near showers, tubs, and wet-floor areas, ventilation, and the intended paint system all affect that decision.
For remodel finish carpentry Venice homeowners can evaluate confidently, compare full-length samples under the room's lighting rather than choosing from a small catalog image. A strong choice repeats a few deliberate lines, from door rails to cabinet edges, without copying every detail. A weak one mixes ornate casing, minimal cabinets, and unrelated baseboards simply because each piece looked appealing on its own.
When to Match Existing Trim and When Replacement Makes More Sense
An older room can reveal its history at every opening: a discontinued profile, layers of paint, a sun-faded stain, or a previous repair that changed the trim's shape. Before choosing a direction, compare the existing pieces side by side for face width, thickness, edge detail, material, paint buildup, and overall condition. Matching is most realistic when the remaining trim is sound, its profile can be reproduced or sourced closely, and the adjacent doors and windows have not been substantially altered.
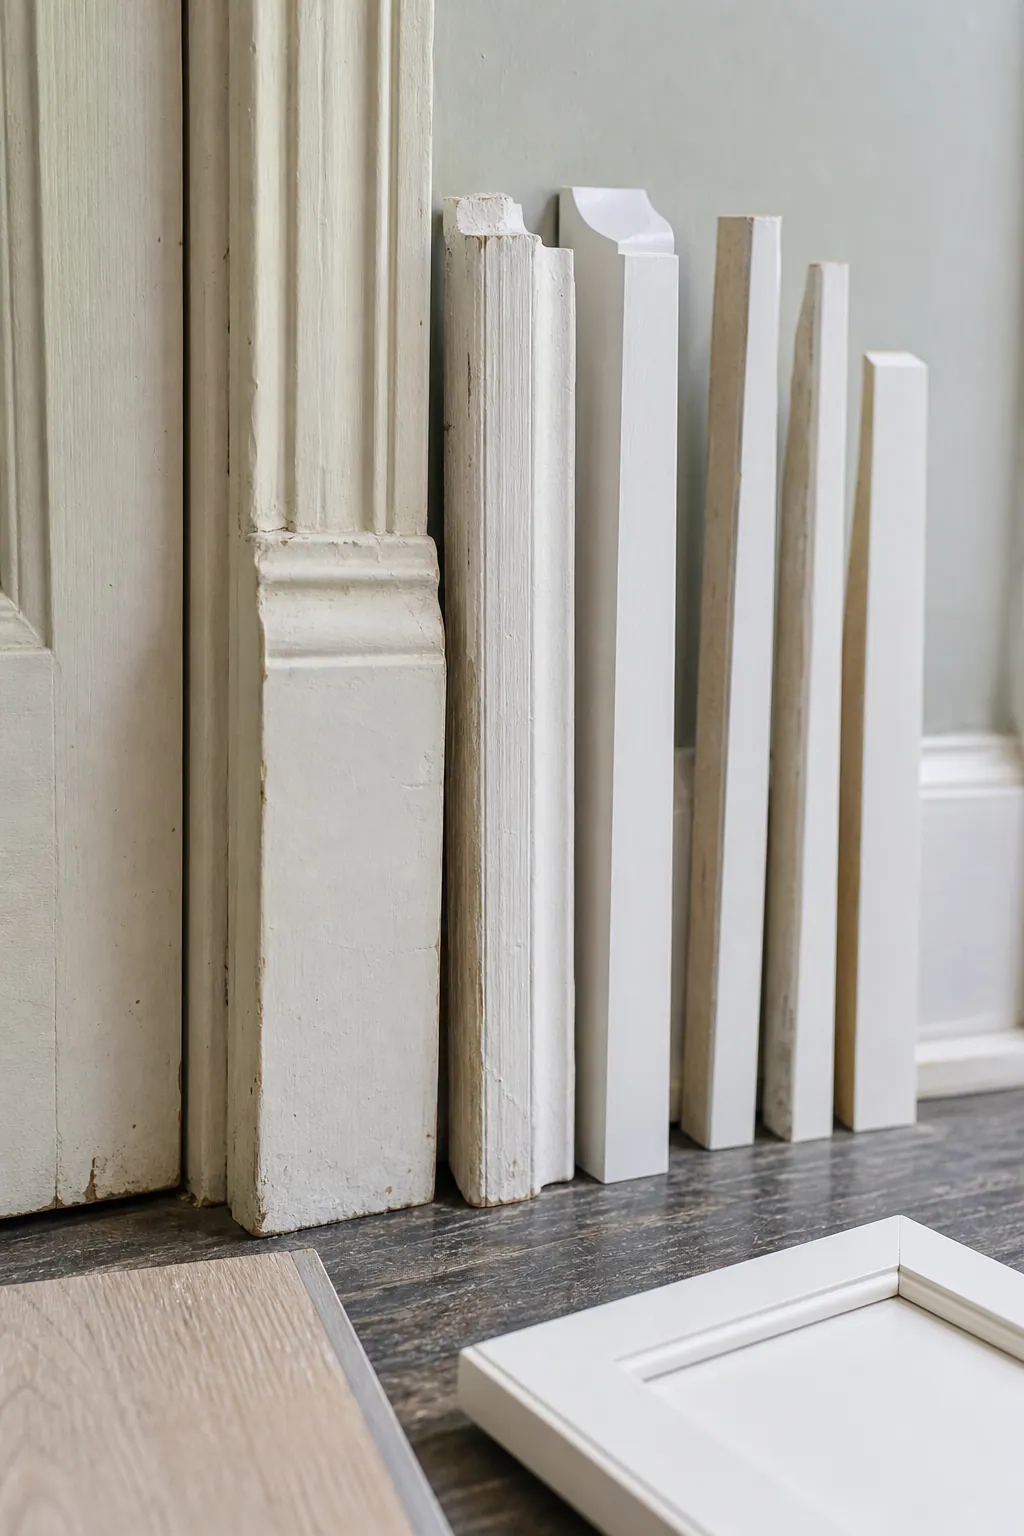
Repair or selective replication can preserve continuity in a limited remodel. For example, retaining an existing door casing may make sense when only one wall is opened and the casing can remain in place without exposing damaged edges or uneven wall surfaces. A close profile match can blend well after consistent preparation and painting, but it should not be presented as an invisible match when the older finish has aged differently or prior patches remain visible.
- Retain and patch when damage is isolated and the existing pieces still establish the look worth carrying into the remodeled area.
- Blend new with old when a near-match can be confined to a small run, with paint creating a more unified appearance than stain would.
- Replace the affected room or connected area when repeated repairs, heavy paint buildup, removal damage, altered openings, or mismatched dimensions would leave the finished work looking pieced together.
Whole-home replacement is not the only clean solution. A doorway, cased opening, or hall entrance can serve as a deliberate transition point: the remodeled side receives one consistent trim family, while the older side remains intact. This works best when the change is intentional and contained rather than stopping new baseboard or casing arbitrarily along a continuous wall. For trim replacement Venice FL projects, defining that boundary before demolition helps prevent a partial update from becoming an awkward patchwork.
Plan Trim Installation Around Flooring, Cabinets, Doors, and Drywall
The cleanest transition boundary is also a useful scheduling boundary: decide where flooring changes, cabinet runs end, and door jambs land before final trim measurements begin. Drywall should be finished enough that wall planes and outside corners are established; otherwise, casing and wall trim can telegraph later corrections. Set or confirm door and window units early, because their jamb depth, reveal, and opening size determine how casing fits.
Cabinets also affect the trim layout. A baseboard may stop at a toe kick, return into an exposed cabinet end, or continue along an adjoining wall; each condition needs a planned termination instead of a last-minute cut. At a doorway between tile and wood or vinyl flooring, the transition piece must account for both materials and their finished heights without crowding the jamb or leaving an exposed edge.
Baseboards are commonly installed after the final flooring height is known. That allows the bottom edge to meet the floor cleanly and avoids reinstalling trim after a thicker floor, underlayment, or leveling work changes the gap. If a small irregular gap remains, shoe molding, a narrow flexible-looking finish strip along the baseboard bottom, can cover it. It is a finishing choice, not a substitute for planning a noticeably uneven floor or an incorrect baseboard height.
- Casing can often be installed once openings, drywall, and jamb conditions are final, even while flooring in other areas is still underway.
- Crown and decorative wall trim are generally best fitted after ceiling and wall surfaces are stable, before final paint touch-ups.
- Baseboards, transitions, and final returns benefit from field measurement after flooring and cabinet conditions are settled.
When flooring replacement requires baseboard removal, inspect each piece before promising reuse. Long, straight lengths with sound edges may come off carefully and reinstall well; brittle material, thick paint bridges, split miters, and trim fastened through damaged drywall raise the likelihood of breakage and repair work. A written sequence for drywall, doors, cabinets, flooring, trim, and painting gives a Venice FL remodel trim project clear handoffs rather than forcing finish carpentry to solve unfinished conditions.
Finish Prep, Caulking, and Paint Coordination for a Complete Look
Finish work is where a carefully selected profile either reads as one continuous detail or looks like separate pieces added to the wall. Before paint, each miter and cope should be fitted tightly, trim should be fastened without bruising its face, and nail holes should be filled, allowed to dry, and sanded flush. Caulk belongs in small paintable seams where trim meets a wall or jamb; it is not a convincing fix for open joints, warped material, or uneven surfaces that need correction first.
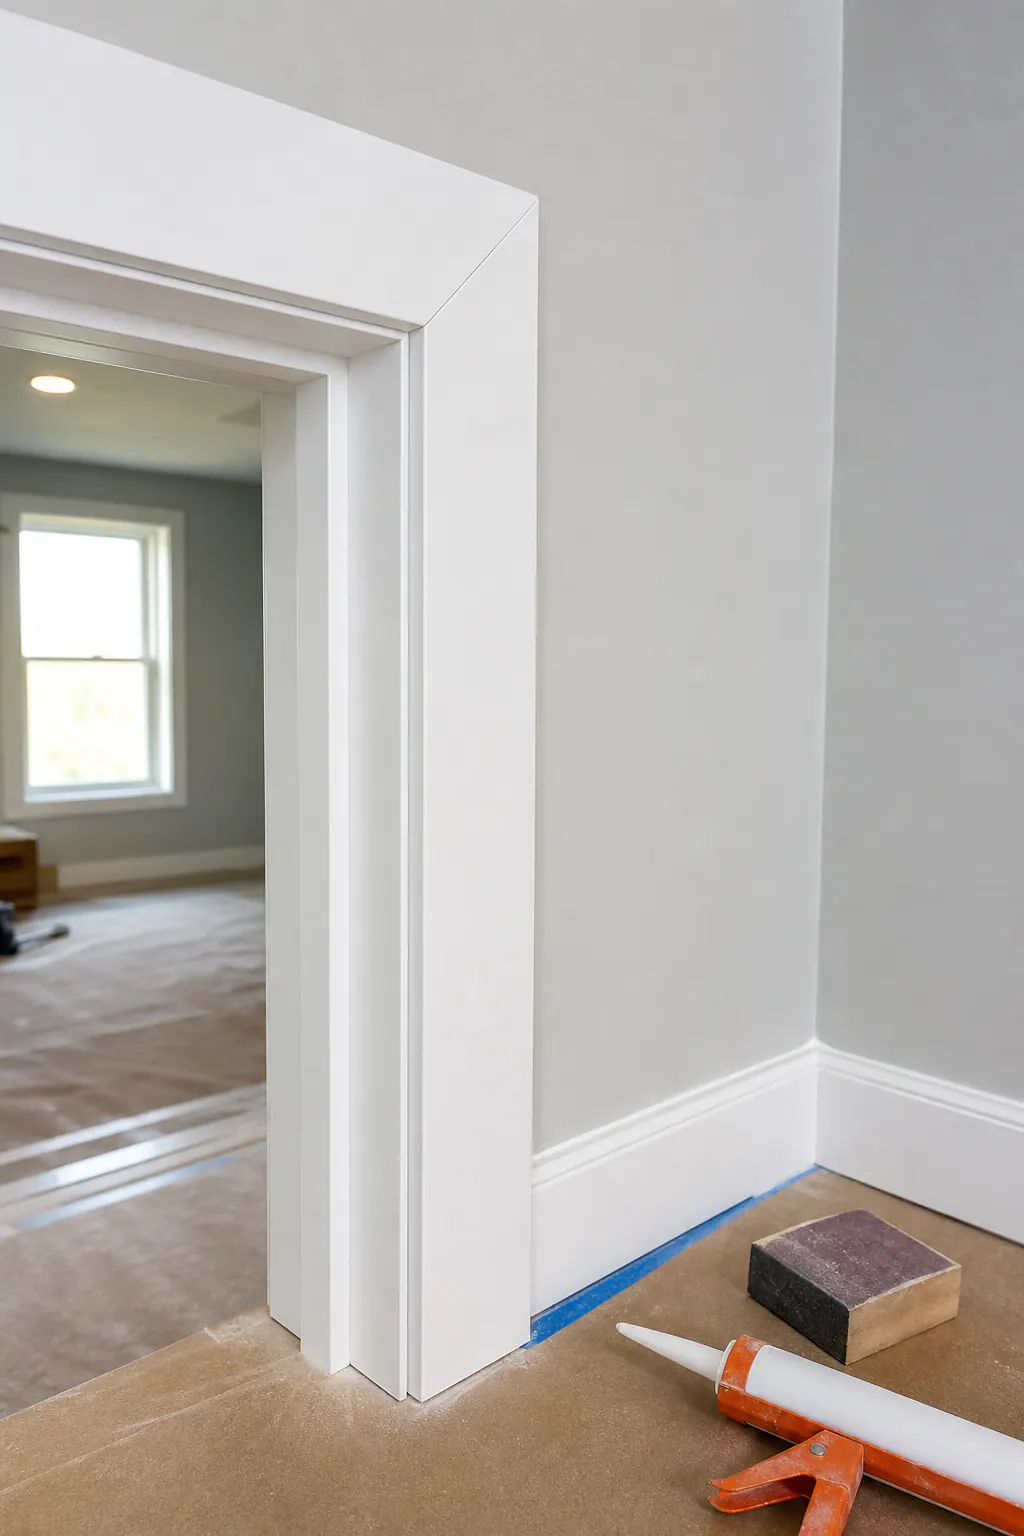
A finish inspection should move along every run at eye level and in angled light: look for proud joints, visible fasteners, rough filler, inconsistent caulk lines, and sanding scratches. This matters especially on paint-grade trim, where a smooth painted surface makes flaws at corners and long wall runs easier to notice. Primer, when the selected material or coating system calls for it, creates a consistent base before the finish coats go on.
Set the paint plan before the last coat. A schedule that identifies the color, sheen, primer, and surface for trim, walls, ceilings, doors, and cabinets prevents accidental near-matches. For example, matching white trim to white cabinets can create a deliberate built-in look, while a contrasting door color makes casing read as a frame. View finish samples together under the room's actual light; sheen changes can make the same color appear noticeably different.
Prefinishing boards before installation can reduce raw-material handling and make broad faces easier to coat. Painting after installation, followed by final touch-ups, unifies filled nail holes, caulked edges, and fitted joints. The strongest approach may combine both: prefinish where practical, then complete a final installed coat so baseboards, casing, crown, and any wainscoting share a clean, intentional finish.
Build a Trim Package Around Your Venice Remodel
Bring a few clear decisions to the first trim conversation: which rooms are changing, which existing profiles are worth carrying forward, and where a new trim family can begin at a doorway or opening. Photos of every affected wall, close-ups of casing and baseboards, flooring samples or specifications, door selections, cabinet elevations, and notes about visible damage give the planning process something concrete to work from.
A project-specific assessment should separate retained trim from replacement trim. Retained trim is material that stays in place and must visually connect to the remodel; replacement trim covers pieces removed for new flooring, doors, drywall, or layout changes. Optional upgrades, such as crown, panel molding, or a more substantial casing, should be listed independently, so a kitchen update does not quietly become a whole-home style change. The same scope should identify the intended material, profile, paint or stain direction, and the points where flooring and door details affect final measurements.
Ask for the installation and finishing sequence to be part of that scope, including when final field measurements occur and how paint preparation and touch-ups will be handled. This is especially useful when a bathroom, living area, and adjoining hall receive different levels of work but need to feel connected.
Rather than choosing from generic trim packages Venice FL homeowners can request a trim assessment and finish-carpentry scope tailored to the rooms, conditions, and finish goals of their remodel. It is a practical way to turn remodel trim Venice FL decisions into a coordinated plan before the last details become difficult to change.
Plan the next step
Compare the broader Remodel Trim Packages service.
Review the Venice, FL service area for local planning context.
When you are ready, request a free estimate with the rooms, trim goals, city, and available photos.
FAQs
What is included in a remodel trim package in Venice, FL?
A remodel trim package typically includes baseboards, door and window casing, and transition pieces for flooring changes, thresholds, stair edges, or cabinet-to-floor conditions. Optional upgrades can include crown molding, chair rail, wainscoting, and decorative panel molding.
When should trim be installed during a kitchen or bathroom remodel?
Install casing after door or window units, drywall, jamb depth, reveals, and opening sizes are final. Install baseboards, flooring transitions, and final returns after final flooring heights and cabinet conditions are confirmed.
What trim material is best for bathrooms and other moisture-prone rooms?
PVC or another moisture-conscious trim option can be used in selected bathroom locations near showers, tubs, and wet-floor areas. The correct choice also depends on ventilation, expected exposure to moisture, and the planned paint system.
Can existing baseboards and door casing be reused after new flooring is installed?
Existing trim can be reused when long, straight pieces have sound edges and can be removed without significant damage. Brittle material, thick paint bridges, split miters, and trim fastened through damaged drywall are more likely to break or require replacement.
How do I choose baseboard and casing profiles that match an older Venice home?
Compare existing trim for face width, thickness, edge detail, material, paint buildup, and condition before selecting a profile. Retain or closely replicate trim when it is sound and can be matched, but replace the affected room or connected area when repairs, altered openings, or mismatched dimensions would create a patchwork appearance.