
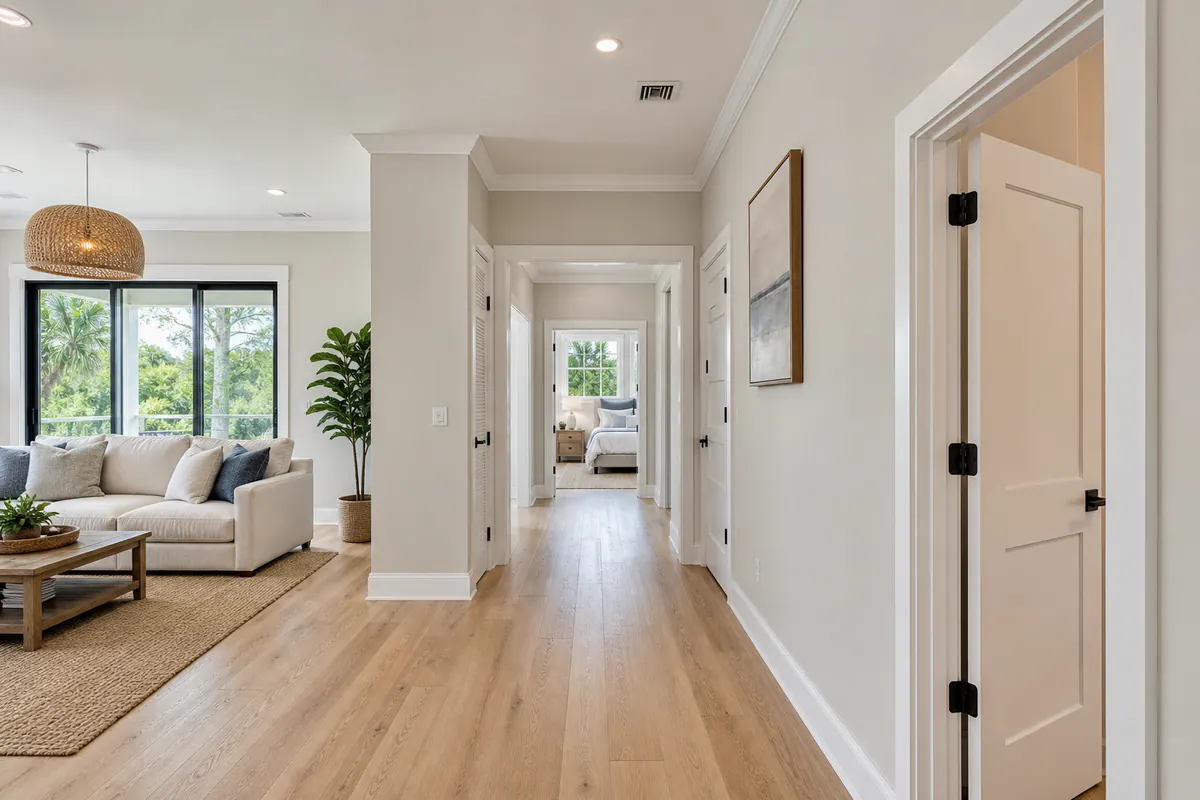
Walk from an open living area into a hallway or bedroom, and mismatched baseboard heights or casing profiles quickly become visible. A coordinated trim plan sets the details for every included room before installation, so adjoining spaces share a deliberate finish rather than a series of unrelated updates.
For whole home trim Osprey FL projects, the scope can bring together baseboards, door and window casing, optional crown molding, shoe molding or quarter round at the floor, and selected transition or decorative details. Baseboards frame the bottom of the wall; casing outlines doors and windows; crown creates a finished wall-to-ceiling transition. Shoe molding and quarter round are smaller pieces that can cover a narrow gap along certain finished floors. The goal is not to add every element, but to select the elements that belong together.
That is different from replacing one water-damaged baseboard or patching a single nicked casing. An isolated repair is meant to blend into what remains. A coordinated approach considers whether the baseboard height, casing width, corner treatment, and paint finish still make sense from room to room. For example, a tall, simple baseboard beside a narrow, ornate casing can look accidental even when each piece is neatly installed.
Trim packages in Osprey FL can make particular sense during an interior refresh, after purchasing an older home with mismatched updates, before seasonal occupancy, or alongside a broader renovation. Starting with a room-by-room scope lets homeowners decide what stays, what changes, and where a consistent finish should carry through the home.
What a Whole-Home Trim Package Can Include
A useful scope turns those room-by-room decisions into a written schedule rather than a single linear-foot total. It can name the baseboard profile and height in each area, count every door and window receiving casing, and show whether crown molding is limited to the entry, living room, or another feature room. For whole house trim installation Osprey projects, the schedule keeps a closet, hallway, bedroom, and open-plan living area from being priced or finished as unrelated jobs.
- Core repeating trim: Baseboards, door casing, and window casing establish the main repeated details. The schedule should identify the baseboard height, casing width, profile, and rooms included, so a wide living-room casing does not meet a visibly narrower hall casing without an intentional transition.
- Floor-edge and opening details: Shoe molding and quarter round are narrow pieces at the baseboard-to-floor line that can conceal a small finished-floor gap. Thresholds and flooring transitions belong on separate scope lines where tile, wood, carpet, or another floor surface meets, while return walls and trim terminations should be identified at pass-throughs, islands, and uncased openings to avoid exposed cut ends.
- Selective feature details: Crown molding finishes the wall-to-ceiling line; chair rail creates a horizontal division on the wall; wainscoting and wall-panel molding add a more decorative lower-wall or framed-wall treatment. A dining room, foyer, or primary bedroom can use these details without carrying them into closets, utility rooms, or every secondary bath.
Before baseboard and casing installation Osprey homeowners should expect measurements and takeoffs that separate wall runs, door openings, windows, transitions, and feature details. Where old trim comes off, the existing-condition review should note nail holes, hardened caulk, damaged drywall paper, uneven wall edges, and floor gaps that could keep new pieces from sitting flat.
The finish portion should state who removes existing trim, installs new pieces, fills fastener holes, sands joints, and caulks paint-grade seams before finish painting. It should also distinguish standard repeat work from additions: full home baseboard installation Osprey may cover baseboards throughout the house while crown, wall treatment, specialty returns, and transition treatment remain room-specific selections.
Choose Profiles and Proportions That Work Together
Profile is the shape cut into the face or top edge of a trim board, and it sets the visual tone before paint color ever enters the conversation. Simple square-edge or lightly eased-edge baseboards and casing keep contemporary interiors crisp; their flat faces and restrained lines work well beside slab doors, streamlined cabinetry, and minimal window treatments. Stepped or more traditional profiles introduce ledges, curves, or layered shadows that better suit homes with panel doors, detailed cabinetry, or existing decorative crown molding.

Height and width determine whether that profile feels intentional at room scale. Taller ceilings and generously sized rooms can carry a taller baseboard and wider casing without making the walls feel crowded. In a compact bedroom with standard-height doors, an oversized baseboard or heavily layered casing can dominate the opening. A useful comparison is the relationship among the baseboard height, casing width, door height, and any crown: these elements do not need to match in size, but they should look like members of the same family.
A reveal is the narrow, deliberate strip of wall left between casing and a door or window frame. Keeping reveals aligned and consistent makes openings read neatly, while uneven reveals or casing widths draw attention for the wrong reason. Window treatments also matter: wide drapery panels, deep shades, or closely placed cabinets can limit the visual and physical room for elaborate casing.
- Use one primary baseboard profile through connected living areas, halls, bedrooms, and visible transitions to create continuity. Abrupt changes from a plain, tall board in one room to an ornate profile in the next can look accidental when both rooms are visible at once.
- Allow practical exceptions in bathrooms, laundry rooms, or utility spaces when a simpler profile better fits tight clearances, built-in cabinets, or the room's more functional character. Repeating the main color and keeping the change contained within that room helps it feel deliberate.
- Reserve built-up trim, two or more pieces combined into a deeper, layered assembly, for formal entries, dining rooms, or high-ceilinged spaces where it has enough wall area to read clearly. It can look undersized or fussy in a small room.
For a complete home trim upgrade Osprey homeowners can compare samples against existing doors, cabinet faces, crown molding, and room photographs before settling on a profile family. That side-by-side view catches weak pairings early and helps each room retain its own purpose without breaking the visual rhythm of the house.
Compare Trim Materials for Humidity, Maintenance, and Finish Goals
Material choice affects how the selected profile looks after painting, how it handles everyday contact, and where it makes sense to use the same trim family with a different substrate. For interior trim replacement Osprey projects, the most practical approach is often to keep the visible style consistent while matching the material to each room's conditions.
- Paint-grade MDF has an exceptionally smooth, uniform face, so it is a strong fit for crisp painted baseboards, casing, and simple decorative profiles in stable, air-conditioned rooms. It does not have grain to hide beneath paint, but edges can swell or break down after repeated wetting. It is best reserved for dry bedrooms, living spaces, halls, and closets rather than areas with an unresolved leak, routinely wet floor edge, or frequent splash exposure.
- Finger-jointed wood uses shorter wood pieces joined together and is commonly chosen for paint-grade work. It offers a familiar wood substrate and can be easier to patch or reshape than damaged MDF, though joints and grain need thorough preparation for a smooth painted result. Solid wood can provide greater impact resistance depending on species, but natural grain, knots, movement, and higher material cost can make it a less economical choice for every painted room.
- PVC or cellular PVC is a useful option around moisture-prone entries, laundry areas, and similar locations where repeated exposure is a concern. It avoids wood-grain variation and can be painted, but it expands and contracts differently than wood-based trim and needs installation details suited to that movement. It may cost more than common paint-grade options and is not a substitute for correcting a wet substrate or water intrusion.
- Stain-grade wood is selected when the wood itself is intended to remain visible. Its species, grain pattern, color variation, and clear finish become part of the design, making careful matching more important across doors, casing, and built-ins. Small dents or scratches can sometimes be repaired or blended, but a mismatched patch can remain visible.
Seasonal vacancy and Florida humidity make moisture history worth discussing room by room. A well-conditioned dry interior may support MDF throughout most of the home, while a bathroom threshold or exterior-adjacent entry may call for a more moisture-tolerant alternative. The useful decision is not which material is "best," but which one delivers the desired finish and serviceability in that exact location.
Installation Details That Make Whole-Home Trim Look Intentional
Consistency is most visible at the small moments: where a long baseboard run meets a doorway, where casing turns a corner, and where one room opens into the next. A careful layout establishes a shared baseboard height, keeps door and window reveals even, and plans how trim will end at short return walls instead of leaving an abrupt exposed edge.

Existing walls, floors, and framing may not be perfectly straight, so forcing every board to follow a rigid line can make gaps more noticeable. Thoughtful fitting may include scribing a baseboard to a wavering floor or wall, coping an inside corner so the shaped end meets the face of the adjoining piece, and refining outside corners so their profiles line up cleanly. At flooring changes, transitions should read as deliberate: baseboard runs, shoe molding, and adjacent casings need a planned stopping point rather than a collection of near-misses.
- Fastening and surface prep: trim should sit securely without excessive visible damage. Filled nail holes, sanded filler, smooth joints, and a controlled caulk line at paint-grade wall edges create the continuous surface paint is meant to unify.
- Paint-grade finishing: caulk and filler can visually soften small seams, but they cannot make poor alignment disappear. The useful checkpoint is a consistent shadow line and clean edge before primer and paint go on.
- Stain-grade finishing: exposed wood does not receive the same visual forgiveness from paint. Board color and grain need selective matching, and miters, copes, fastener placement, and glue joints need to remain especially neat because the joinery stays visible.
For baseboard and casing installation Osprey homeowners can review a few representative corners, openings, and floor transitions before the same approach carries through the house. That makes workmanship decisions repeatable across rooms while allowing sensible fitting where the home itself is out of square.
Coordinate Trim With Flooring, Paint, Doors, and Remodel Work
Floor height is the first scheduling decision to settle, because it determines where the bottom edge of the baseboard lands. When finished flooring is already in place, baseboards can be fitted to that final elevation; a narrow shoe molding or quarter round can then be used only where it helps cover an uneven perimeter gap. Shoe molding is typically the slimmer, less prominent option, while quarter round has a fuller curved face. Either can conceal a gap, but neither should become a substitute for a well-planned baseboard line.
Baseboards are commonly installed after finished flooring so they sit neatly at the completed floor level, but the sequence is project-dependent. Floating floors need room to move at their edges, while tile, glued flooring, carpet, and flooring that will be refinished can create different height, protection, and transition decisions. A flooring change between rooms also needs an intentional meeting point: decide whether the transition strip ends beneath a doorway, aligns with the door when closed, or continues through an open passage before trim is cut.
For a whole house trim replacement Osprey project, schedule disruptive work before final trim whenever practical: drywall patches and texture repair, cabinet placement, replacement doors and windows, electrical relocations, and wall treatments can all change the wall surface or opening dimensions. Painting also needs a defined plan, whether trim receives primer and finish coats before installation, after installation, or alongside wall painting, so caulked edges, patched fasteners, and fresh flooring are protected.
- Inventory what remains: photograph and sample existing doors, cabinet finishes, crown molding, hardware, and paint colors.
- Choose the visual direction: match the surviving profile family where it is still available, or deliberately replace visible competing elements rather than forcing a near-match.
- Record finished floor heights: include each room, threshold, and planned transition before selecting baseboard height or deciding on shoe molding.
- Set a finish sequence: identify which trade completes walls, cabinets, flooring, trim, and paint so completed surfaces are not repeatedly disturbed.
Plan Your Osprey Whole-Home Trim Project
An on-site walk-through can turn the room schedule into a clear installation scope. List each included bedroom, hallway, bath, living area, door, and window; flag wall patches, moisture history, and openings where an unmatched casing width would stand out across a connected sightline. The written scope should name the profile and material in each area, locate flooring transitions, and assign removal, fastener filling, sanding, caulking, priming, and finish-paint responsibilities.
For seasonal residents, access dates, occupied rooms, and protection needs belong in the plan with drywall, cabinet, flooring, and painting work. Request an on-site evaluation for whole home trim Osprey FL work to review the home, select samples, record exclusions, and organize a defined scope before trim is cut.
Plan the next step
Compare the broader Whole-Home Trim Packages service.
Review the Osprey, FL service area for local planning context.
When you are ready, request a free estimate with the rooms, trim goals, city, and available photos.
FAQs
What is included in a whole-home trim package in Osprey, FL?
A whole-home trim package can include baseboards, door and window casing, optional crown molding, shoe molding or quarter round, and selected threshold or decorative details. The written scope should identify the profile, height, width, rooms, openings, transitions, and finishing responsibilities for each item.
Should all rooms use the same baseboard profile?
Use one primary baseboard profile through connected living areas, hallways, bedrooms, and visible transitions to create continuity. Bathrooms, laundry rooms, and utility spaces can use a simpler profile when tight clearances or built-ins require it, especially if the trim color remains consistent.
What trim material is best for a humid Florida home?
Paint-grade MDF works well in dry, air-conditioned bedrooms, living areas, halls, and closets because it has a smooth, uniform painted finish. PVC or cellular PVC is better suited to moisture-prone entries and laundry areas, while MDF should not be used where repeated wetting, leaks, or splash exposure are unresolved.
Can new baseboards be installed before new flooring?
Baseboards are commonly installed after finished flooring so they fit the final floor elevation cleanly. Floating floors need expansion space at their edges, and shoe molding or quarter round can cover a narrow perimeter gap when needed without replacing a properly planned baseboard line.
How do I match new trim to existing doors, cabinets, and crown molding?
Compare trim samples side by side with existing doors, cabinet faces, crown molding, paint colors, and room photographs before selecting a profile family. Match the relationship among baseboard height, casing width, door height, and crown, and replace visibly competing elements rather than forcing an imperfect near-match.