
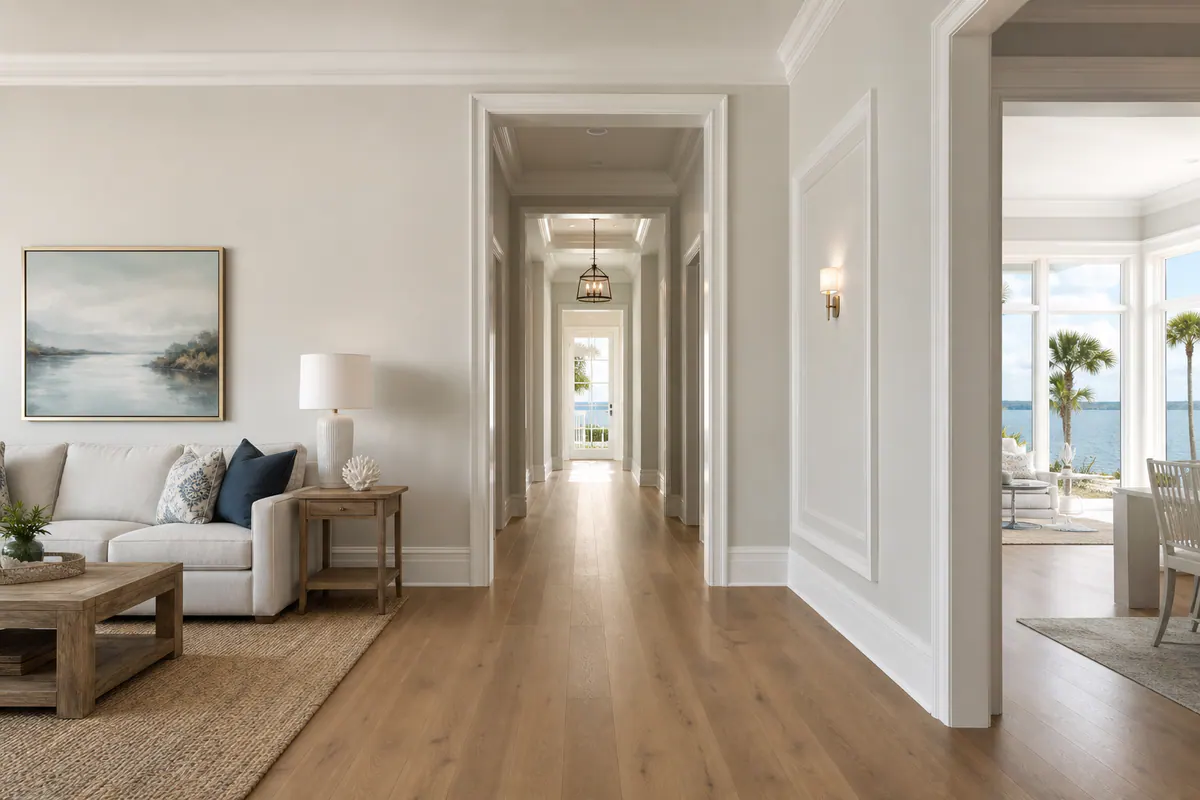
A Coordinated Whole-Home Trim Package for Sarasota Homes
Start by deciding which profile should carry through the main sightlines: the living room, hallways, doorways, and transitions into renovated areas. In Sarasota homes with open layouts, that early choice prevents a new baseboard or feature wall from looking unrelated to the trim visible just a few steps away.
The coordinated scope can pair baseboards at the floor line with door and window casing that frames openings, crown molding that finishes the wall-to-ceiling transition, and optional wall details such as panel molding in a dining room or entry. Each element has a different job, but the proportions and edge details should relate. A simple square-edge casing and modest baseboard can keep a lower-ceiling contemporary room clean; a taller baseboard with more substantial crown has a different visual weight in a larger room.
Flooring and transitions deserve attention early. Tile or luxury vinyl can leave differing gaps at the wall, while an original wing and a remodeled addition may have unlike jamb depths, ceiling heights, or existing trim. A weak plan solves those conditions one room at a time. A stronger whole home trim Sarasota FL plan records where profiles change, where they should remain continuous, and how paint will unify the finished work.
Painting is part of the package, not an afterthought: filled joints, clean caulk lines, primer where needed, and a consistent sheen help the trim read as one intentional interior finish.
What a Whole-House Trim Scope Can Include
The clearest way to prevent gaps in the finished look is to map trim by room and by transition, not just by the spaces guests see first. Baseboards finish the floor-to-wall line throughout living areas, bedrooms, halls, and closets; a full home baseboard installation in Sarasota should identify the profile, height, and any rooms where existing baseboards will remain. Door casing frames jambs and helps openings read consistently, while window casing gives windows a deliberate border where the design calls for it.
Crown molding finishes the upper wall line and is often most effective in main living spaces, dining rooms, entries, or bedrooms with enough visual breathing room. Shoe molding and quarter round are smaller pieces installed along the baseboard's lower edge when they are needed to cover a flooring gap; they are useful problem-solvers, not automatic additions to every room. The written scope should note which of these components are included, where they stop, and how they meet at tile, carpet, doorways, and stairs.
Wall details deserve a selective approach. A chair rail can create a horizontal break in a dining room or hall, picture-frame molding adds tailored structure to a foyer or formal room, and wall panel molding or wainscoting can give a powder room, entry, or stair wall more presence. Used across every wall, however, those details can make smaller rooms feel busy and compete with a clean interior. Strong interior trim installation Sarasota planning identifies focal spaces for these upgrades while keeping secondary rooms simpler.
- Include bedrooms, closets, laundry areas, hallways, and pantry openings in the room-by-room count.
- Record stair skirts, landing returns, open cased openings, and transitions between old and new trim.
- Define paint touchups, filled nail holes, caulk lines, and any excluded repairs so the finish work is not left to assumption.
Choosing Profiles, Scale, and a Consistent Design Language
Choosing Profiles, Scale, and a Consistent Design Language
Start by looking at the trim as a set of related shapes, not as individual boards. A profile family is the shared design vocabulary: the edge treatment on the baseboard, the face and backband of the casing, and the curves or steps used in crown. When those elements have a similar visual weight, openings and wall lines feel connected even as the pieces serve different purposes.
For clean, contemporary rooms, square-edge or lightly eased profiles keep the lines quiet. An eased profile has subtly softened corners rather than a sharp edge, so it reads simpler than ornate molding while still feeling finished. Modest baseboards paired with flat or restrained casing are often a comfortable choice for lower ceilings, smaller bedrooms, and modern slab or shaker-style doors. The practical takeaway: let the trim frame the room without making the ceiling feel lower or the openings overly formal.
Traditional stepped profiles introduce layered edges and shadow lines. They work well when a home has panel doors, more classic furnishings, or existing architectural details worth carrying forward. In larger living rooms, entries, or spaces with taller ceilings, taller baseboards and a built-up crown assembly can add enough presence to hold the room together. Built-up crown combines two or more molding pieces, creating a wider, more dimensional transition at the ceiling; it needs adequate wall and ceiling scale to look intentional rather than heavy.
Trim scale should also respond to what it meets. Casing needs enough width to visually frame the door without crowding a narrow wall return. Baseboards should meet flooring cleanly, while their height should relate sensibly to the casing rather than appearing like two unrelated selections. A narrow, simple casing beside an oversized decorative baseboard is usually a weak signal; compatible widths, edge details, and paint treatment are a stronger one for whole house trim Sarasota planning.
- Use the same casing profile and consistent reveal, the small, even strip of jamb left visible beside casing, at comparable doors and windows.
- Keep top lines, plinth details, and baseboard transitions aligned where rooms open into one another.
- Use a profile board or simple elevation before ordering so the baseboard, casing, crown, and any wall molding can be viewed together rather than chosen room by room.
Trim Material Choices for Sarasota Interiors
Trim Material Choices for Sarasota Interiors
Material affects more than the budget line: it changes how sharply a profile paints, whether it can carry a stained look, how readily a damaged edge can be repaired, and where each piece makes sense inside the home.
MDF trim is a dense engineered material commonly selected for smooth paint-grade trim. It can produce crisp, consistent painted profiles without visible grain, making it a natural fit for clean-lined baseboards, casing, and decorative wall molding in dry, conditioned rooms. Its tradeoff is that exposed edges, cut ends, and areas likely to see repeated moisture need careful sealing and a complete paint system; it is not the right assumption for every location.
Finger-jointed pine uses shorter pine sections joined together, then milled into a paint-ready board. It gives homeowners a wood-based paint-grade option that can be cut, fastened, and spot-repaired more like solid lumber. Joints and grain can still influence the finished surface, so a good primer and finish coat matter when the goal is a uniform painted appearance.
Solid wood is the usual direction when the design calls for a transparent stain or clear finish that celebrates grain variation. It also allows localized repair in many situations, but color and grain can vary from board to board. Sample boards are especially useful when matching existing stained doors, cabinetry, or older trim.
Moisture-resistant composite trim can be worth considering at interior areas with elevated moisture exposure, such as certain bath-adjacent details, when its profile and intended use suit the design. It offers a different balance of surface finish and movement than wood-based options, rather than a universal upgrade.
For Sarasota interiors, a durable result depends on the whole finish approach: allow materials to acclimate to indoor conditions, fasten them securely, seal cut ends where appropriate, and match primer and paint to the selected material. A strong material schedule identifies each room or condition; a weak one assigns one product everywhere without accounting for finish goals or moisture-prone areas.
Installation Details That Make Trim Look Finished
Installation Details That Make Trim Look Finished
Straight-looking trim starts with an honest read of the surfaces it will meet. Older homes and remodeled rooms can have bowed walls, floors that drift, uneven drywall corners, or door jambs that no longer sit perfectly flush. Those conditions should be noted before baseboards and casing are cut, so the installation plan resolves visible transitions rather than forcing every board into an unrealistic straight line.
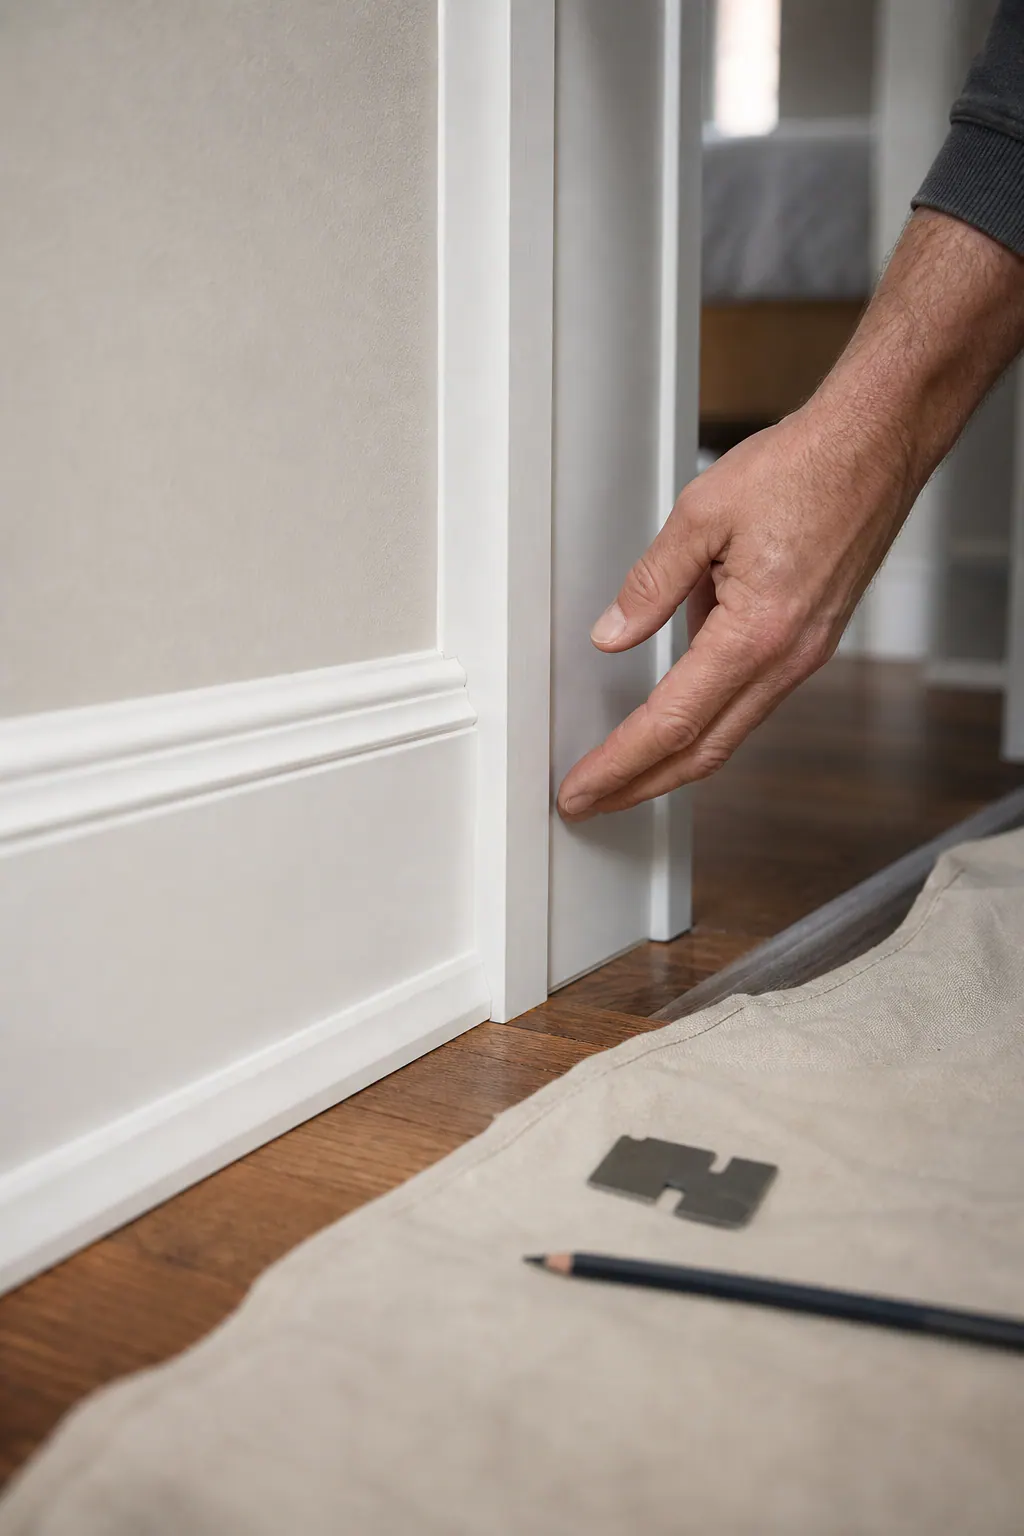
Scribing is the practice of shaping an edge to follow a slightly uneven wall or floor; it creates a tighter fit than relying on a wide bead of caulk. Inside baseboard corners often benefit from coping, where one profile is cut to fit the face of the adjoining piece. The result is a corner that stays visually closed when walls are not perfectly square. Outside corners and casing returns depend on accurate miter joints, with both pieces aligned before fastening so the profile reads continuously around the turn.
For baseboard replacement in Sarasota, FL, fastening should hold the trim firmly without leaving the face scarred or distorted. Nail holes, minor seams, and small finish gaps are normal preparation items: they are filled, sanded smooth, and caulked where trim meets the wall. A clean checkpoint is simple, corners meet tightly, seams do not telegraph through the paint, and caulk lines are narrow and even rather than doing the work of a missing fit.
Door openings and new flooring need the same attention. Casing must meet the jamb cleanly, while baseboards may need a planned return, shoe molding, or other detail where floor gaps occur. Caulk and trim can refine minor irregularities; they cannot responsibly disguise loose flooring, significant wall damage, active moisture, or a badly misaligned jamb. Identifying those larger conditions early keeps finish work from becoming a short-lived cover-up.
Painting, Caulking, and Finish Sequencing
Painting, Caulking, and Finish Sequencing
The final coat is what turns separate boards, joints, and repairs into a unified surface. Paint-grade trim often arrives pre-primed, which provides a prepared face, but cut ends, nail-hole repairs, filled seams, and sanded areas still need spot priming so they do not show differently through the finish coat.
Caulk comes after fitting and filling: filler levels nail holes and small face imperfections, while a narrow paintable caulk line softens the trim-to-wall joint. Caulk should refine a close installation, not create a heavy shadow line. After it cures, sanding dust is removed before paint goes on.
Pre-painting boards can speed coverage and keep paint off adjacent walls, but fastening, joints, and caulk lines still require touchups after installation. Painting after installation gives a continuous final coat across those details, although it requires more careful masking. For interior trim installation Sarasota homeowners can plan around, either route works best when the scope assigns final touchups clearly.
A written finish schedule should name the primer, trim color, sheen, and responsibility for touchups. Satin or semi-gloss trim can provide a deliberate contrast against flatter wall paint; matching doors, existing built-ins, and wall details keeps that contrast intentional. In occupied rooms, protect floors and furnishings, mask adjacent surfaces, and contain sanding dust as work moves through the home.
Planning Whole-House Trim Replacement Without Room-by-Room Guesswork
A clean project begins with decisions on paper before the first piece is removed. For a whole house trim replacement Sarasota homeowners can manage confidently, start with an inventory of each room: existing baseboards, door and window casing, crown, shoe molding, retained trim, and any damaged or unfinished areas that need repair.

Turn that inventory into a room-by-room scope rather than a general wish list. Note the selected profile and paint color, which openings receive casing, where crown stops or returns, and which focal spaces receive optional panel molding or a chair rail. An entry or dining room may be a strong place for wall detail, while bedrooms may stay intentionally simple. Choosing profiles, wall treatments, and retained pieces before materials are ordered prevents mismatched transitions later.
Flooring and door conditions deserve an early walk-through. Replacing baseboards without replacing flooring is often workable, but removing old shoe molding can reveal perimeter gaps, paint lines, damaged drywall, or unfinished floor edges. The scope should state whether a new shoe molding will cover those edges, whether patching is needed, and how new baseboards will meet existing flooring. At each doorway, confirm that casing can meet the jamb cleanly and that planned flooring height will not change the reveal around the opening.
- Schedule flooring decisions before final baseboard fitting, especially where new material, transitions, or floor-height changes are planned.
- Coordinate cabinetry, built-ins, and appliance locations so trim terminates intentionally rather than being cut back afterward.
- Assign painting order and furniture access by room, including which areas remain usable while work moves through the home.
Early approval of the trim schedule makes a Sarasota whole-home trim upgrade easier to keep visually consistent: the same selected profiles arrive where intended, paint details carry across connected rooms, and exceptions are deliberate rather than last-minute compromises.
Start With a Coordinated Trim Plan for Your Sarasota Home
The next useful step is an on-site assessment that turns those choices into a workable plan. For whole home trim Sarasota FL projects, the review can look at wall, jamb, and flooring conditions; identify rooms that deserve priority; and compare a clean, simple profile direction with more detailed focal-area treatments.
A complete proposal should carry the decisions through installation and paint: selected materials by location, profile and transition details, preparation needs, and the primer, color, and sheen plan. A strong signal is a scope that names those decisions; a weak one is a broad promise to "update trim" without resolving where it starts, stops, or changes.
Request an assessment for your Sarasota home to discuss room priorities, design direction, material options, and the practical work sequence. It can clarify the scope and next steps, while final recommendations should follow the home's conditions and your goals.
Plan the next step
Compare the broader Whole-Home Trim Packages service.
Review the Sarasota, FL service area for local planning context.
When you are ready, request a free estimate with the rooms, trim goals, city, and available photos.
FAQs
What is included in a whole-home trim package in Sarasota?
A whole-home trim package can include baseboards, door and window casing, crown molding, and selective wall details such as chair rail, panel molding, or wainscoting. The scope should also identify shoe molding, stair skirts, landing returns, open cased openings, paint touchups, caulk lines, and excluded repairs.
Should baseboards, door casing, and crown molding match throughout the house?
They should use a coordinated profile family with compatible widths, edge details, and paint treatment, especially through connected living areas, halls, and doorways. The same casing profile and consistent jamb reveal should be used at comparable doors and windows, while crown or wall details can be limited to focal rooms.
How do I choose the right baseboard height for my ceilings?
Choose a modest baseboard with restrained casing for lower ceilings, smaller bedrooms, and contemporary rooms so the trim does not make the ceiling feel lower. Taller baseboards and more substantial crown work better in larger rooms or spaces with taller ceilings, provided their scale relates to the casing.
Can trim be replaced without replacing flooring?
Yes, baseboards can be replaced while existing flooring remains, but removing old shoe molding may reveal perimeter gaps, paint lines, damaged drywall, or unfinished floor edges. The plan should specify whether new shoe molding, patching, or baseboard returns will address those conditions.
What trim material is best for Sarasota homes?
MDF is well suited to smooth painted trim in dry, conditioned rooms, while finger-jointed pine offers a paint-grade wood option that can be spot-repaired more like solid lumber. Solid wood is the preferred choice for stained or clear finishes, and moisture-resistant composite can suit certain bath-adjacent interior locations when moisture exposure is higher.