
How Cabinet and Built-In Trim Creates a More Custom Look
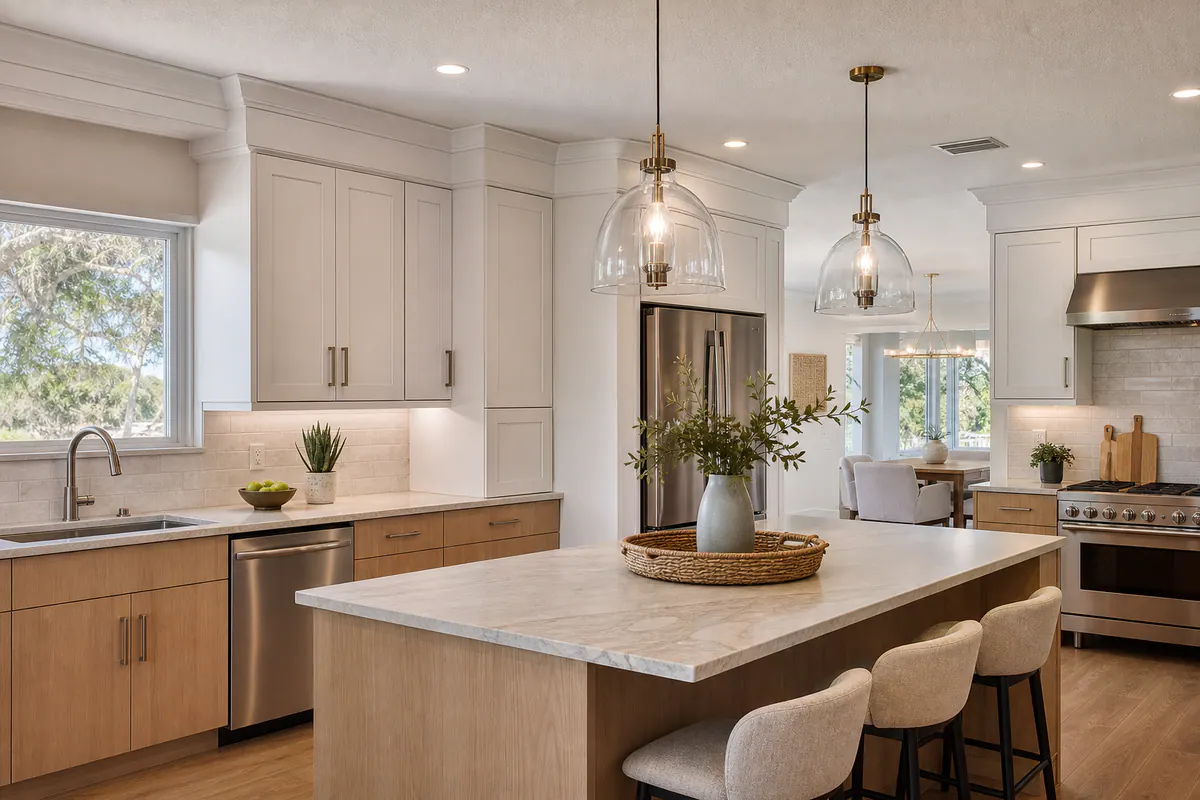
That custom look usually begins at the edges: the small transitions that make cabinetry appear designed with the room rather than simply set against a wall. Cabinet trim in Englewood, FL can close an awkward space above upper cabinets, soften a visible cabinet end, or carry the line of existing baseboards and door casings into a vanity, bookcase, or refrigerator surround.
Crown molding is the profiled piece that finishes the top of cabinetry; it can visually bridge a cabinet-to-ceiling gap when the proportions allow. A scribe molding is a narrow, flexible-looking finishing strip that follows an uneven wall, while a filler strip creates needed spacing beside a wall or appliance. End panels cover exposed cabinet sides, giving a run of boxes a more furniture-like face. Applied panel molding adds framed detail to a flat surface, but it needs enough uninterrupted panel area to avoid looking crowded.
Successful finish carpentry is more than selecting a profile. Cabinet boxes need a sound attachment point, walls may require scribing rather than a perfectly straight trim line, and the trim's width should relate to nearby doors, baseboards, and ceiling height. Paint color, sheen, and grain direction also matter: a close profile with a mismatched finish can still read as an add-on. In splash-prone or humid rooms, the substrate, sealed edges, finish system, and ventilation all shape the long-term result.
Cabinet Trim Styles and Where Each One Works Best
Profile choice is most convincing when it follows the cabinet's lines instead of competing with them. For custom cabinet trim in Englewood, a simple shaker door usually benefits from clean, squared-off details, while a raised-panel door can carry a more shaped profile without feeling overdone.
- Crown molding finishes the top edge of upper cabinets and tall built-ins. It is strongest where it can create a deliberate top termination or visually close a modest gap to the ceiling. A large, deeply detailed crown over short, plain cabinet doors can make the uppers feel top-heavy; a very small profile may disappear below a tall ceiling.
- Light rail molding attaches below upper cabinets to conceal under-cabinet lighting and soften the bottom edge. It suits kitchens with task lighting, but a bulky rail can crowd a shallow cabinet or look fussy beneath minimal slab doors.
- Scribe molding is the narrow finishing piece at a cabinet-to-wall edge. It follows wall irregularities so the cabinet run reads cleanly. It should remain discreet; using a wide decorative profile here calls attention to a transition meant to disappear.
- Filler strips provide the planned clearance needed beside walls, appliances, or doors. They can be finished to blend into the face frame, but an overly wide filler often signals that the cabinet layout needs a better visual break, such as an end panel or pilaster.
- Toe kicks recess the base of lower cabinets, creating foot room while establishing a grounded horizontal line. Matching the cabinet finish keeps the run quiet; carrying a contrasting room baseboard across it can look disconnected.
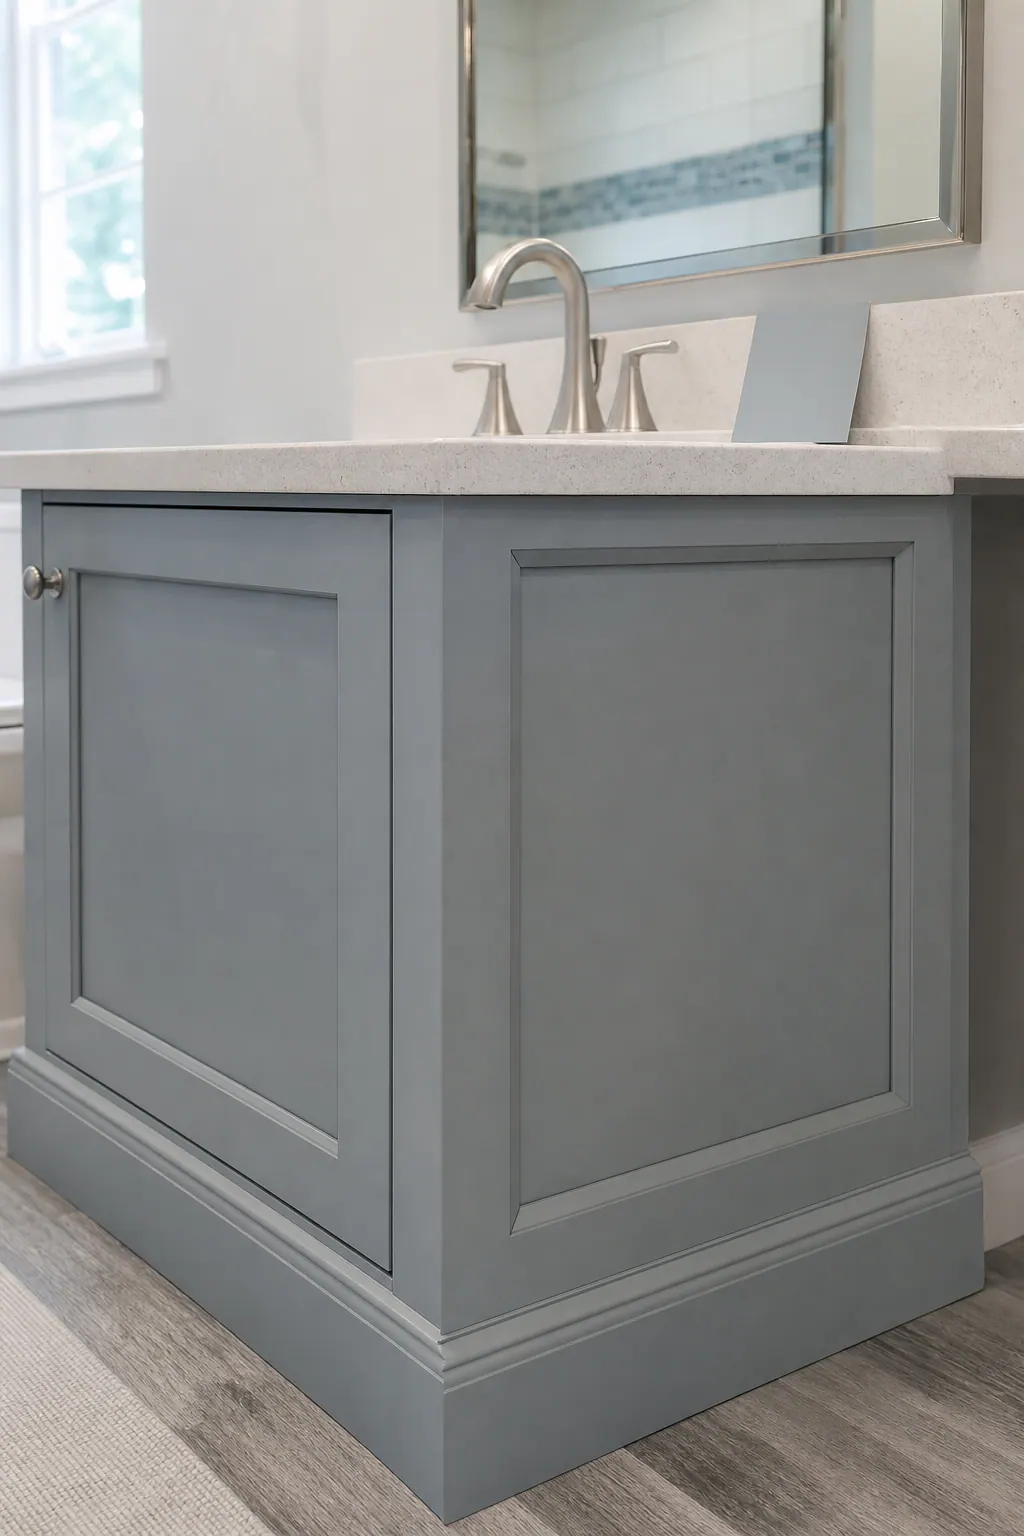
- End panels cover exposed cabinet sides, especially at islands, range runs, and refrigerator surrounds. A finished panel makes the side read like furniture, while a thin or mismatched panel can look applied as an afterthought.
- Applied panel molding adds framed rectangles to a flat end, back, or built-in face. It works best on broad, uninterrupted surfaces and when its rail widths echo nearby door details. On a narrow panel, or beside sleek flat fronts, it can feel crowded or overly ornate.
During cabinet molding installation, viewing the door profile, cabinet height, and adjoining room trim together helps each added piece look intentional rather than separately selected.
Trim Details for Bookcases, Fireplace Built-Ins, and Window Seats
A bookcase earns its place when its outer frame follows the room's existing lines. A face-frame extension, an added border that projects beyond the cabinet box, gives shelving a stronger furniture-like edge and creates room to meet uneven walls cleanly. Built-in bookcase trim can return the room's baseboard across the bottom, continue crown at the ceiling, and use a narrow scribe at each side so the wall joint disappears instead of becoming a visible gap.
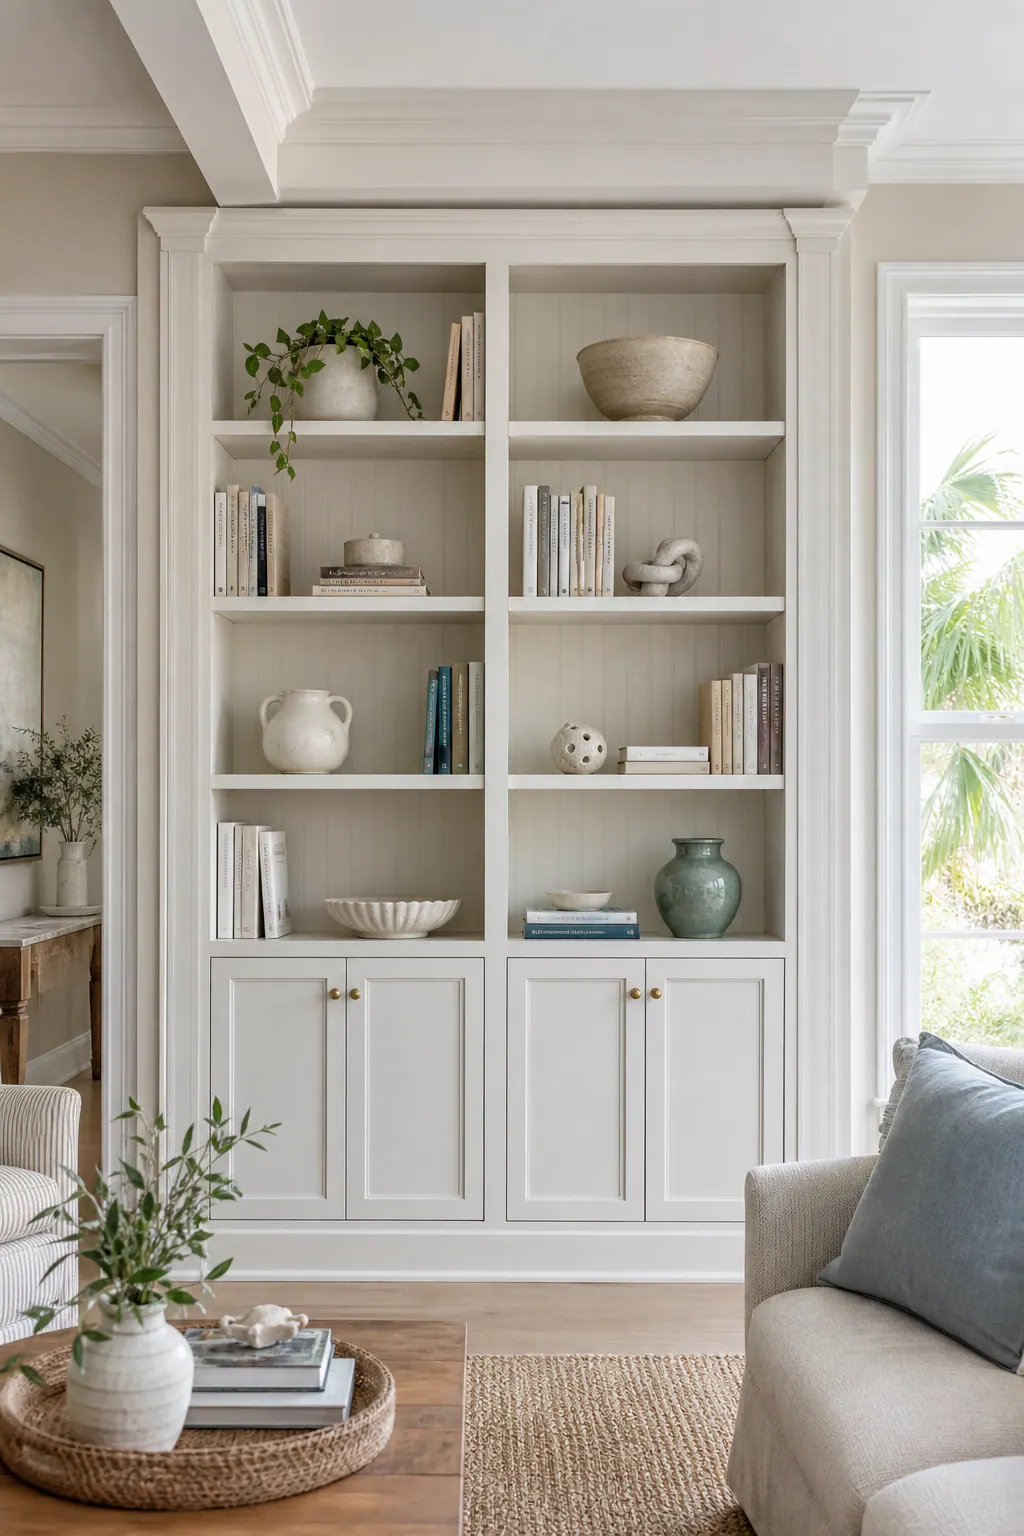
Inside the bookcase, a recessed panel sets the panel back from the face frame for depth and shadow; an applied panel adds a raised frame to a flat surface. Recessed panels tend to suit quieter, traditional built-ins, while applied panels bring more detail to broad cabinet backs, lower doors, or a window-seat front. Either approach is weakest when rails, stiles, and shelf spacing do not align: a simple elevation drawing that shows face frames, fillers, shelf locations, baseboard, and crown together can catch those awkward intersections before installation.
Fireplace built-ins need a different kind of planning. The surrounding trim can mirror the mantel profile or stay intentionally simpler so the fireplace remains the focal point, but cabinet depth, trim projection, vents, controls, and service access should be resolved around the specific fireplace equipment. A removable or discreetly hinged access panel can preserve a finished appearance while keeping necessary connections reachable. Required clearances and finish limitations should follow the fireplace manufacturer's installation instructions rather than being solved with decorative trim alone.
For window-seat storage, the seat cap is both a visual ledge and a working surface. A face frame and baseboard return can make drawers or doors below feel integrated, while a durable, smoothly finished seat edge is more comfortable for daily use. Nearby window light also changes how paint color and sheen read across the seat and surrounding custom built-ins in Englewood, FL; sampling the finish in that light helps avoid a contrast that looks stronger by day than it did indoors.
Choosing Trim Materials for Englewood’s Humid Coastal Conditions
Material selection is where a crisp trim profile meets the realities of a conditioned coastal home. Humidity changes, air-conditioning cycles, plumbing proximity, bathroom ventilation, and strong daylight all deserve a place in the decision, not just the desired color. Those conditions can show up over time as movement at seams, stressed caulk lines, finish wear, or a paint touch-up that no longer blends cleanly.
Paint-grade solid wood brings a traditional substrate to face frames and narrower trim pieces. Its natural grain is covered rather than featured, so it is a good fit when the goal is a painted cabinet surround with a substantial edge. Stain-grade wood, by contrast, is selected for the grain and color that will remain visible; it needs to relate closely to the existing cabinet species, grain pattern, and undertone. Either wood choice benefits from allowing for movement where long runs meet walls or adjoining panels.
MDF cabinet trim is a strong option for smooth painted profiles, applied panels, and stable-looking interior details in normally conditioned rooms. Its uniform surface helps create a clean painted finish without wood grain telegraphing through. Moisture-resistant MDF is a more considered paint-grade choice for a vanity surround or another interior location with occasional humidity, but it is not a substitute for managing repeated splashing, leaks, damaged cut edges, or poor ventilation.
Plywood-based panels are useful where a broad end panel, furniture-style side, or longer span needs a more robust panel construction. A compatible composite trim may also suit painted details where its profile, fastening method, expansion behavior, and paint system work together. For cabinet trim in Englewood, FL, the practical dividing line is exposure: use a carefully sealed paint-grade material in dry interior locations, and choose a more appropriate panel or trim substrate when water contact is a realistic possibility.
Before finishing, map every cut edge, seam, exterior-wall connection, sink-side panel, and sunlit face. A matched primer, flexible paintable caulk where movement is expected, and a topcoat suited to the selected substrate give the finish system a better chance of remaining consistent. Long unsupported MDF runs, swollen edges, or recurring moisture marks are signals to revise the material plan rather than simply add more paint.
Matching New Trim to Existing Cabinet Paint, Stain, and Sheen
A new profile can be perfectly cut and still look added on if its finish misses the cabinet beside it. For painted cabinetry, cabinet trim paint matching means comparing both color and sheen: a close white in a flatter finish can read dull next to satin doors, while a glossier new crown or end panel may catch light as a separate strip. View physical paint samples against the existing doors in daylight and with the room lights on, especially at the joint where old and new work meet.
Stained work needs a broader comparison. Cabinet trim stain matching depends on the visible wood species, grain character, warm or cool undertone, and the aged clear coat over the existing cabinets. A trim piece may take a similar stain but still stand apart if its grain is much plainer, redder, or more open than the door faces. Test boards should include the intended primer or conditioner, stain, glaze if used, and final topcoat, not just a stain swatch, so the full finish build can be judged beside the cabinetry.
When a near-match remains unconvincing, a deliberate contrast often looks more intentional: for example, a clean painted bookcase surround beside wood cabinets, or a darker painted refrigerator panel that repeats a nearby island color. The contrast should relate to another finish already in the room. In finish carpentry Englewood, FL, careful cleaning, scuff-sanding where appropriate, and a consistent sheen across connected trim help prevent a visible "patch" at every transition.
Room-by-Room Planning for Kitchens, Bathrooms, and Living Areas
Room conditions often settle the profile choice faster than a sample board does. In a kitchen, measure the space above the upper cabinets at several points before choosing crown; a ceiling that rises or dips can make one continuous line look uneven. Cabinet crown molding in Englewood kitchens can close a modest top gap and carry the eye upward, while a light rail, a narrow strip beneath upper cabinets, hides under-cabinet lighting hardware and gives the cabinet bottom a finished edge. Also inspect refrigerator panels, exposed cabinet ends, door swing, drawer pull-out, and appliance clearances so added trim does not crowd a functional opening.
Bathroom vanity trim needs a more guarded approach around daily water. Look closely at sink splash paths, plumbing-side panels, floor contact, and how well the room is ventilated. A finished toe kick creates a recessed space beneath the vanity for comfortable standing; it should be detailed so its exposed edges and seams are not left vulnerable beside a wet floor. For vanity trim ideas, a simple face-frame return or restrained applied panel can relate the vanity to existing door casing without introducing deep ledges that are awkward to keep clean.
In living areas, built-in bookcase trim should be sized to the room rather than made as large as possible. A broad surround can give tall shelving presence beside a fireplace or media wall, but may overwhelm a low ceiling or narrow wall. Compare the proposed face width with nearby baseboard, crown, and casing, then measure side walls for out-of-plumb conditions. Narrow scribe pieces can absorb a wandering wall line, while a finished end panel gives an exposed bookcase or media cabinet a deliberate furniture-like side.
What to Decide Before a Cabinet or Built-In Trim Project
A clear project brief starts with one focal area: the upper-cabinet line, a refrigerator surround, a vanity face, or a bookcase wall. Photograph that area straight on and from each side, along with nearby doors, baseboards, crown, cabinet doors, and hardware. Those references make it easier to decide whether new work should disappear into a seamless match or create an intentional contrast that repeats another color or finish in the room.
- Note where water, humidity, and direct sun reach the proposed trim, including sink-side panels, window-adjacent shelving, and exposed toe kicks.
- Record practical clearances: door swings, drawer pull-outs, appliance ventilation space, outlets, and access panels cannot be buried behind a wider face or end panel.
- Bring finish and profile samples into the actual room. A sample that works under showroom lighting may read differently beside existing cabinetry.
- Expect final decisions to follow site measurements, cabinet-box condition, wall irregularities, exposed edges, and the approved finish sample, not a one-size-fits-all trim package.
For cabinet and built-in trim in Englewood, FL, a written scope should name the selected materials, transitions, visible edges, and finish expectation so the finished detail is as deliberate as the design idea.
Plan the next step
Compare the broader Cabinet and Built-In Trim service.
Review the Englewood, FL service area for local planning context.
When you are ready, request a free estimate with the rooms, trim goals, city, and available photos.
FAQs
What type of trim looks best on kitchen cabinets in Englewood, FL?
Trim should follow the cabinet door style: simple Shaker doors look best with clean, squared-off details, while raised-panel doors can support more shaped profiles. Crown molding finishes upper cabinets, light rail hides under-cabinet lighting, and finished end panels make exposed sides look furniture-like.
Can crown molding be added to existing kitchen cabinets?
Yes, crown molding can be added when the upper cabinets have a sound attachment point and the gap to the ceiling is modest enough for the profile to look proportional. Measure the cabinet-to-ceiling space at several points first, because a dipping or rising ceiling can make a continuous crown line appear uneven.
What trim works best for built-in bookcases?
Built-in bookcases commonly use a face-frame extension, baseboard return, ceiling crown, and narrow scribe molding at the walls. Recessed panels create quieter depth, while applied panel molding works best on broad, uninterrupted surfaces with rail widths that echo nearby door details.
Is MDF a good choice for cabinet trim in coastal Florida?
MDF is a good paint-grade option for smooth interior trim, applied panels, and normally conditioned rooms because its uniform surface prevents visible wood grain. Moisture-resistant MDF is better for occasional bathroom humidity, but it should not be used where repeated splashing, leaks, damaged cut edges, or poor ventilation are likely.
How do you choose and match new cabinet trim to existing paint or stain?
Compare physical samples beside the existing cabinet doors in daylight and with room lighting, matching both color and sheen for painted cabinets. For stained trim, match the wood species, grain character, undertone, stain, and final clear coat, then use a deliberate contrasting color if a convincing near-match is not possible.