
Custom Cabinet and Built-In Trim for Siesta Key Homes
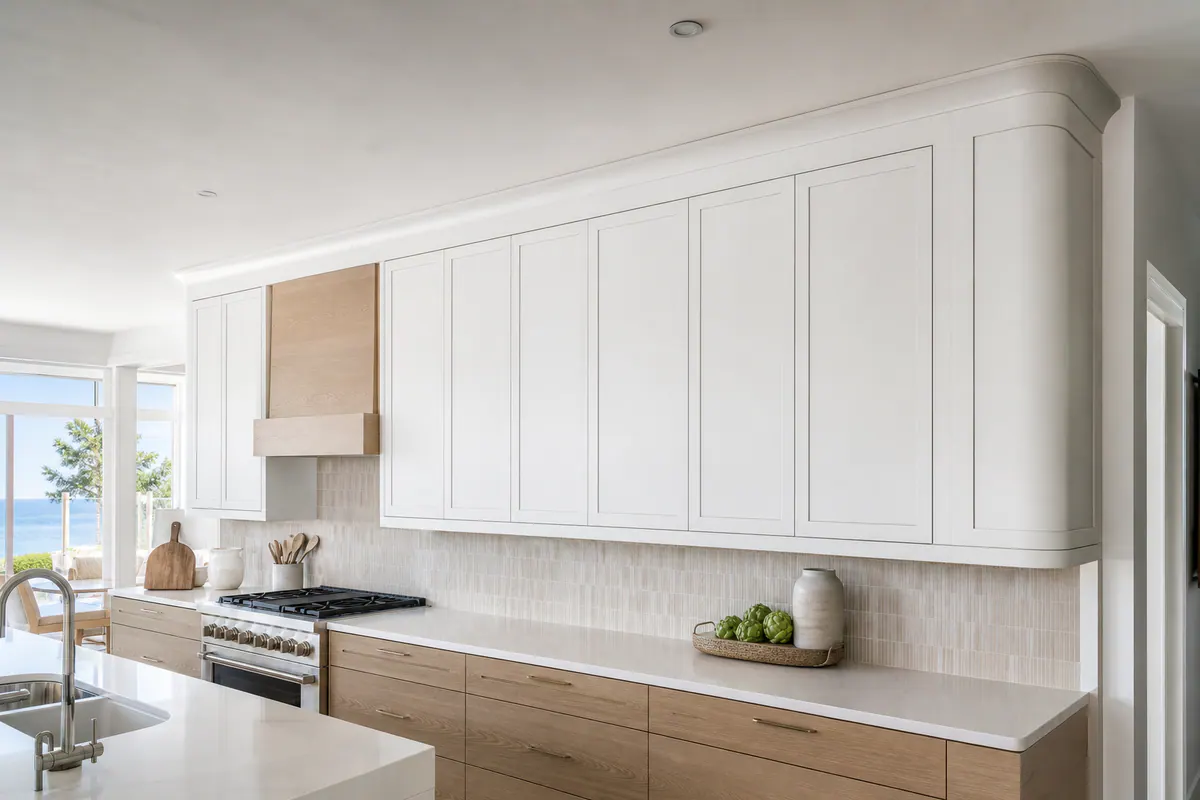
Cabinet trim Siesta Key homeowners choose can make standard cabinetry feel deliberately designed for the room. This finish-carpentry layer adds the clean transitions that separate a basic installation from a tailored one: a crown detail can visually close the space above upper cabinets, a finished panel can give an exposed cabinet end a furniture-like appearance, and a trimmed shelf edge can make open storage look intentional rather than incomplete.
Built-in trim applies the same thinking to bookcases, media cabinetry, window seating, and vanities. Precise scribing, the custom shaping of a trim piece to follow a wall or ceiling, helps the finished work meet surfaces that are not perfectly straight. That detail matters in rooms where a narrow shadow line, uneven gap, or raw edge would otherwise remain visible.
For bright, relaxed Siesta Key interiors, coastal finish carpentry can stay simple: square-edged details, restrained shaker-style lines, subtle painted crown, or natural wood accents in protected dry areas. Material and finish choices should suit the room's moisture exposure, air-conditioning cycles, and sunlight rather than applying one trim solution everywhere.
Trim enhances sound existing or newly installed cabinets; it does not repair failing boxes, replace damaged cabinetry, or substitute for a full kitchen remodel. Its role is the visible finishing layer that brings cabinetry, shelving, and vanities into alignment with the room's architecture.
Cabinet Trim Upgrades That Add a Finished, Built-In Look
The most effective upgrade often starts at the gaps and exposed edges that draw the eye. Cabinet crown molding runs along the top of upper cabinets, closing the open area below the ceiling and giving the cabinetry more vertical presence. It works especially well where cabinets stop short of the ceiling or where a room needs a stronger top line. For lower ceilings or compact cabinet runs, a slim, simple crown usually looks more proportional than a deep, layered profile.
- Light rail is the narrow trim installed beneath upper cabinets. It gives the cabinet underside a finished edge and can hide the direct view of under-cabinet lighting, wiring channels, or mounting hardware. A small square or eased-edge rail keeps the effect clean while still providing useful visual coverage.
- Filler panels and scribe molding solve the awkward transition where a cabinet meets an uneven wall. A filler is a matching panel that takes up planned space at the side of a cabinet; scribe molding is a narrow finishing piece shaped to follow wall irregularities. Together, they prevent a conspicuous wedge-shaped gap without forcing cabinet doors or drawers too close to a wall.
- End panels and applied molding turn a visible cabinet side into a deliberate furniture-style surface. A finished panel can match the door finish, while applied molding adds a framed or shaker-like pattern over a flat end. These details are most useful on island ends, exposed refrigerator surrounds, and cabinets that face an adjoining living area.
- Toe-kick trim finishes the recessed base below floor cabinets. It creates a consistent line across a cabinet run and avoids the unfinished look of visible gaps or mismatched base material at the floor.
For custom cabinet trim Siesta Key homes can carry comfortably, profile scale matters as much as ornament. Painted cabinetry with a subtle crown, clean end panels, and a neat toe kick suits a bright kitchen without making it feel busy. More decorative cabinet molding can be effective in a larger, traditional room with taller ceilings, but it can overwhelm narrow uppers, simple slab doors, or a relaxed contemporary layout. Clean miters, consistent reveals, aligned panel details, and tight paint or caulk lines are what make the selected trim read as part of the cabinetry rather than an add-on.
Built-In Shelving Trim That Looks Seamless With the Room
A bookcase or media wall feels built in when its outer edges resolve into the room's existing lines instead of stopping as a separate box. A face frame creates a visible border around cabinet openings, and shelf-edge trim covers the front edge of each shelf so a 3/4-inch panel reads as a purposeful, thicker detail. On a media wall beside cased openings, matching the face-frame width to nearby door casing, or using the same quiet square edge, helps the shelving share the room's visual rhythm.

- Panel returns carry a finished side from the front edge back to a wall, ceiling, or adjacent opening. They are especially useful at the exposed side of a window-seat cabinet or tall bookcase, where an unfinished plywood or cabinet-box edge would remain visible from the room.
- Scribe molding is a narrow strip fitted at the wall-to-unit joint. It can be trimmed to follow a wall that bows inward or outward, leaving a tight, controlled seam rather than a tapered gap covered by a broad bead of caulk.
- Baseboard integration determines how the built-in meets the floor line: the existing base can return neatly into the unit, continue across a window-seat face, or stop at a deliberate plinth. Carrying the same base profile across adjoining surfaces prevents an awkward break at the storage cabinet.
- Crown transitions finish tall shelving at the ceiling. A modest crown can align with existing ceiling trim or return into a finished side panel, while a flat top strip is often the cleaner choice for a low ceiling or a contemporary floating-shelf composition.
Layout also shows in the small alignments: shelf openings should repeat at intentional intervals, door and drawer reveals should remain even, and vertical stiles should land in relation to a television, window, or adjacent casing rather than at random. Where a ceiling rises or dips, a fitted top strip, tapered scribe, or restrained crown transition absorbs the variation more cleanly than an oversized caulk line.
For built-in trim Siesta Key homeowners want to feel calm rather than ornamental, painted square-edge shelf fronts, slim shaker framing, finished end panels, and crisp returns offer a flexible coastal look. Natural wood shelf accents can bring warmth to protected dry spaces, while the painted face frame and wall transitions keep the custom built-in visually connected to the architecture.
Vanity Trim and Material Choices for Moisture-Prone Spaces
A vanity has less room to hide an unfinished edge. A finished end panel can cover the exposed side of the cabinet; a fitted base trim can give the unit a deliberate floor line; and restrained applied molding can add dimension to a plain door or drawer front without making a compact bath feel crowded. Where a vanity stands apart from the wall, these details are especially useful for turning a cabinet box into a furniture-like piece.
Mirror-frame coordination keeps the composition from feeling pieced together. A simple square mirror frame may echo a shaker vanity, while a slim top cap or modest crown can give a taller cabinet surround a finished stopping point. In a low-ceiling bath, a clean flat cap is often the better choice; heavier crown can overwhelm a short vanity or compete with nearby tile.
- Paint-grade wood is a practical choice for painted vanity trim when a crisp profile and smooth, prepared finish are the priority. It suits simple rails, caps, and applied details, provided exposed cut edges and joints receive careful sealing.
- Moisture-resistant MDF can provide very smooth painted faces and consistent edges for interior trim kept clear of routine splash and standing water. It is not a stain-grade substitute, and damaged or exposed edges deserve particular attention.
- Stain-grade solid wood offers natural grain and richer visual variation for a protected dry-area accent. Because wood can move with changing conditions, joint layout and finish selection matter as much as the species itself.
- PVC trim is a strong painted option for details nearest higher-exposure areas, such as a base detail beside a wet floor. Its painted appearance differs from natural wood, so it is generally a weaker fit when a stained grain match is the goal.
For vanity trim Siesta Key homeowners can live with comfortably, there is no universally moisture-proof choice. A durable result depends on selecting a material for its actual exposure, priming or sealing cut edges, allowing sensible movement at transitions, keeping trim out of standing water, and maintaining bathroom ventilation and finishes over time. Clean painted panels and a restrained profile often deliver the relaxed, tailored look without asking decorative trim to do more than the room conditions allow.
Choosing Coastal Profiles, Colors, and Finish Details
In a bright Siesta Key interior, the most convincing coastal look usually comes from restraint. A simple cabinet crown with a soft curve or small stepped edge adds a finished top line without turning the room into a theme. Flat-panel ends and square-edged shelf fronts keep the architecture calm, while applied molding works best as a narrow frame that gives a plain panel just enough shadow and dimension.
Scale determines whether those details feel tailored or heavy. Taller rooms can carry a deeper crown or a layered combination of top cap and crown, especially when nearby room crown and door casing have similar visual weight. Compact kitchens, baths, and condos generally benefit from lower-profile trim: a slim crown, flat cap, or clean shaker-style edge preserves breathing room and avoids making upper cabinets appear oversized. Cabinet crown molding Siesta Key homeowners select should relate to the cabinet height and the room's existing trim rather than stand apart from it.
Color and sheen complete the effect. Warm whites and soft painted neutrals can brighten cabinetry while still feeling less stark than a cool, pure white. A painted finish can carry across cabinet trim, face frames, and surrounding millwork for a unified look; matching every surface exactly is not required, but undertones should not fight. Hardware and lighting matter here as well: brushed metal hardware and warm lighting can soften a crisp painted palette, while high-contrast black hardware makes each profile read more distinctly.
Natural stain-grade accents bring welcome warmth when used selectively in protected dry spaces, perhaps on open shelves, a mantel-like top, or a small built-in detail. View paint and stain samples beside the cabinet door, wall color, flooring, casing, and lighting before choosing. That comparison reveals whether a finish supports the room's relaxed character or makes the new trim look like an unrelated addition.
What Quality Cabinet and Built-In Trim Installation Involves
Field measurement is where a finish carpenter separates a planned detail from a piece of molding forced into place. The cabinet run is measured at several points, along with ceiling height, out-of-level ceiling lines, wall bows, door swings, and the solid cabinet rails or framing available for attachment. A full-scale profile sample makes the decision tangible: a crown may require a straight top build-out so it lands level, while a flat cap can better absorb a ceiling that rises across a short cabinet run.
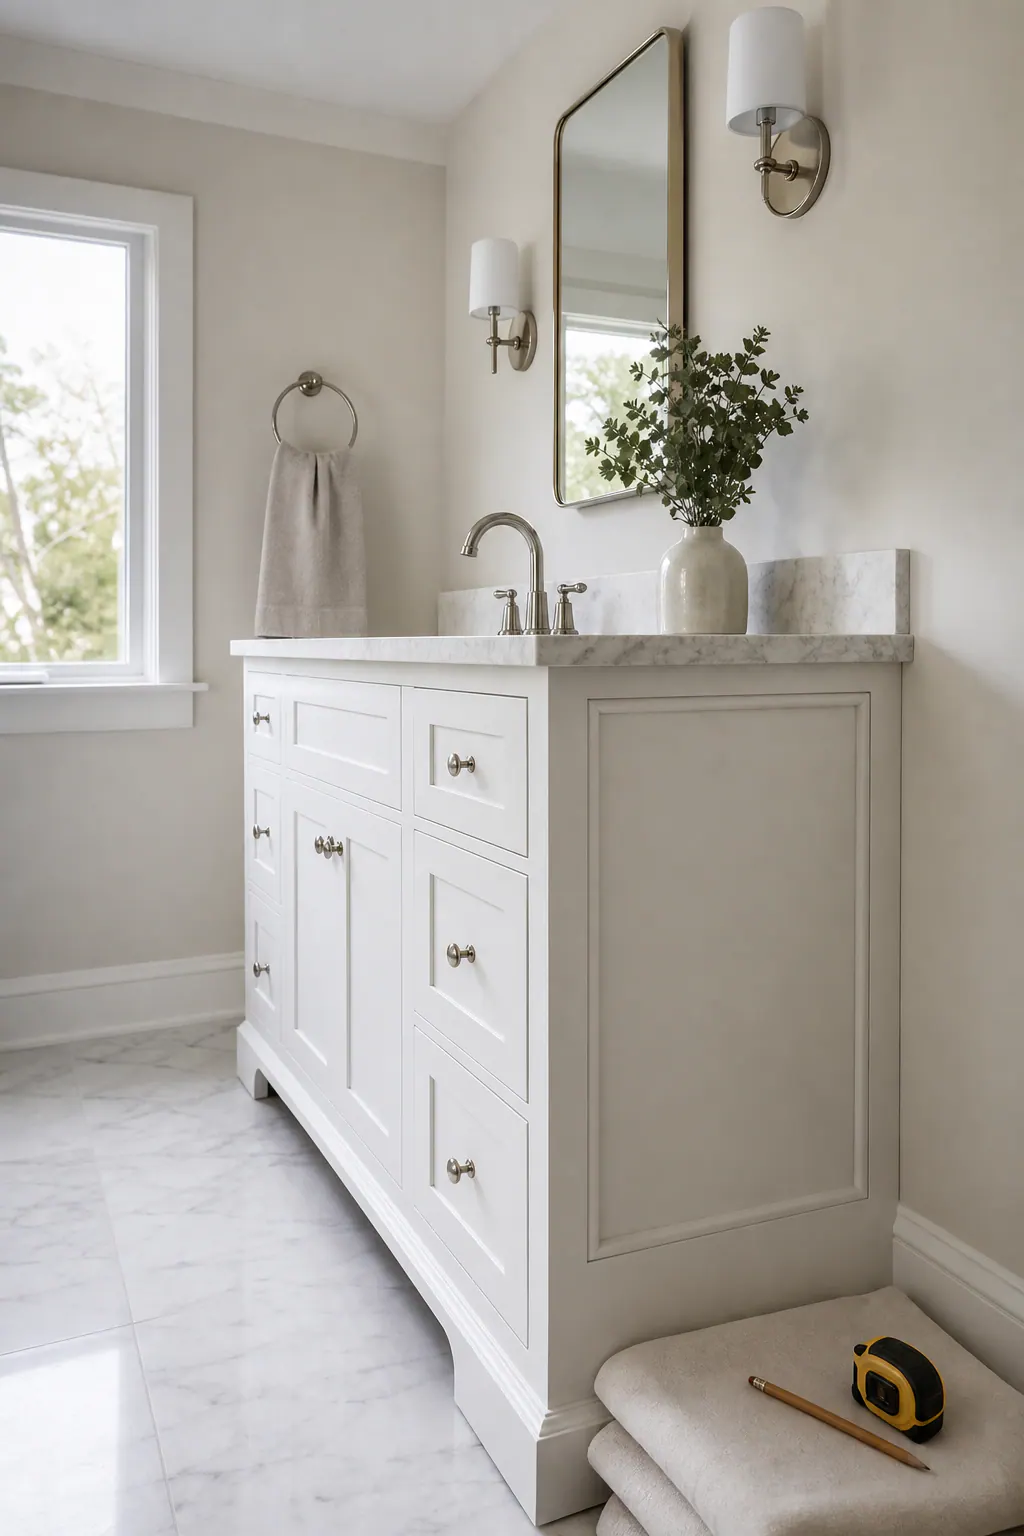
Components should be test-fitted before fastening, including crown lengths, finished end panels, shelf fronts, and fillers. A scribe piece is a narrow strip trimmed to follow an uneven wall; it creates a deliberate wall-to-built-in transition rather than leaving a jagged gap. Fillers belong in planned locations, such as beside a cabinet that needs clearance from a wall, and should be proportioned to adjacent stiles instead of becoming a wide patch. Clean miters keep inside and outside corners crisp, while returns turn an exposed molding end back toward the cabinet so crown, light rail, or shelving trim does not stop with raw end grain visible.
Fasteners are placed through concealed edges or solid attachment points to avoid scars on finished faces. After installation, nail holes are filled, paint-grade wall transitions receive a fine caulk line, and surfaces are sanded before primer and finish touch-up. Stain-grade trim demands especially tight joints because caulk and filler remain more visible than they do beneath paint. The close-up standard for custom cabinet trim Siesta Key homeowners should expect is simple: even reveals around doors and panels, aligned shelf edges, tight joints, smooth sheen from old surface to new trim, and intentional, not accidental, adjustments where walls or ceilings wander.
Plan Cabinet Crown, Vanity Trim, or Built-In Finishing Details
To turn those measured conditions into a workable scope, start with photos of each cabinet run or built-in, rough width and ceiling-height dimensions, and finish preferences. A photo of the gap above upper cabinets, a refrigerator-side cabinet end, or the underside of wall cabinets helps identify whether crown, an end panel, or a light rail is the useful detail.
A Siesta Key site visit can review cabinet boxes, ceiling lines, wall transitions, adjacent casing, and how the room is used. A slim painted crown or square cap can suit a lower kitchen ceiling, while shelf-edge trim gives thin-looking open shelves a more substantial face. In a bath, vanity trim materials and finish details should be selected for splash-prone conditions; natural wood accents are better reserved for protected dry-space built-ins.
For cabinet trim Siesta Key homeowners want tailored to the room, reach out with photos, dimensions, finish samples, and the visual problem you want solved. The detail plan can size crown, panels, light rail, and shelving trim to the actual cabinet proportions and exposure conditions, not treat stock molding as a one-size-fits-all answer.
Plan the next step
Compare the broader Cabinet and Built-In Trim service.
Review the Siesta Key, FL service area for local planning context.
When you are ready, request a free estimate with the rooms, trim goals, city, and available photos.
FAQs
Can crown molding be added to existing kitchen cabinets?
Yes, cabinet crown molding can be added to sound existing upper cabinets to close the gap below the ceiling and create a stronger top line. It is most effective when cabinets stop short of the ceiling, and slim, simple profiles suit lower ceilings or compact cabinet runs.
What is the difference between cabinet crown molding and light rail molding?
Cabinet crown molding installs along the top of upper cabinets to finish the ceiling transition and add vertical presence. Light rail installs beneath upper cabinets to finish the underside and conceal direct views of under-cabinet lighting, wiring channels, or mounting hardware.
How do you make built-in shelves look seamless with the wall?
Use face frames, finished panel returns, shelf-edge trim, and scribe molding at wall joints. Scribe molding follows wall irregularities, while shelf-edge trim covers the front of a 3/4-inch shelf panel so it appears thicker and intentionally finished.
What should you look for in quality cabinet and built-in trim installation?
Look for even door and panel reveals, aligned shelf edges, tight miters, concealed fasteners, and smooth paint or stain transitions. Quality installation also uses test-fitted components, properly proportioned fillers, scribed wall joints, and returns that hide raw molding end grain.
Should bathroom vanity trim be made from wood, MDF, or PVC?
Choose paint-grade wood for crisp painted profiles when cut edges and joints can be carefully sealed, and use moisture-resistant MDF only where it stays clear of routine splash and standing water. PVC is the stronger painted option near higher-exposure areas such as wet floors, while stain-grade solid wood is best reserved for protected dry-area accents.