
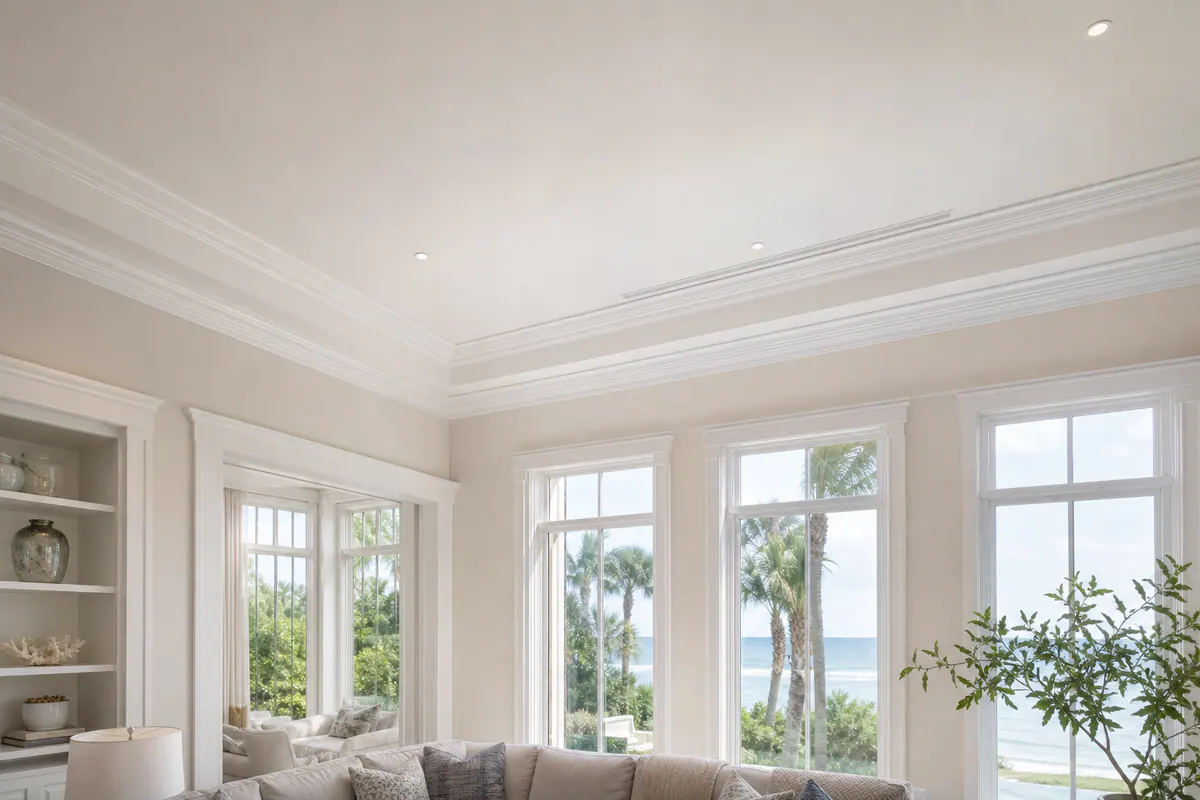
Crown Molding That Completes a Refined Casey Key Interior
Crown molding is most successful when it feels like part of the room's architecture, not an add-on at the end of a renovation. It creates a deliberate transition where wall meets ceiling, giving painted interiors a finished edge and helping ceilings, door casings, cabinetry, and nearby millwork read as one considered composition. In light-filled Casey Key homes, that quiet continuity can carry more presence than an overly ornate detail.
For crown molding installation in Casey Key, the visible result begins with proportion. A shallow, simple profile can keep a clean-lined room airy, while a deeper or built-up profile adds visual weight to a taller, more formal space. Neither is inherently better: the right choice relates to ceiling height, the scale of existing trim, and how much definition the room can comfortably hold.
Installation quality determines whether that choice looks intentional. Balanced projection along the ceiling line, closely fitted corners, and a controlled paint finish allow the profile to appear continuous rather than pieced together. Walls and ceilings are not always perfectly straight, so site conditions, joinery planning, and finish preparation all shape the final impression. The aim is luxury trim that frames the room with restraint, crisp where it should be crisp, seamless at a glance, and appropriate to the home rather than competing with it.
Selecting a Crown Profile That Fits the Room
Begin by looking upward and outward: ceiling height matters, but so do the room's width, daylight, furnishings, and the trim already in view. A crown profile that feels substantial in a compact bedroom may disappear above an open living area, while a large decorative treatment can make a lower-ceilinged room feel top-heavy. The goal is a molding scale that gives the ceiling line definition without becoming the room's loudest feature.
- Simple one-piece crown uses one continuous molded board, often with a clean curve or restrained stepped edge. It suits standard-height ceilings, streamlined cabinetry, and contemporary coastal interiors where a quiet shadow line is more valuable than ornament. It can look underwhelming in a tall great room if surrounding casings and baseboards carry much more visual weight.
- Cove-forward profiles place a broad concave curve at the face of the molding. That curve softens the wall-to-ceiling transition and works well with relaxed, painted interiors. A restrained cove can feel tailored beside simple square-edged door trim; a heavily layered version may conflict with similarly plain built-ins.
- Stepped or multi-piece assemblies combine separate moldings to create greater depth, projection, and a more architectural ceiling line. They are often a strong choice for elevated or vaulted ceilings, where a single narrow crown can be visually lost. Their tradeoff is presence: adding layers simply because the ceiling is tall can create an overly formal band in an otherwise minimal room.
- Traditional decorative crowns incorporate details such as dentils, beads, or pronounced ogees. These profiles can support classical casings, paneled walls, and formal furniture, but ornate shapes competing with flat-panel cabinetry and spare furnishings are a weak signal.
For custom crown molding Casey Key homes, compare the proposed profile against baseboards, window and door casings, and any built-ins in the same sightline. Matching every detail exactly is unnecessary; aligning their visual weight is what makes the composition feel settled. In many contemporary rooms, the more sophisticated crown profile is the simpler one, sized confidently enough to register, yet calm enough to let the architecture and coastal light lead.
Choosing Crown Molding Materials for Coastal Interiors
The finish you want should lead the material conversation. A smooth, opaque painted ceiling line leaves room for paint-grade trim choices, while a clear or lightly tinted finish puts the material's grain, color variation, and joint work on display. The room's interior conditions, the lengths needed to span each run, and the trim already installed all matter more than a blanket label of "coastal-friendly."
- MDF crown molding is a dense, smooth engineered option commonly chosen for painted interiors. Its uniform face can suit a crisp enamel finish and detailed painted profiles without the visible grain of wood. It is most at home where interior conditions are controlled and the installation plan accounts carefully for the product's intended use. A long, uninterrupted wall may also call for deliberate seam placement, so joins do not land in the most visible sightline.
- Solid wood molding is the natural choice when crown will be stained, clear-coated, or matched to existing wood casings, beams, cabinetry, or paneling. Grain and color make each length distinct, which can be a strength in a warm wood interior but demands thoughtful selection across corners and scarf joints. Wood can also be painted; the practical question is whether its character is worth specifying beneath an opaque finish.
- Composite or specialty profiles can be useful where a project calls for a particular shape, a lightweight assembly, or a material suited to the specified location. These options are not interchangeable: some are intended only for paint, while others have limitations in available lengths, edge detail, fastening, or finishing. The useful comparison is the finished appearance at corners and seams, not the material name alone.
For crown molding installation Casey Key homeowners should evaluate the actual room before settling on a board. HVAC use, nearby moisture exposure, ceiling condition, and the time materials have to acclimate can affect the installation approach. A strong material specification also respects adjoining trim: painted MDF crown can look completely at home above painted casings, while solid wood molding may preserve continuity where a stained wood ceiling treatment or millwork is already the visual anchor.
What Professional Crown Molding Installation Looks Like
A custom-looking result is decided before the first length is cut. A finish carpenter begins by field-measuring each run, noting corner angles, ceiling changes, and the locations where a seam could be seen from the room's main approach. That layout turns a profile on paper into a practical plan for the actual room, rather than assuming every wall is straight, level, and square.
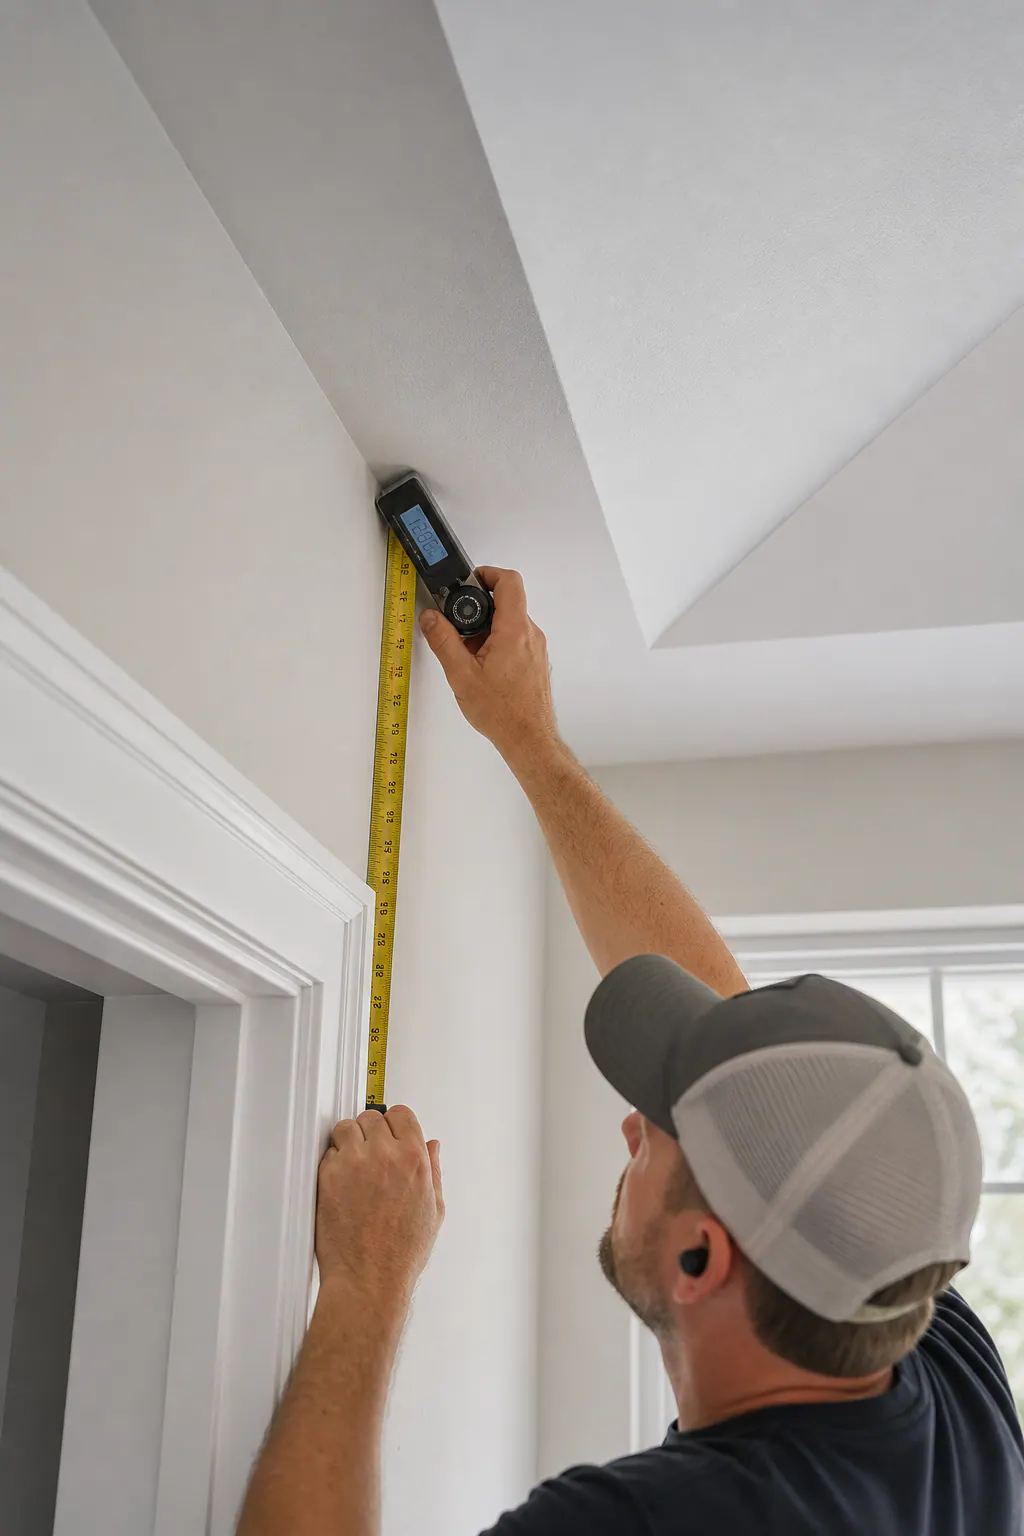
Inside and outside corners deserve particular attention because they sit at eye-catching breaks in an otherwise continuous ceiling line. Compound miters are angled cuts that account for crown's position against both wall and ceiling; they allow two pieces to meet at a corner. On inside corners, coping, cutting the profile of one piece to nest against the face of the other, can produce a more controlled visual fit than relying on two matching miters alone. Outside corners need equally crisp alignment so the profile's ridges carry around the turn without a shifted step or blunt-looking point.
Long runs call for planning, not simply adding another board wherever stock length ends. A restrained seam positioned away from a dominant sightline reads far differently than one dropped over an entry, a picture window, or a focal wall. Secure fastening and careful alignment keep the crown's projection consistent as it travels around the room, while small site adjustments help it follow real ceiling and wall conditions without looking forced.
Professional crown molding installation in Casey Key also means treating architectural interruptions as part of the composition. At a tray ceiling, the crown must turn and return cleanly at the change in plane. Around beams, tall cabinetry, and built-ins, the installer plans terminations and transitions so the molding appears intentionally connected rather than abruptly stopped. The most revealing test is simple: corners, seams, and returns should let the eye follow the profile, not draw attention to the individual pieces that created it.
Working With Uneven Ceilings, Beams, Trays, and Existing Trim
The room itself often decides whether a single crown profile is enough. A ceiling that rises or dips, a wall that wanders slightly, or a vaulted plane can make a sharply detailed, narrow crown emphasize irregular lines. A profile with a broader face or a simpler silhouette can be more visually forgiving, while a built-up treatment, separate trim pieces layered to create a larger transition, can establish a deliberate level line where the architecture supports that added presence.
Tray ceilings and exposed beams need an intentional hierarchy. Crown may follow the tray perimeter to reinforce its stepped shape, or stop and return at a beam so the beam remains the dominant feature. Tall cabinetry, built-in shelving, and window walls create similar decisions: ending crown with a small return makes the termination look resolved, whereas an arbitrary cutoff can make the room feel unfinished. On angled or vaulted ceilings, the proposed path should be reviewed in the room rather than assumed from a flat-ceiling layout.
Legacy trim deserves the same scrutiny. Crown does not need to duplicate every casing curve or baseboard detail, but their widths and visual weight should feel related from the main sightlines. A substantial crown above thin, plain casings may call for a quieter profile or selective casing updates; a balanced set of transitions reads more composed.
A caulked finish can soften minor paint-grade transitions after pieces are properly fitted. It should not be used to disguise wide gaps, misaligned profile ridges, or a crown forced to follow a visibly uneven ceiling. Those conditions call for a candid layout decision, adjusting the design, adding a build-up, or accepting an architectural variation, before paint makes the issue harder to judge.
The Finish Details That Make Crown Molding Read as Custom
Light traveling across a ceiling can reveal finish work that looks acceptable from the floor at first glance. Luxury trim in Casey Key is defined by disciplined consistency: the profile's ridges line up across every joint, its projection from the wall stays even, and corners read as clean transitions instead of patched interruptions. Seams should be placed discreetly where the room's sightlines make them less prominent, not clustered at the most visible wall.
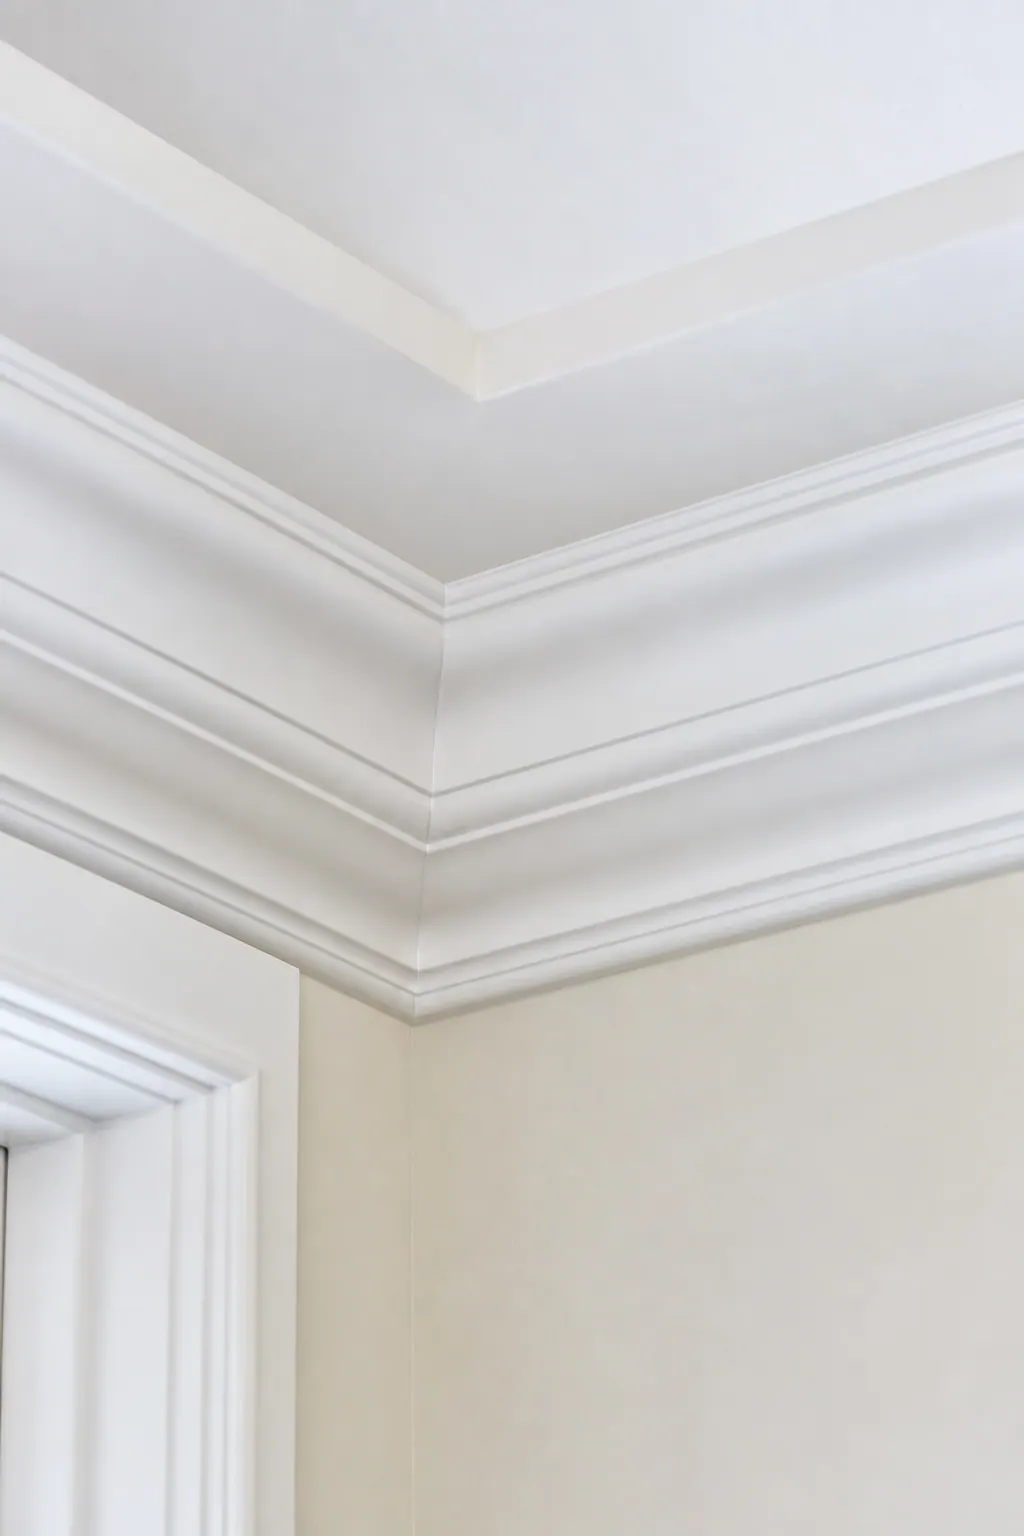
For paint-grade trim, surface preparation is part of the installation rather than a last-minute cosmetic step. Fasteners are set slightly below the face so their holes can be filled without leaving proud metal or broad depressions. Filled areas are sanded smooth, minor fitted transitions receive restrained caulk, and primer is used where the selected material or repair work calls for it. The final paint system should be coordinated across the crown, ceiling, and adjacent trim so sheen and color changes look intentional. A heavy, overfilled bead or paint bridging an open joint is not refinement; it usually draws more attention in daylight.
Stain-grade work has a different standard: grain direction, color variation, clean joinery, and careful finish matching remain visible. Because opaque paint cannot conceal those details, exposed faces and joints need to be judged more critically before finish is applied.
- Follow the ceiling line and look for a continuous profile without shifted ridges.
- View inside corners, outside corners, and seams from several angles for tight, composed joints.
- Use daylight and raking light, light cast along the surface, to spot uneven sanding, visible fasteners, or excess filler.
- Look for a uniform painted or stained finish, with clean edges and no isolated glossy or dull repair patches.
Plan Crown Molding Installation Around Your Home’s Architecture
A productive room review starts with a small set of visual references rather than a profile picked from a catalog. Note ceiling heights and room dimensions, then photograph the door and window casings, baseboards, cabinetry, and any existing ceiling detail. Those references show whether a proposed crown should carry more visual weight, stay restrained, or transition into adjacent millwork.
Also decide early whether the goal is an opaque painted finish or a stained finish. Paint-grade crown allows the ceiling line to read as one controlled color field; stain-grade crown makes grain, color matching, and joinery part of the design. Include tray ceilings, beams, soffits, tall built-ins, and open room connections in the conversation, since each may require a return, termination, or change in profile treatment rather than a simple run around the perimeter.
For crown molding installation Casey Key homeowners can bring those measurements, photos, and finish preferences to a qualified finish carpenter Casey Key for a room-by-room assessment. The useful outcome is a defined scope that aligns profile scale, material choice, transitions, fitting approach, and finish expectations with the architecture already in place, so the completed molding reads as a considered part of the home.
Plan the next step
Compare the broader Crown Molding Installation service.
Review the Casey Key, FL service area for local planning context.
When you are ready, request a free estimate with the rooms, trim goals, city, and available photos.
FAQs
What size crown molding looks right with 8-foot, 9-foot, and vaulted ceilings?
A shallow, simple crown profile helps standard-height 8-foot and 9-foot rooms stay airy and defined without feeling top-heavy. Taller or vaulted ceilings often need a deeper profile or multi-piece assembly so the molding does not disappear above the room.
What crown molding material is best for a humid coastal home in Casey Key?
Painted MDF is a smooth, dense option for controlled interior conditions and crisp enamel finishes, while solid wood is the preferred choice for stained or clear-coated trim. Material selection should also account for HVAC use, nearby moisture exposure, acclimation time, required run lengths, and adjoining trim.
Can crown molding be installed on uneven ceilings or plaster walls?
Yes, but the installer should field-measure each run and adjust the layout for walls and ceilings that are not straight, level, or square. Caulk can soften minor fitted transitions, but wide gaps, shifted ridges, and visibly uneven ceiling lines require design or build-up adjustments before painting.
Can crown molding be added around tray ceilings, beams, and built-ins?
Yes, crown can follow a tray ceiling perimeter, turn and return at beams, or terminate with a small return beside tall cabinetry and built-ins. Each transition should be planned so the molding looks intentionally connected rather than abruptly cut off.
What should I look for in a finish carpenter for custom crown molding?
Look for a finish carpenter who field-measures corner angles, ceiling changes, and seam locations before cutting material. Quality work includes tight coped or compound-mitered corners, discreet seams away from focal sightlines, consistent projection, aligned profile ridges, filled fasteners, restrained caulk, and a uniform final finish.