

Door and Window Trim That Makes Siesta Key Openings Look Finished
A consistent reveal, the narrow, even line between jamb and casing, is one of the first details that makes an opening look intentional. Casing bridges the seam where the wall surface meets the door jamb or window frame, while the unit itself handles the opening, closing, or glazing. In a dated condo, that border can hide a ragged drywall cut or exposed gap; in a renovation, it can help a replacement window belong with the rest of the room.
For interior trim in Siesta Key, the visual goal is coordination rather than ornament for its own sake. Flat casing creates a crisp, quiet outline that works with contemporary baseboards. Profiled casing adds shadow lines for a more traditional room. A wider surround or backband, an added molding around the outer edge of casing, makes an opening more prominent and can echo crown molding or paneled wall details.
A clean result is easy to recognize: even reveals around the jamb, joints that meet without forced gaps, and casing that transitions neatly into the wall and nearby trim. Heavy caulk used to disguise uneven cuts is a weaker finish signal than a properly fitted joint.
Coastal suitability is not a one-material promise. It comes from matching the trim product to the interior location and opening condition, using sound installation details, and applying a paint system suited to the selected surface. That combination creates a durable, paint-ready border instead of simply covering a problem at the wall.
Why Humidity, Moisture Exposure, and Substrate Condition Matter
Before new casing goes on, the opening needs to be stable and dry enough to finish, not merely able to be covered. Indoor trim can still be affected by seasonal humidity, air-conditioning cycles, and moisture that has traveled in around a window or door opening. A past leak may leave staining, softened drywall or wood, separated paint, or recurring cracks at the wall-to-frame seam. Those are repair signals, not cosmetic details to bury behind a wider board.

A useful site inspection looks at the jamb as well as the wall: loose jamb sections, damaged edges, cracked old caulk, irregular drywall, and openings that are out of square all change how the casing should be fitted. Minor wall variation can often be handled with a scribe fit, in which the edge of the trim is carefully shaped to follow the wall rather than leaving a wandering gap. That is different from forcing a bowed piece tight or filling a large void with caulk. Where the frame and wall meet, a narrow, flexible caulked seam can create a tidy paint line while allowing the finish transition to remain visually controlled.
Reveals deserve the same attention. The reveal is the intentional strip of jamb left visible beside the casing; keeping it consistent makes an opening look settled even when the surrounding wall is imperfect. If one side of a replacement window has a sound but uneven drywall edge, careful layout, scribing, and modest surface repair may be enough. If the jamb is loose, materials are soft, or moisture damage remains active, trim installation should wait for the underlying repair. That distinction keeps coastal trim in Siesta Key from becoming a temporary cover-up and gives the finished paint work a better surface to hold together.
Choosing Trim Materials for Siesta Key Interiors
Material choice should follow the room and finish goal rather than a one-size-fits-all rule. For a painted living room, bedroom, or hall, paint-grade solid pine offers crisp edges, can take a range of casing profiles, and allows small dents or installation marks to be filled before painting. Finger-jointed pine is a paint-grade alternative made from shorter wood sections joined together; it can be a practical choice for long runs, but its joints need thorough prep so they do not telegraph through a smooth paint finish.

MDF casing has a very smooth, uniform face that suits a clean painted look and detailed profiles. It can be a sensible fit for protected, climate-controlled interiors where the opening and surrounding wall are dry and stable. Its tradeoff is that exposed edges and damaged areas are less forgiving when moisture reaches them, and a hard impact can bruise or crush the profile more readily than solid wood. MDF is therefore better reserved for lower-risk interior locations than for an opening with unresolved moisture concerns or frequent wet cleaning.
PVC and similar moisture-tolerant trim products shift the decision toward locations where exposure risk is higher. These materials are commonly selected for their nonwood composition and paintable surface, though the available profiles, fastening approach, joint treatment, and paint system may differ from wood-based casing. A well-planned door and window casing Siesta Key project may use PVC at a moisture-prone transition while keeping painted wood or MDF in consistently protected rooms, so the material changes only where the conditions justify it.
Stain-grade wood belongs where the grain itself is part of the design, such as a warmer traditional interior, a custom surround, or trim matched to existing woodwork. Clear finishing makes every joint, color variation, fastener repair, and board selection more visible, so it demands more deliberate material matching than painted casing. For any option, a good finish starts with square, supported joints and cleanly prepared cut ends; paint or stain should refine the work, not disguise weak fitting.
Casing Styles and Decorative Details for Doors and Windows
The profile around an opening sets the room's visual volume before color or furniture enters the picture. Simple flat casing is a square-edged board with little or no routed detail; its quiet outline suits contemporary coastal interiors, especially where walls, cabinetry, and floors already provide texture. Traditional profiled casing adds a shaped edge, such as an ogee or stepped contour, giving a door or window more shadow and form. It is often the natural choice when a renovation needs to continue existing millwork rather than introduce a competing style.

Wider craftsman-style trim uses broad, usually flat stock and deliberate horizontal lines. It can give taller doors and substantial windows a grounded presence, particularly when the casing width relates to a similarly robust baseboard. A header casing is the horizontal top member, sometimes wider or built up to create emphasis; an apron is the matching horizontal board below a window sill. Together, they can make a standard window read more like a designed architectural feature. For window casing Siesta Key updates in a compact condo, however, an oversized header or apron can crowd the wall area and make the room feel smaller.
Backbanded surrounds add a second, narrower molding outside the primary casing, creating a layered border and deeper shadow line. Decorative built-up details combine flat casing, backband, headers, and small molding elements for a more formal or custom appearance. These options suit traditional homes or focal openings, but they need enough wall space to read cleanly. A useful proportion check is to compare the proposed casing with nearby baseboards and crown: narrow casing beside a tall baseboard can look under-scaled, while a heavy surround around a small window can overwhelm it. Matching the existing profile family, board widths, and transition details keeps new door casing aligned with the rest of the interior rather than looking like an isolated upgrade.
What Professional Trim Installation and Paint-Ready Prep Should Include
A clean surround begins with layout, not caulk. Each opening is measured for width, height, square, jamb depth, wall variation, and the relationship to adjacent baseboards. When the jamb sits back from the finished wall, a jamb extension brings its face outward so the casing has a flat, stable surface to meet. The installer then marks a uniform reveal, cuts the head and side pieces to that layout, and dry-fits them before fastening. Tight miters should meet at the face without being pulled closed by fasteners; a forced joint is likely to open again as materials move.

Walls are not always flat, especially around older openings or prior renovations. Good Siesta Key door and window trim installation accounts for those irregularities through careful scribing, shimming, or small adjustments to the casing position while keeping the overall border visually balanced. Casing should also resolve intentionally at the floor: it may die into, sit on, or be coordinated with the existing baseboard rather than leaving an abrupt mismatch. A close inspection should show aligned profile lines, supported joints, and a consistent reveal, not wide gaps disguised with a heavy bead of caulk.
For paint-grade trim, finish preparation is part of installation. Nail holes are filled, repaired areas are sanded smooth, and paintable seams at the wall or between suitable trim components are caulked lightly for a continuous edge. Primer must suit the selected material and any filled or sanded areas, creating an even surface for the chosen paint sheen. Caulk can refine a narrow finish seam, but it cannot correct a loose jamb, a bad miter, or an unstable wall condition. Stain-grade work follows a different standard: grain, color variation, and joinery remain visible, so board selection, cuts, fastener placement, and sanding need to look deliberate before clear finish is applied.
Updating Existing Openings in Siesta Key Homes and Condos
A dated surround does not automatically mean the door or window itself needs to be replaced. When the existing unit operates properly and the jamb, wall surface, and nearby finishes can support new work, door and window casing Siesta Key projects can focus on removing old trim and fitting a new border around the same opening. That makes sense for a condo with narrow, builder-grade casing, a renovated room whose new baseboards no longer match the openings, or a window with an awkward drywall transition that needs a more deliberate finish.
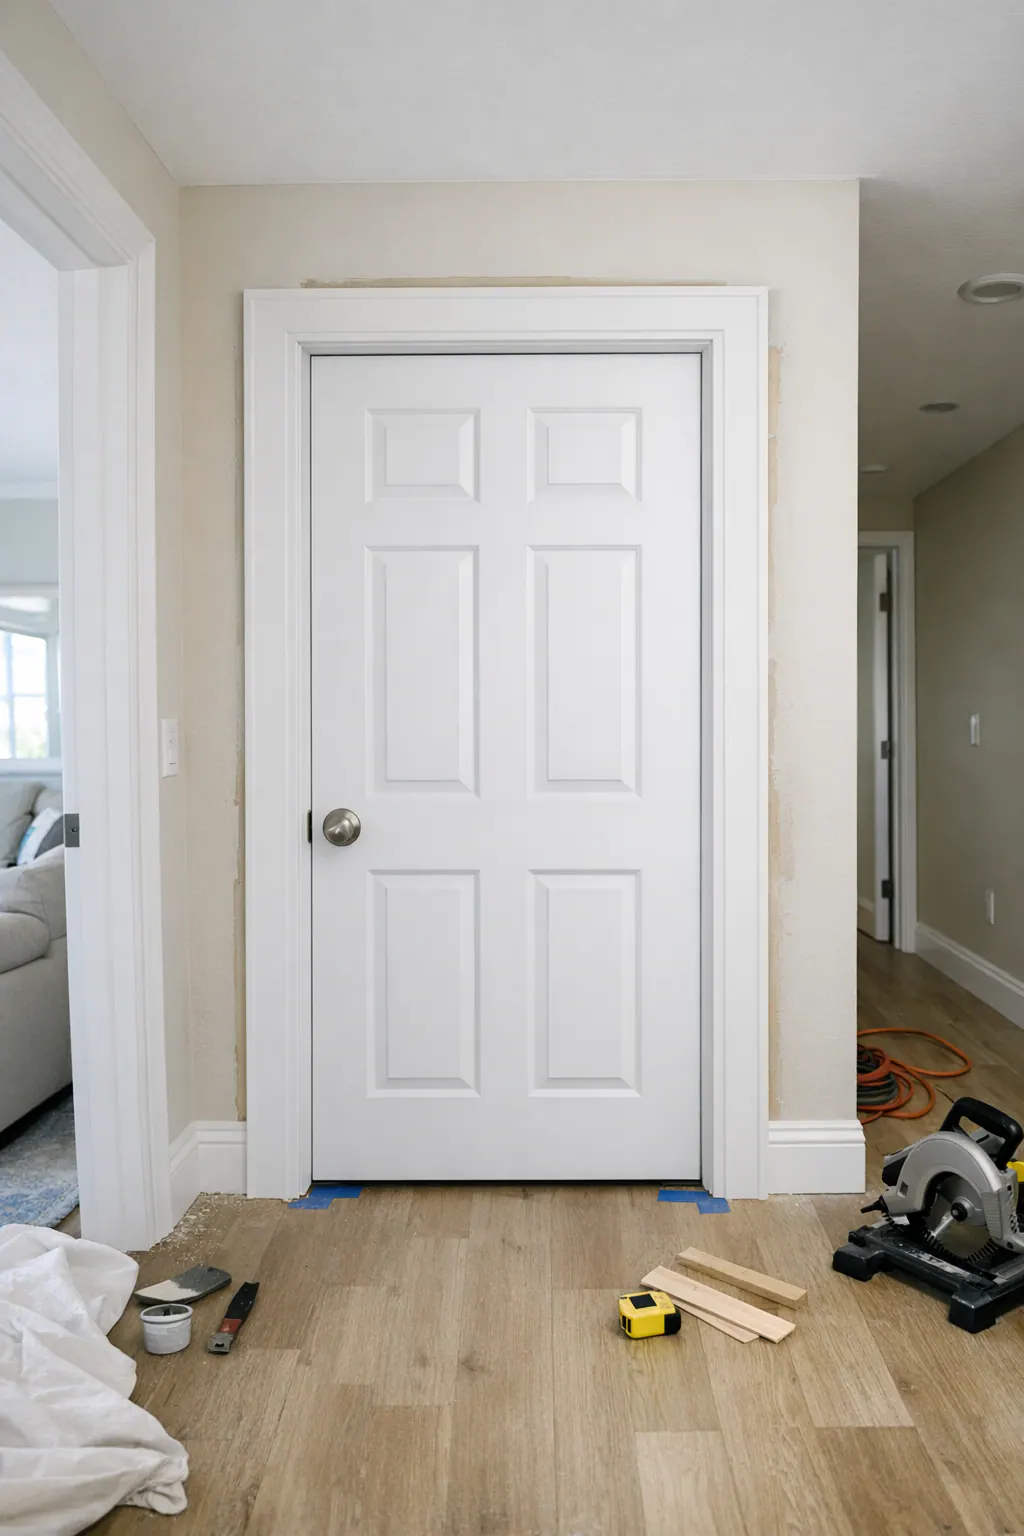
The planning visit should identify what will stay visible after the old casing comes off. Matching an existing profile may mean carrying the same casing width, edge detail, and paint color into one updated room; choosing a new profile may instead establish a coordinated look for several openings. Wall texture matters as well: smooth drywall can accept a crisp new paint line, while orange-peel texture, patched areas, or uneven paint may require localized repair and repainting beyond the casing edge. Flooring and baseboards determine how the new side pieces terminate, so a clean fit is planned rather than trimmed short around an obstacle.
In occupied homes, targeted interior trim work calls for practical protection around the opening. Furniture can be moved or covered, floors shielded from dust and tools, and nearby walls protected while old casing is removed. Paint coordination should be decided in advance: touch-up may be sufficient when colors and wall condition match, while a broader repaint can be the better visual choice when removal exposes old paint lines or repairs.
Condo scheduling adds another layer of coordination. Elevator reservations, work-hour limits, parking, material delivery routes, and association procedures vary by property and project scope, so those details should be settled before work is booked. The result remains focused interior trim work, not a door or window replacement project, while respecting the routines and finishes already in place.
Plan a Door and Window Trim Project in Siesta Key
Bring a few photos of the openings you want to change, along with inspiration images or a sample of nearby baseboard and casing. An on-site evaluation can compare those visual goals with the actual jamb depth, wall condition, existing paint lines, and any signs that moisture has affected the area.

The right recommendation may be smooth MDF for a dry, painted interior, paint-grade wood where a particular profile or repairable edge matters, or a moisture-tolerant product for an interior location with greater exposure concern. A simple flat surround keeps the update restrained; a layered backband or built-up header adds more presence. The useful choice is the one that fits the room, opening, and finish plan, not a default material or profile.
Request a trim installation Siesta Key consultation for your home or condo to review existing openings, painted casing, decorative details, material options, moisture-related concerns, and the paint-ready scope needed for a clean final transition.
Plan the next step
Compare the broader Door and Window Trim service.
Review the Siesta Key, FL service area for local planning context.
When you are ready, request a free estimate with the rooms, trim goals, city, and available photos.
FAQs
What is the difference between window casing, trim, and a jamb extension?
Casing is the trim board that covers the seam between the wall and a door jamb or window frame. A jamb extension brings a recessed jamb face outward to meet the finished wall so casing has a flat, stable surface to attach to.
Can new window casing be installed around existing windows?
Yes, new casing can be installed around an existing window when the unit operates properly and the jamb, wall surface, and nearby finishes are sound. Loose jambs, soft materials, active moisture damage, or unstable walls should be repaired before trim is installed.
How can trim installation create cleaner transitions around uneven walls or existing openings?
Installers use a scribe fit to shape the casing edge to follow minor wall variation while maintaining a consistent reveal beside the jamb. Small shims, localized wall repair, and a narrow paintable caulk seam can refine the finish, but caulk should not fill large gaps or hide bad miters.
Is MDF trim suitable for humid coastal interiors?
MDF is suitable for dry, stable, climate-controlled rooms because its smooth uniform face creates a clean painted finish. It should be avoided at openings with unresolved moisture or frequent wet cleaning because exposed MDF edges can be damaged by moisture and impacts can crush its profile.
How do you choose the best door and window trim material for a Siesta Key home?
Use paint-grade pine for repairable painted trim and flexible profile options, MDF for protected dry interiors, PVC for higher moisture-exposure locations, and stain-grade wood where visible grain is part of the design. Choose a casing width and profile that relate to nearby baseboards and crown molding so the opening does not look under-scaled or overly heavy.