
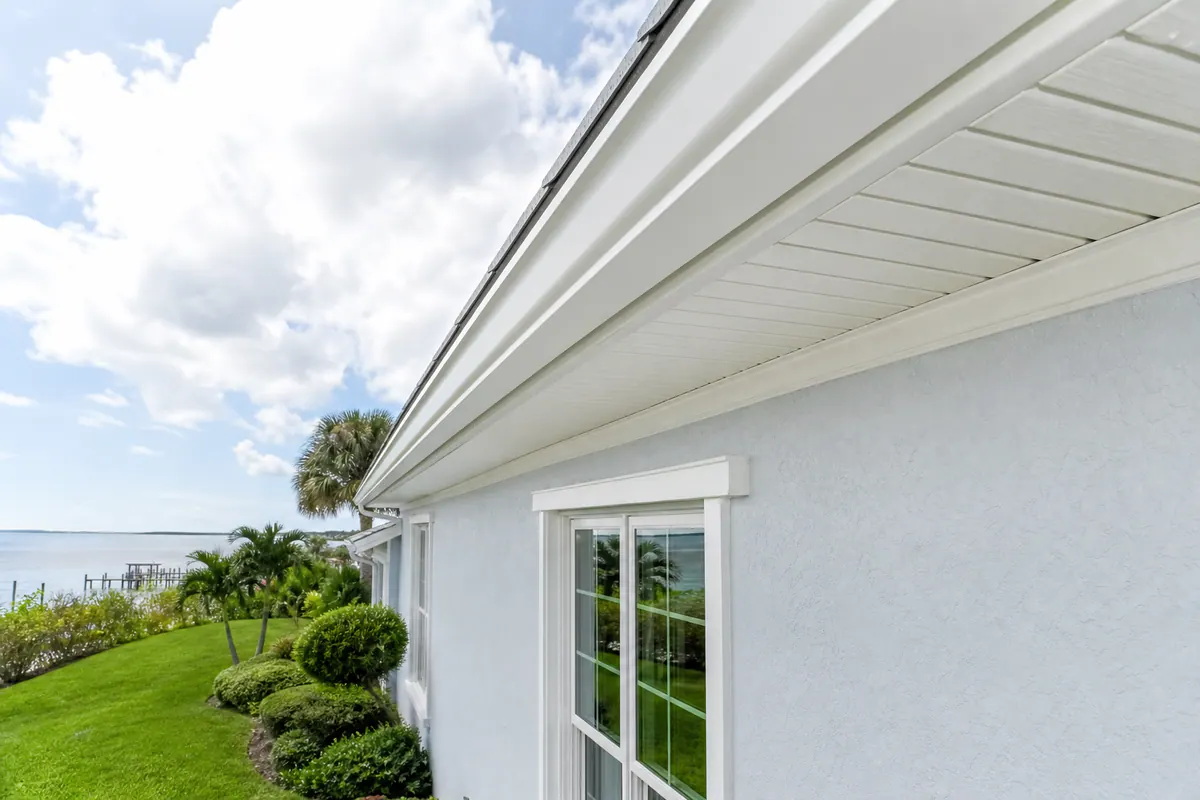
Why Exterior Trim Fails Faster on Casey Key Homes
On a Casey Key home, exterior trim is more than decorative carpentry: it closes and finishes vulnerable transitions around the roofline, walls, windows, and doors. Fascia and rake boards sit at highly exposed roof edges; corner boards and exterior casing frame joints between cladding and openings; soffit edges can hold moisture where airflow and drying are limited. Salt air, persistent humidity, strong sun, wind-driven rain, and repeated wet-dry movement can all work against these details.
That exposure often shows up first where water can linger or enter: seams at casing, board ends, fascia joints, and trim-to-siding connections. Faded paint on a broad, sun-facing surface may be a finish issue. Peeling that repeatedly returns at a joint, however, along with open caulk, staining below fascia, swollen edges, or soft wood, points to a moisture problem worth tracing beyond the paint film. Effective exterior trim repair in Casey Key addresses the affected board and the pathway that keeps it wet, so the repaired finish is not simply covering a recurring failure.
Signs Your Exterior Trim Needs Attention
A slow walk around the house after rain can reveal patterns that are easy to miss from day to day. Look for paint peeling in the same small area after repainting, especially at board joints, cut ends, and the lower corners of window or door casing. Broad, even fading is different: it may be limited to the finish, while repeated, concentrated failure suggests moisture is working at the trim or the joint behind it.
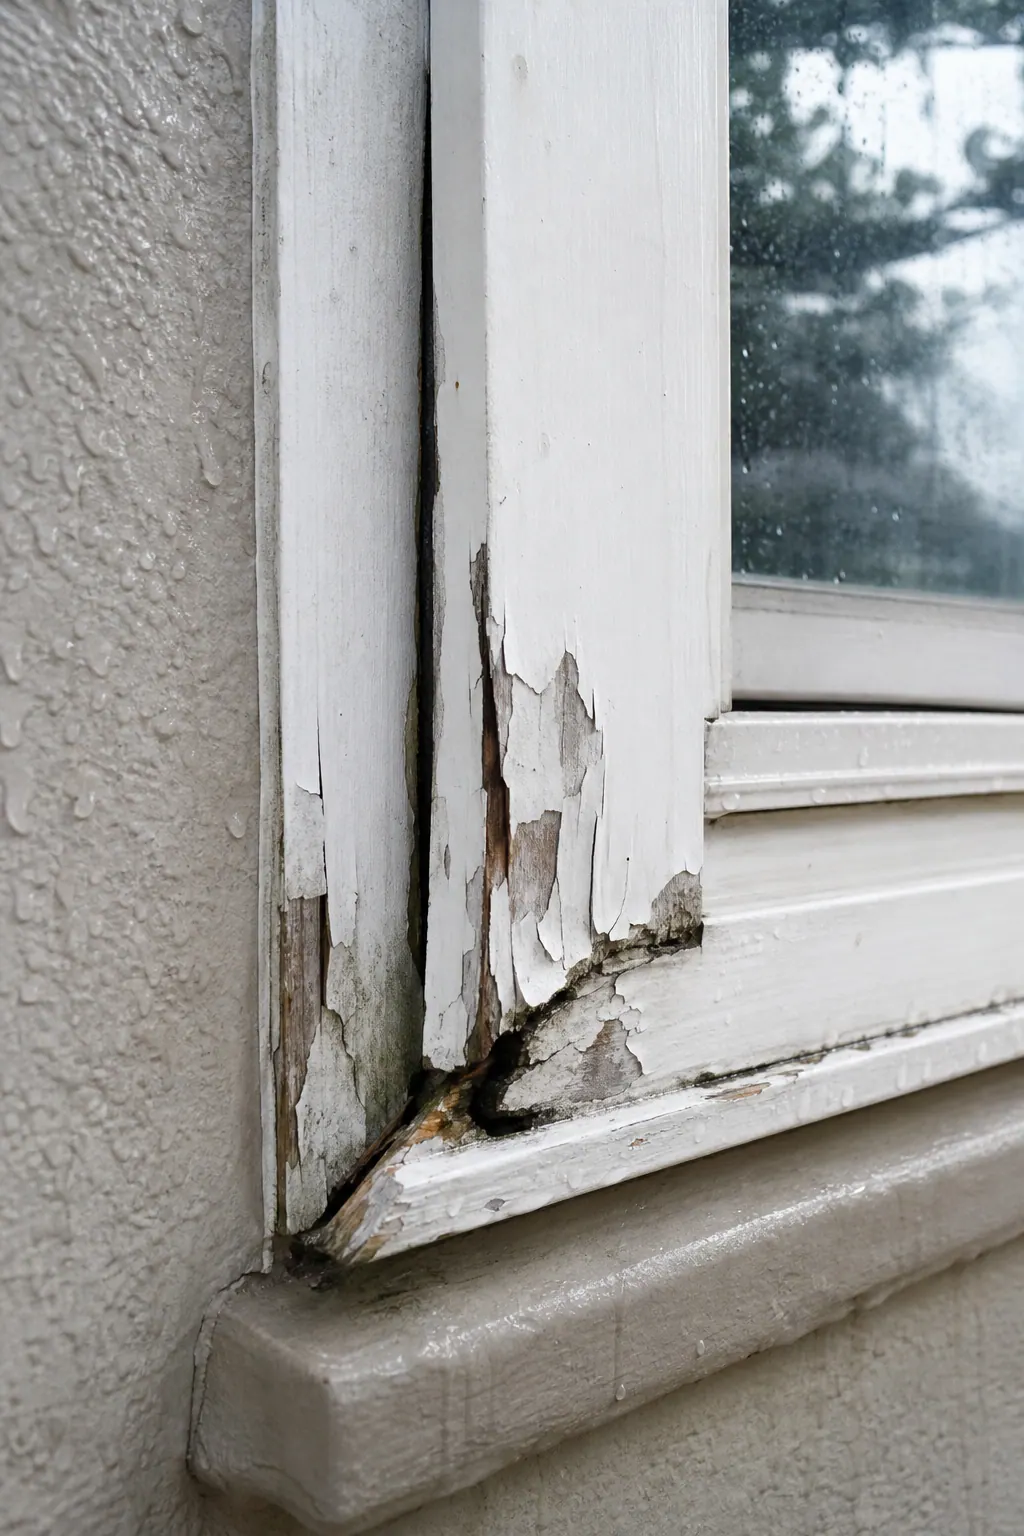
- Soft, crumbling, split, or swollen wood: Press gently only where it is reachable from the ground. Wood that gives under light pressure, flakes apart, or has edges that have puffed up has lost integrity; a painted surface cannot restore it.
- Open seams and failed caulk: Gaps where casing meets siding, where corner boards meet, or at fascia joints give water a route behind the visible face. Caulk that has pulled away, cracked, or is missing is a signal to inspect the condition of the materials on both sides.
- Movement at fasteners: Nail heads backing out, loose boards, or dark fastener marks can accompany trim that has shifted or stayed wet.
- Roof-edge staining: Streaks or discoloration on the wall below fascia, or deterioration at soffit edges, deserve attention because they can follow water traveling from above. This is often the starting point for fascia board replacement or soffit repair in Casey Key.
At windows and doors, inspect lower casing ends, miters, and the gap between trim and wall finish. Darkened joints, exposed end grain, and recurring paint blisters are stronger warning signs than a single hairline crack. Rotted exterior trim repair means addressing decayed material and the water path that fed it; adding fresh caulk or paint over an active leak may improve appearance briefly without stopping the underlying damage.
When Exterior Trim Can Be Repaired, and When It Should Be Replaced
The key decision is not how small the damaged spot looks from the curb; it is whether the trim and the material behind it remain sound once the affected area is opened. A localized repair can make sense when deterioration is confined to a short section, the surrounding board is firm, fasteners still hold securely, and adjacent sheathing or framing shows no moisture damage. The water route also needs to be corrected first, such as a separated joint or a small failed seal at an otherwise sound connection, before the repair is closed and finished.
Replacement is the more dependable scope when probing reveals soft wood beyond the visible blemish, decay at several joints, loose fasteners, or repeated paint breakdown in the same location. Those conditions indicate that the board is no longer providing a stable surface for a patch and may be allowing water farther into the assembly. For exterior trim repair in Casey Key, a sound repair means cutting back to solid material rather than filling over wood that has lost its strength.
- Repair a contained defect: A small damaged portion of casing or a limited board-end repair may be appropriate when the remaining trim is dry, solid, and securely attached. The new piece must tie into the surrounding detail so water is directed out, not into the seam.
- Replace a full board: Full-board replacement is often the cleaner choice for fascia with long runs of softness, casing with failed miters and deteriorated lower ends, or trim that cannot reliably hold fasteners. It removes questionable material instead of leaving hidden decay at the patch edges.
- Open the assembly when water came from above or behind: Staining below fascia, decay near a roof edge, or persistent failure around a window calls for removal sufficient to inspect the drip edge, flashing, wall interface, and backing materials. Fresh trim should not conceal an unresolved water path.
A useful standard for rotted trim replacement is simple: the exposed board, its attachment surface, and the detail that sheds water all need to be serviceable before the final sealing and painted finish go on. Paint and caulk then protect a sound, properly detailed repair; they are not the structure of the repair itself.
Choosing Wood, PVC, or Composite Trim for a Coastal Home
The replacement board should suit the location as well as the home's look. A highly exposed fascia run, shaded window casing, broad corner board, and detailed porch element do not place the same demands on a material, so there is no single right choice for every coastal exterior trim application.
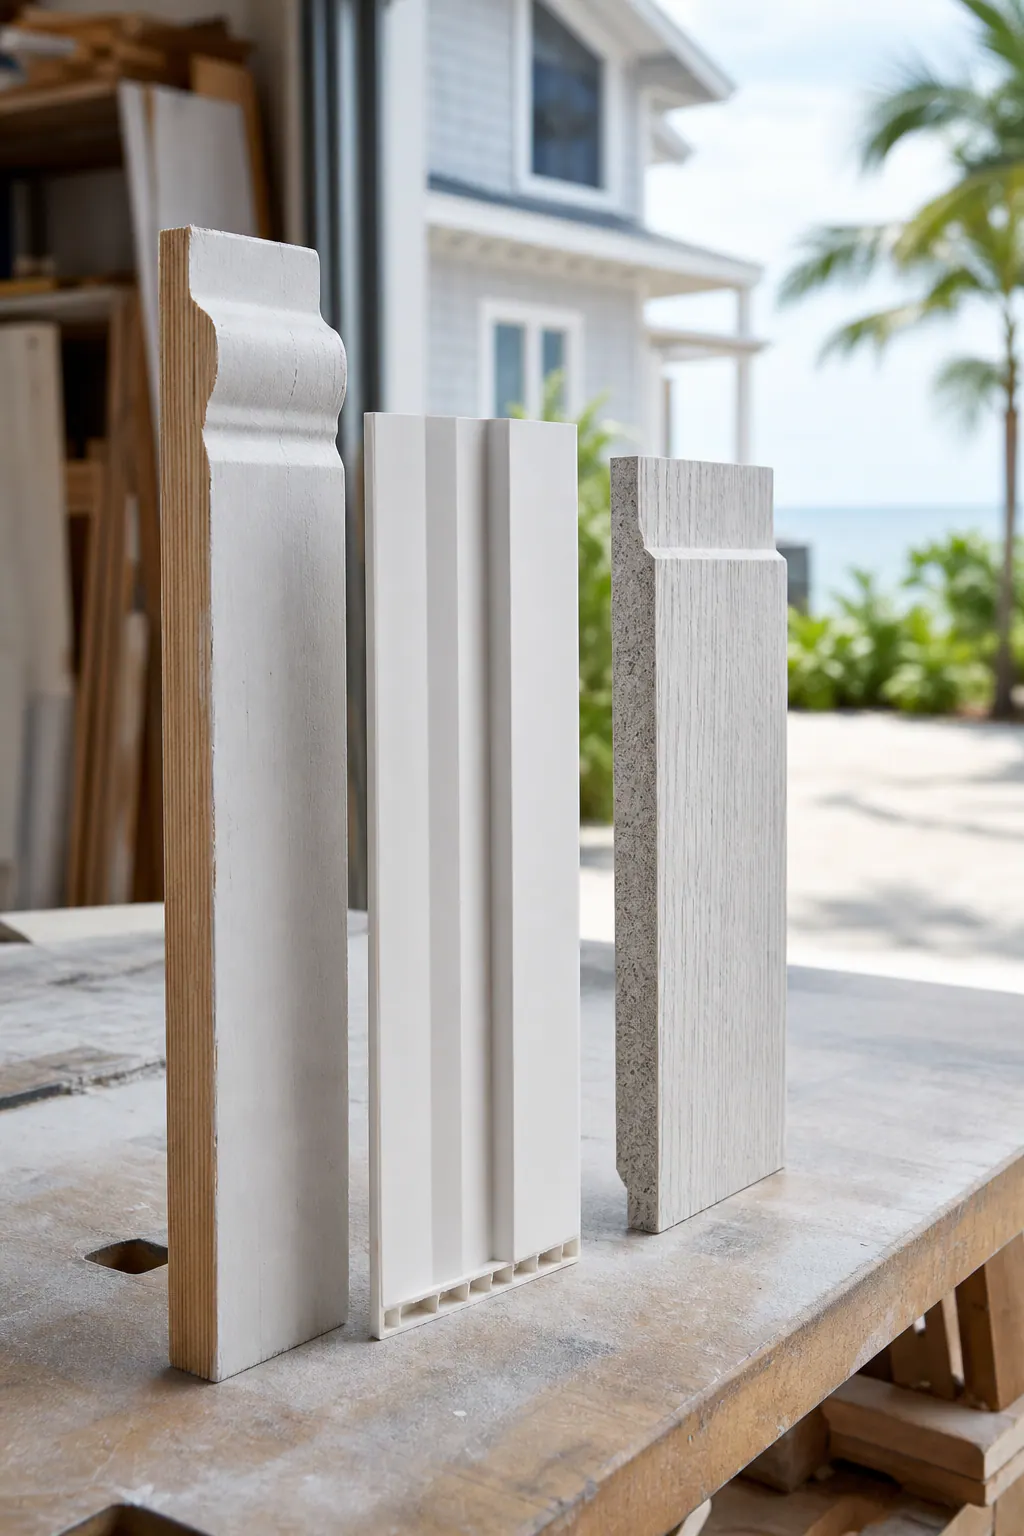
- Painted wood trim is solid wood shaped into boards, casing, moldings, and custom details, then protected with a paint system. It is often the strongest visual match where an older home has deep profiles, crisp routed edges, or traditional joinery. Wood can also be repaired in small, well-defined areas. Its tradeoff is that cut ends, joints, and faces need thorough coating and ongoing attention; it is a less forgiving choice where water repeatedly stands or enters.
- Cellular PVC trim is a solid, paintable plastic trim board commonly used for fascia, rake boards, exterior casing, and corner boards. It does not absorb moisture as wood does, making it useful at exposed edges and near splash-prone details. PVC exterior trim in Casey Key still needs proper support, manufacturer-specified fasteners, and joining methods that allow for thermal expansion and contraction. Long runs installed without movement allowance can show open joints or distortion.
- Composite trim combines wood-based fibers with binders or polymers in a manufactured board. It can provide a more wood-like surface or a particular profile where that appearance matters, while offering an alternative to solid wood in selected locations. Product lines differ considerably in edge finish, available profiles, painting requirements, fastening, and cut-end treatment, so the exact board matters as much as the category.
Appearance often decides the visible front elevation: painted wood may better preserve a historic casing profile, while PVC or composite can be a practical fit for simpler, repeatedly wet fascia and corner-board work. Adjacent siding, roof-edge details, and the desired paint sheen should guide the choice so replacement trim does not look like an afterthought.
For coastal exterior trim in Casey Key, the workmanship checkpoint is equally important: boards should sit on sound backing, fasteners should hold the material without stressing it, joints should be made for that product's movement, and cut or joined areas should receive the finish treatment the material requires. A neatly painted seam that reopens with seasonal movement is a weak detail; a stable joint with the appropriate gap, fastening pattern, and finish is the better result.
The Details That Help Replacement Trim Last: Flashing, Sealing, and Paint Finish
At every transition, the goal is to give rain a path out and down rather than a hidden route behind the new board. At roof edges, that means fascia and rake trim should meet the roofing, drip edge, and any flashing so water sheds clear of the face and the backing behind it. Around windows and doors, casing needs a clean transition to the wall finish, with head flashing where the opening detail calls for it and joints arranged so upper pieces lap over lower pieces. A sealed joint can finish that connection; it cannot correct water that is being directed behind it.
Small detailing choices are easy to inspect once the work is complete. Open seams should be corrected rather than simply covered with a thick bead of caulk. Wood cut ends need to be treated and coated before installation, since exposed end grain takes on moisture more readily than the board face. Fasteners should secure trim to solid backing without splitting the material or pulling boards into a stressed position. At soffits, replacement should also preserve the intended ventilation path; blocking vented panels or closing necessary openings can leave moisture with fewer ways to escape. This matters during soffit repair in Casey Key, where staining at the eave may point to a roof-edge or airflow detail, not just a failed board.
Sealant belongs at appropriate movement joints and trim-to-wall connections, using a product suited to the trim and paint system. It should form a neat, continuous joint, not bridge a wide gap, conceal loose material, or trap water at a horizontal ledge. The finished work should leave orderly transitions where trim meets siding, roofing, door frames, and window units, without reverse laps that invite runoff inward.
Paint is the final protective and visual layer. Wood needs a complete compatible coating system, particularly at ends, miters, and repaired areas. Some cellular PVC can remain unpainted when its factory color suits the design, while painted PVC can better match the home's palette or reduce a stark contrast. For PVC exterior trim in Casey Key, paint choice still matters: compatible coatings and suitable color limits help account for heat-related movement. A smooth painted face is a good finish only when the flashing, laps, fastening, and drainage behind it are already doing their jobs.
What a Thorough Exterior Trim Repair or Replacement Project Includes
A well-scoped project starts by tracing the problem beyond the visible face of the board. The affected fascia, soffit, exterior casing, corner board, or rake board is examined along with nearby joints, wall surfaces, roof edges, and opening transitions. Soft material, staining below an eave, open seams, failed caulk, or peeling concentrated at one joint can identify where water may be entering rather than merely where the finish has failed.
Next comes careful removal of deteriorated trim to reach sound material. Once the board is off, the exposed attachment surface can be assessed for damaged sheathing, loose backing, or a transition detail that needs targeted correction before new trim covers it. That does not automatically turn Casey Key exterior trim repair into a siding, window, or roofing project: a sound roof, wall, or window can remain in place while only the failed trim component and its immediate interface are addressed.
Installation should match the selected material. New boards need secure fastening into solid backing, joints arranged to suit expected movement, and straight, consistent reveals around windows, doors, corners, or rooflines. Applicable flashing or transition corrections are completed before designated trim-to-wall and movement joints are sealed. Surface preparation then removes loose coating and readies the repair for a compatible painted finish. Whether the work involves fascia board replacement or window casing, the finished result should show secure boards, controlled joints, clean edges, and even coverage, not oversized caulk beads hiding gaps or paint bridging loose material.
Plan Coastal Trim Replacement Before Small Failures Spread
Before requesting exterior trim repair in Casey Key, photograph problem areas after rain and keep note of where peeling paint returns, staining forms below fascia, seams reopen, or a board feels soft. A pattern is more useful than a fresh coat of paint because it gives the inspection a starting point.
Ask for a proposal that identifies both the failed trim and the likely water route. For each area, the scope should distinguish a localized repair from board replacement, name the material proposed for that location, and explain what will be exposed or corrected behind the board.
- Will the work include inspection of adjacent backing, sheathing, and flashing once deteriorated trim is removed?
- How will joints allow for the selected trim material's movement, and which joints will receive sealant?
- How will cut ends, fasteners, and trim-to-wall transitions be finished before painting?
- What surface preparation and compatible paint system will be used for the replacement material?
Early coastal trim replacement can keep a limited fascia run, casing section, or corner board from concealing a larger moisture problem. If the same defect returns, schedule an inspection rather than repeatedly repainting over it.
Plan the next step
Compare the broader Exterior Trim Repair and Replacement service.
Review the Casey Key, FL service area for local planning context.
When you are ready, request a free estimate with the rooms, trim goals, city, and available photos.
FAQs
What causes fascia and window trim to rot near the coast?
Salt air, persistent humidity, strong sun, wind-driven rain, and repeated wet-dry movement accelerate trim failure. Water commonly enters through open casing seams, fascia joints, exposed cut ends, and trim-to-siding connections.
How can I tell if exterior trim has a moisture problem instead of just faded paint?
Repeated peeling in the same small area, open caulk, staining below fascia, swollen edges, soft wood, and recurring paint blisters indicate moisture intrusion. Broad, even fading on a sun-facing surface is more likely a finish issue.
Can rotted exterior trim be repaired, or does it need to be replaced?
A localized repair works when decay is limited to a short section and the surrounding trim, fasteners, backing, and sheathing are dry and sound. Replace the full board when softness extends beyond the visible area, fasteners are loose, multiple joints have failed, or the board cannot securely hold fasteners.
How do you prevent rot from returning after exterior trim replacement?
Correct the water path before installing new trim by inspecting flashing, drip edges, roof transitions, wall interfaces, and backing materials. Treat and coat wood cut ends before installation, fasten boards to solid backing, use sealant only at appropriate joints, and preserve soffit ventilation.
Is PVC trim a good choice for Casey Key coastal homes?
Cellular PVC is a strong option for exposed fascia, rake boards, corner boards, and splash-prone areas because it does not absorb moisture like wood. It still requires manufacturer-specified fasteners, sound backing, and expansion gaps at long runs to prevent open joints or distortion from thermal movement.