
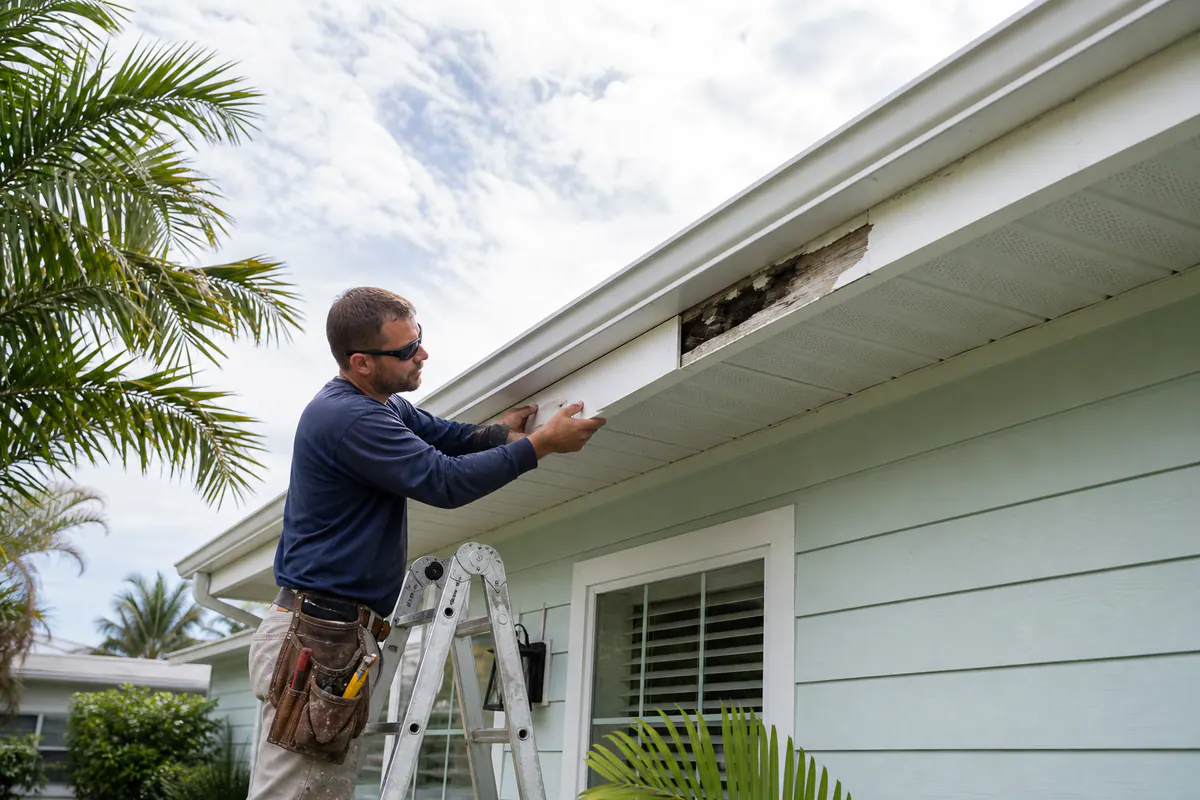
For Siesta Key exterior trim repair, the goal is more than making peeling, cracked, or weathered edges look fresh again. Salt-laden air, persistent humidity, intense Florida sun, UV exposure, and wind-driven rain can wear down the paint, caulk, and joints that help keep exterior transitions closed. When those details fail, water can work behind the visible trim instead of simply staining its surface.
That matters at fascia and soffit edges, around windows and doors, along siding terminations, at stucco-to-trim transitions, and beneath roofline details. A soft fascia corner, open seam, darkened board end, loose casing, or recurring paint failure can be a visible clue that the surrounding area needs closer attention. The right repair restores crisp exterior lines and curb appeal while helping re-establish the protective connection between the finish materials and the home envelope.
Exterior trim replacement in Siesta Key may involve a localized board repair when the affected area is limited, or a broader replacement when deterioration extends through connected pieces or a recurring moisture path is involved. In either case, a lasting-looking result depends on addressing the opening, joint, or roof-edge detail that allowed water in, not just covering damaged material with caulk and paint.
Why Exterior Trim Fails Faster Near the Coast
A narrow crack at a joint, horizontal ledge, or board bottom edge is a useful warning sign: it gives water a route in and a place to linger. Rain driven against the exterior can enter these small openings, while humid conditions slow drying. Each wet-dry cycle makes vulnerable wood move and stresses paint and caulk further, particularly where end grain was left unsealed or a trim detail does not shed water.
Sun exposure adds a different kind of wear. UV light gradually breaks down paint films and flexible sealants, so caulk may crack, pull away, or lose its bond at seams. Once paint peels, bare wood can absorb moisture more readily. Salt air can also leave residue on exterior surfaces, making routine cleaning and sound coating adhesion important for clean coastal exterior trim repair.
Wood rot is therefore rarely just an age issue. It often develops where a moisture-sensitive material meets a weak detail: an open miter, a failed caulk line, an unsealed cut end, or a flat trim ledge that holds water. A freshly painted surface may hide that pattern briefly, but it does not correct moisture intrusion behind the board. Looking for the path water follows, not only the visibly soft or discolored spot, helps distinguish a durable repair from a cosmetic patch.
Exterior Trim Areas That Commonly Need Attention
The location of a defect often tells you where to look next. Fascia boards run along the roof's lower edge; staining, peeling paint, soft spots, or separated joints there can point to water working around the roofline. For fascia repair Siesta Key homeowners may also notice nail pops or a waviness that makes the gutter line look uneven.
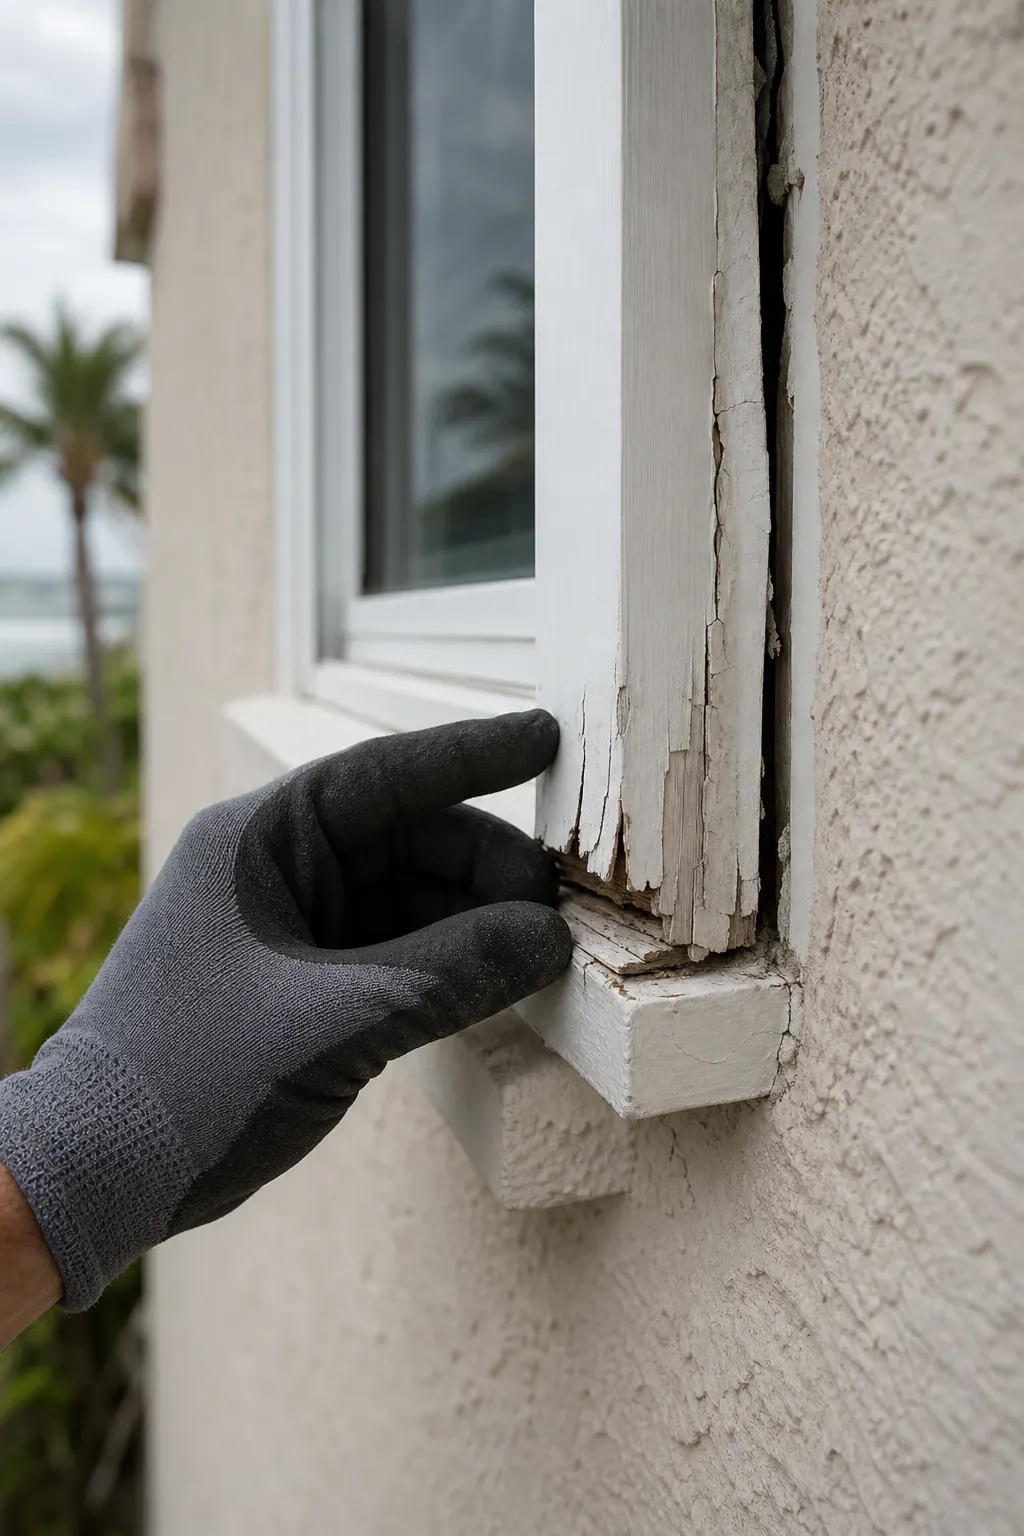
- Soffit-adjacent trim and rake boards: Trim beside the soffits and along sloped gable edges is exposed at roof transitions. Watch for open seams, cracked caulk, discoloration, or boards pulling away from the wall or roof edge.
- Frieze and corner boards: Frieze boards sit near the top of an exterior wall, while corner boards cover the meeting point of two walls. Swelling at their ends, vertical gaps, peeling paint, and dark staining deserve attention because these pieces often connect multiple exterior surfaces.
- Window and door trim: These surrounds finish the opening and cover transitions around frames. A localized paint crack may be cosmetic; softness at lower corners, recurring caulk separation, or staining below the trim can suggest moisture is reaching behind it.
- Belly bands and water-table trim: Horizontal bands break up a façade, and water-table trim forms a lower wall transition. Because they create ledges, look for dirt lines, standing-water staining, split miters, and swelling along the top edge.
- Decorative details: Columns wraps, brackets, shutters, corbels, and layered moldings can hide failing joints. Loose fasteners, nail pops, cracked seams, or a detail that feels soft rather than solid calls for a closer look.
Exterior trim repair in Siesta Key starts with identifying whether the visible defect is limited to a finish layer or continues into the board and the transition behind it. An in-person inspection can trace that boundary without assuming every stained or cracked area needs a full replacement.
When Trim Can Be Repaired and When Replacement Is Better
The practical dividing line is whether the defect is confined to the surface or has weakened the board and the area supporting it. Small paint failures, hairline cracks, a failed caulk joint, or a shallow non-structural nick may be good candidates for localized exterior trim repair in Siesta Key. The repair should remove loose material, restore the profile where needed, and reseal the joint, not simply cover an opening with paint or caulk.
- Spot repair suits a limited defect when the surrounding trim remains firm, dry, and securely attached. It preserves sound material and keeps the work focused on one isolated area.
- Partial replacement makes sense when deterioration is concentrated in one section, such as the lower end of a window casing or a short run of damaged fascia, while adjoining pieces remain solid.
- Full replacement is often the better value when rot extends across connected boards, trim feels soft or crumbles under light probing, fasteners no longer hold securely, or swelling and recurring seam failure affect multiple areas.
Damaged fascia deserves particular attention because a weak board at the roof edge can be connected to an ongoing water-entry detail rather than a one-time surface problem. Likewise, swollen trim, darkened end grain, loose corners, and repeated paint failure in the same location can indicate that replacing only the visible face will not solve the underlying condition.
A professional assessment probes suspect areas to gauge how deep the softness extends, then examines nearby joints, backing, wall transitions, and roof-edge details for related deterioration. That inspection helps separate practical rotted trim repair in Siesta Key from exterior trim replacement in Siesta Key, with a scope based on what is still sound, not an assumption that every damaged piece can be saved or that every stain requires wood trim replacement.
Wood, PVC, and Composite Trim Options for Coastal Homes
Material selection shapes both the finished look and the amount of upkeep a trim detail may need over time. The right choice should match the profile, depth, reveal, and paint scheme already used around the home so a repaired corner, fascia run, or window surround does not look like an obvious patch.
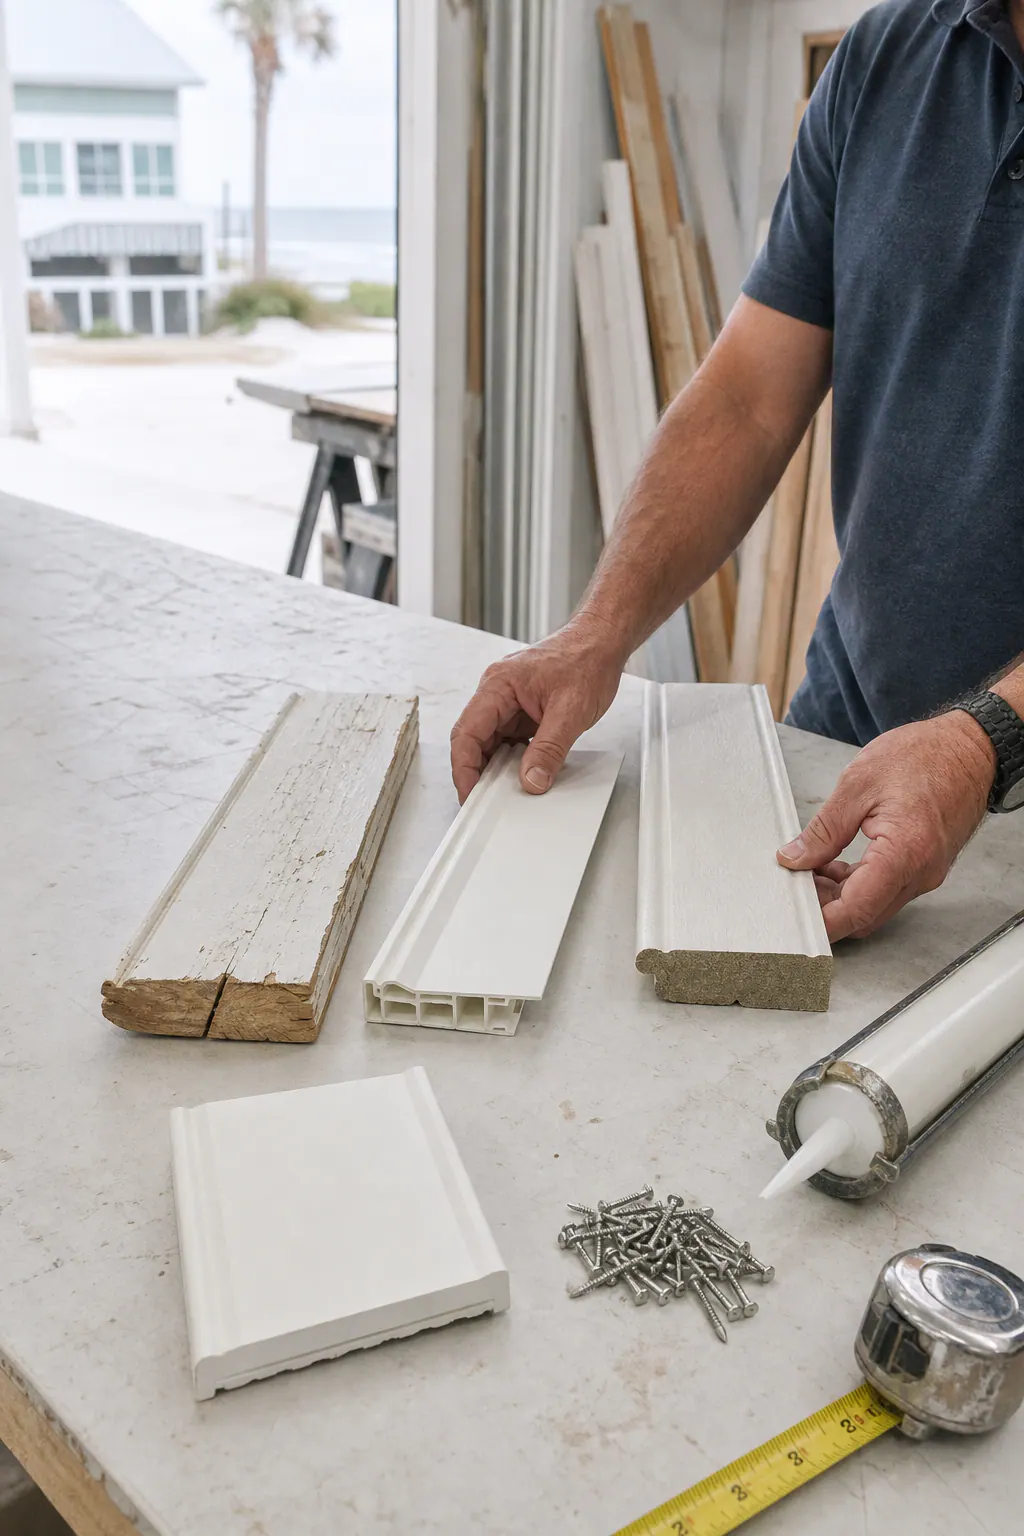
- Wood remains a natural fit for traditional homes and detailed profiles because it can be milled, shaped, and painted to blend with original trim. Wood trim replacement can preserve an established architectural look, but exposed cuts, joints, and horizontal surfaces need careful finishing and more ongoing attention in a humid coastal setting. It is often the lower material-cost starting point, although the long-term maintenance commitment can be higher.
- PVC trim is a solid, non-wood option for moisture-prone locations such as lower trim, rake details, fascia, and window surrounds. PVC trim in Siesta Key can reduce concerns about rot in the board itself while retaining a crisp painted-trim appearance. It generally costs more upfront than basic wood, and it must be fastened and joined for movement rather than treated like a rigid wood board.
- Composite trim combines manufactured materials into boards intended to offer durability and dimensional stability. It can suit homeowners who want a substantial trim appearance with less moisture sensitivity than wood, but products vary in surface texture, paint requirements, edge detailing, and price. Composite trim is commonly positioned between wood and premium PVC options, depending on the profile and scope.
Neither PVC nor composite is maintenance-free. Clean installation still means allowing for expansion where applicable, using suitable fasteners, sealing transitions and cut edges as required by the selected product, and keeping joints neat and intentional. A strong result follows the home's existing design: matching board thickness at a stucco return, preserving the right window-casing profile, and avoiding a bulky replacement material that disrupts shadow lines. Material choice matters, but the finished detail matters just as much.
Proper Prep, Sealing, Fastening, and Paint Make the Repair Last
A replacement board only performs as well as the surfaces and details around it. For trim repair for Siesta Key homes, the work should begin by removing softened material and old failed sealant, then cleaning the adjoining area so the condition of the backing, edge, and joint is visible. Any damp area needs time to dry before it is enclosed; otherwise, a new face board can conceal the same moisture problem.
Preparation also shapes how water leaves the detail. Cut ends and exposed joints should be sealed, while roofline, window, door, siding, and stucco transitions need a deliberate drainage path rather than a flat ledge or caulk-only dam. Exterior-grade flexible sealant is used to close a movement joint; it is not a substitute for correcting a gap or flashing detail that directs storm-driven rain behind the trim. Clean, continuous caulk lines at these transitions improve the finished appearance without trapping water where it needs to shed.
Fasteners and coatings complete the assembly. Corrosion-resistant fasteners help avoid staining and premature failure around coastal-facing details, and they should be set securely without crushing or distorting the board. Wood cut ends and repaired areas need primer before paint; PVC and composite require a finish approach suited to the selected product. Skipping these steps, or painting over open seams, may make a repair look complete briefly, but it leaves the same entry points for moisture and recurring rot.
What to Expect During a Trim Repair or Replacement Visit
A productive visit begins with a walk-around of the affected area, not an assumption based on one peeling edge. The inspection should look at the damaged fascia, window trim, door casing, or corner board alongside the joints and adjacent surfaces that may be contributing to the problem. You should be shown what is cosmetic, what feels soft or loose, and what remains concealed until material is removed.
- Discuss the practical scope. Localized damage may call for a shaped repair or a partial board replacement; deterioration that continues through connected trim calls for a broader section replacement. The written scope should identify the affected locations, material, finish work, and any water-management detail that needs attention.
- Choose the replacement approach. Wood can preserve a traditional profile, while PVC trim offers a moisture-tolerant upgrade for painted details and composite may suit selected trim profiles. For PVC trim Siesta Key projects, the profile and installation method should still blend with the home rather than creating a mismatched patch.
- Complete and review the work. Damaged pieces are removed, surrounding surfaces are prepared, and the new or repaired trim is installed, sealed, and finished. A final walkthrough should cover the repaired areas, clean caulk lines, paint-ready or painted surfaces, and any scope change revealed after opening the detail.
That clear sequence helps make house trim repair Siesta Key homeowners can evaluate feel straightforward: you know what is being addressed, why that approach was selected, and what the finished exterior detail should look like.
Request Exterior Trim Repair in Siesta Key
Put an inspection on the calendar when fascia feels soft, a window-casing bottom corner is swollen, or a pulled-away caulk line exposes a dark gap. Peeling paint, open miters, rotted fascia, and gaps around doors or windows are specific signs that water may be getting past the exterior trim rather than affecting the finish alone.
An on-site review can distinguish a single damaged board from decay that continues into connected trim or the detail behind it. It also makes material selection practical: wood can match an existing traditional profile, while cellular PVC is a painted, moisture-tolerant option for vulnerable areas; composite can suit select profiles but must match the surrounding reveal and finish.
Request exterior trim repair Siesta Key homeowners can use to restore straight lines, close open seams, and address the moisture pathway before wind-driven rain reaches the space behind the trim. Early attention helps preserve curb appeal and provides a clear repair or replacement scope suited to a coastal property.
Plan the next step
Compare the broader Exterior Trim Repair and Replacement service.
Review the Siesta Key, FL service area for local planning context.
When you are ready, request a free estimate with the rooms, trim goals, city, and available photos.
FAQs
What causes exterior trim and fascia boards to rot in Siesta Key?
Salt-laden air, persistent humidity, UV exposure, and wind-driven rain break down paint, caulk, and joints. Water then enters through open miters, failed caulk lines, unsealed cut ends, or flat ledges that hold moisture against the trim.
How do I know if exterior trim can be repaired instead of replaced in Siesta Key?
Spot repair is appropriate for limited paint failure, hairline cracks, failed caulk, or shallow damage when surrounding trim remains firm, dry, and securely attached. Replacement is needed when the board is soft, crumbles under light probing, has loose fasteners, or shows rot extending across connected pieces.
Can rotted fascia indicate a roof, gutter, or flashing problem?
Yes. Soft fascia, separated joints, staining, peeling paint, or an uneven gutter line can indicate water entering at a roof-edge detail rather than a surface-only problem. The repair should inspect nearby roofline joints, backing, drainage paths, and flashing-related transitions before installing new fascia.
What should I look for when inspecting exterior trim near the coast?
Look for peeling paint, cracked or pulled-away caulk, darkened board ends, open seams, soft lower window corners, swelling, loose casing, nail pops, and split miters. Pay close attention to fascia, soffit-adjacent trim, window and door surrounds, horizontal water-table trim, and decorative details with layered joints.
Should I choose wood, PVC, or composite trim for a Siesta Key home?
Choose wood when matching traditional profiles and detailed millwork is the priority, but seal exposed cuts and joints because wood needs more coastal maintenance. Choose PVC for moisture-prone fascia, rake boards, lower trim, and window surrounds because it will not rot, or select composite for dimensional stability and a substantial trim appearance when its profile, finish, and cost fit the project.