
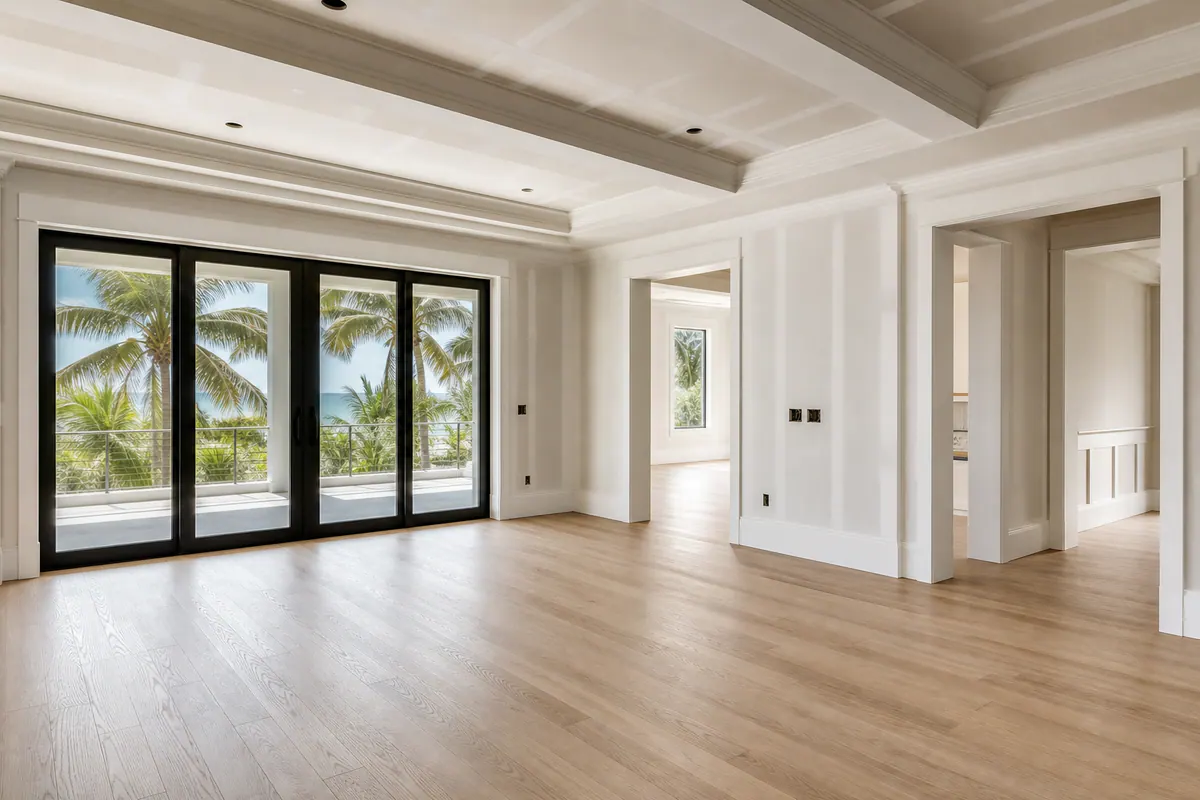
Premium Trim Packages for New Construction Homes in Casey Key
Finish carpentry is not a last-round touch-up. It is the architectural layer that gives a new home its visual rhythm: framing openings, setting transitions, and making separate rooms read as one considered interior. For new construction trim in Casey Key, the strongest result begins while choices can still work together, not after drywall, cabinetry, flooring, and paint decisions have already narrowed the options.
A cohesive trim package considers ceiling height, room scale, wall color, flooring thickness, cabinet lines, and the home's interior architecture. A taller baseboard can give a generously scaled room a grounded edge; casing with a consistent head alignment creates order across nearby doors and windows. The goal is not to add decoration everywhere, but to use proportionate profiles and deliberate transitions so each detail belongs to the same visual language.
That is the difference between planned finish carpentry and generic post-construction patchwork. A new build trim package should define its scope early, coordinate with the builder and design team as conditions develop, and hold installation to visible standards: even reveals, clean transitions, aligned casing heads, tight miters, and joints placed with intention. Before paint, a dedicated walkthrough creates time to review incomplete details, alignment, and paint-readiness items while they remain easy to see and address.
What a New Construction Trim Package Can Include
A useful scope starts with the parts that establish the room's edges and openings. Baseboards finish the wall-to-floor junction; a taller, more substantial profile can suit a larger room, while a quieter profile keeps a smaller space from feeling overworked. Door and window casings frame openings, and their width, head treatment, and alignment influence how ordered an elevation feels. Crown molding finishes the wall-to-ceiling line, from a simple profile to a built-up assembly with greater visual weight.
- Interior returns finish exposed drywall edges at openings, niches, and similar conditions where a full casing may not be desired. They create a deliberate edge rather than an abrupt stop.
- Transitions resolve the meeting points between trim, flooring, cabinetry, tile, and other finishes. A well-defined transition prevents one finish from appearing to run into another by accident.
- Paint-grade millwork is intended for a painted finish, allowing the profile, shadow, and proportion to lead visually. Stain-grade millwork is selected when the wood itself will remain visible, so grain direction, color consistency, and joinery become part of the appearance.
For custom interior trim in Casey Key, these decisions work best room by room without becoming room by room unrelated. A bedroom may call for restrained base and casing, while a formal entry or main living area can carry more layered profiles. Door style, cabinetry, ceiling height, and the paint plan should all inform the choice, so casing heads, crown lines, and built-in details read as part of one whole-home trim language.
Decorative millwork is a separate, approved layer of scope rather than an automatic inclusion. Panel molding can give a formal wall composition structure; wainscoting adds a lower-wall treatment; ceiling beams and coffered ceilings introduce dimension overhead. Reveal details and shadow lines create intentionally recessed breaks for a more minimal look, while built-ins and specialty profiles solve a specific storage or architectural objective. The strongest custom trim for new construction in Casey Key uses those elements where the design calls for them, not simply wherever a blank surface is available.
Choosing Trim Profiles That Fit the Home’s Architecture
Proportion is the deciding factor: a profile should look intentional from across the room as well as at arm's length. Flat-stock trim uses clean, square-edged boards with little projection, creating crisp shadow lines that suit pared-back interiors, broad openings, and a restrained paint scheme. Layered casing combines multiple pieces to add depth and a more articulated frame; it can give taller doors or formal openings greater presence, but too many layers on a narrow wall can make the opening feel crowded.
Crown follows the same logic. A simple crown creates a controlled finish at the ceiling line and keeps attention on expansive walls, cabinetry, or views. A built-up crown stacks profiles to create more depth and a stronger horizontal band, which can help taller ceilings feel connected to the room below. In either direction, the profile needs enough scale to register: undersized crown can appear stranded at a high ceiling, while an overly deep assembly can visually lower the room.
- Use casing when an opening needs a frame. Consistent casing widths, aligned heads, and matching reveals make repeated doors and windows read as a planned elevation. A drywall return can be the quieter choice for a minimal opening, but mixing returns and substantial casing without a clear pattern creates abrupt transitions.
- Build a hierarchy rather than adding accents one wall at a time. Decorative paneling or a layered entry treatment can establish emphasis, while adjacent rooms step back to simpler base, casing, and crown. That sequence gives luxury finish carpentry in Casey Key a sense of order instead of visual competition.
- Let paint reinforce the profile. A single wall-and-trim color highlights depth through shadow; contrasting trim makes casing lines and crown more pronounced. Either approach benefits from repeatable reveal widths and deliberate transitions at built-ins, tile, and cabinetry.
For Casey Key new construction trim, the strongest direction is rarely the most ornate or the most minimal by default. Contemporary rooms may favor flat stock and narrow reveals; coastal-influenced spaces can stay light while using enough depth to avoid looking unfinished; traditional and transitional interiors often support layered casing and built-up crown when ceiling height and opening scale can carry them. The test is whether every profile belongs to the same visual language.
How Finish Carpentry Is Planned and Coordinated During Construction
Coordination begins on paper and continues in the field. Plans and interior elevations are reviewed together so casing lines, panel layouts, ceiling treatments, and built-ins land where the design intends, not wherever a late-stage installation happens to leave room. That early review also identifies locations needing backing before walls are closed, such as a heavy built-in, a ceiling beam detail, or a panel-molding grid that must hold a precise alignment.

Before new home trim installation in Casey Key begins, actual conditions matter as much as the drawings. Framing, drywall planes, ceiling lines, and rough openings are measured for consistency. A small variation can affect a casing reveal or force an awkward joint at a return. The useful checkpoint is the meeting point between finished materials: where trim meets tile, a cabinet end panel, stone, or a drywall return should have a defined edge and a deliberate transition.
- Flooring sets the baseboard relationship. Finished-floor thickness determines where baseboard lands and how it meets door jambs, thresholds, and adjacent rooms. Planning from the finished elevation avoids a base profile that is unintentionally crowded, floated above a surface, or broken by an unconsidered transition.
- Cabinets and counters shape the wall composition. Cabinet elevations, countertop overhangs, and backsplash limits should be known before panel molding or trim returns are laid out. A well-coordinated wall keeps rails, stiles, and casing lines from terminating randomly behind a cabinet or into a countertop edge.
- Doors, hardware, and lighting need clear space. Door swing, hinge side, handle height, sconces, and recessed-light locations influence where casing heads, built-up details, and ceiling elements can sit. Resolving those relationships early protects usable clearance and balanced sightlines.
The painter's sequence belongs in this conversation as well. Installation should reach a defined handoff point where joints, nail holes, transitions, and intended paint breaks can be reviewed before primer and finish coats soften the evidence of incomplete work. For finish carpentry for new homes in Casey Key, that shared sequence reduces improvised fixes and keeps the builder, designer, cabinet team, flooring team, drywall team, and painter working toward the same finished elevation.
What Polished Finish Carpentry Looks Like Before Paint
Paint can unify a color scheme, but it cannot straighten a drifting casing line or make a poorly resolved intersection disappear. Before paint, the work should already read as orderly from across the room and precise at the joint: casing heads align across related openings, spacing around doors and windows feels balanced, and baseboards run straight without wavering along the floor line.
At close range, the signals are equally clear. Miter joints at outside corners should meet tightly rather than open at the face. A cope is a shaped inside-corner joint that lets one molding profile fit against the other; a return turns the end of a profile back to the wall or itself so an exposed cut edge is avoided. Both should look continuous and purposeful, not like pieces that stop abruptly. Reveals, the small, controlled setbacks between trim and jamb or wall, should stay consistent so the opening reads as a single frame.
Walls and floors are rarely perfectly straight, which is where fitting matters. Scribe work trims the edge of a board to follow an adjoining uneven surface. It allows a baseboard, cabinet-adjacent piece, or wall return to sit closely without forcing the entire run out of line. Transitions may be flush when adjoining surfaces are meant to share one plane, or intentionally offset when a shadow line is part of the design. Either choice should be consistent along the elevation.
- Crisp after paint: tight miters, planned returns, even reveal lines, cleanly scribed edges, and fastening that holds pieces in position while joints are fitted.
- Still visible after paint: open seams filled with heavy caulk, casing heads that step out of alignment, irregular gaps around an opening, and patched intersections with no clear trim logic.
That distinction is central to luxury finish carpentry in Casey Key. Caulk has a finishing role at small paint-grade gaps, but it should not become the strategy for hiding layout errors, wall variation, or material movement. Careful measuring, selective fitting, and deliberate joint placement give the painter a stable, paint-ready surface, and leave the trim with the clean shadow lines the package was designed to create.
The Pre-Paint Trim Walkthrough: Reviewing Details Before Final Finish
The walkthrough turns those visual standards into a room-by-room handoff before primer and final paint make small conditions harder to judge. A pre-paint trim walkthrough in Casey Key is not a catch-all review of every trade; it is a focused inspection of installed finish carpentry, its adjacent surfaces, and the items that need a clear owner before painting begins.

Start at the broad view, then move closer. Related rooms should carry the intended profile consistently, panel-molding grids should land evenly on the wall, and casing heads should align where openings share an elevation. At close range, review miters, ceiling intersections, returns, and the junction between baseboard and finished flooring. The goal is to distinguish a small paint-grade gap that can be prepared cleanly from an uneven layout, open joint, or incomplete return that needs carpentry correction first.
- At openings and built-ins: inspect casing clearance at doors, cabinet ends, and built-in faces so trim does not crowd hardware, interrupt a planned reveal, or end without a resolved transition.
- At floors and ceilings: follow baseboard runs through changes in flooring and look at crown, beams, and wall panels where planes meet. A deliberate transition reads cleanly; an unexplained stop or shifted line does not.
- For paint preparation: identify nail holes, minor caulk-ready seams, and areas needing patching separately from items requiring trim adjustment.
Observations can be recorded on annotated elevations, room-by-room notes, and photographs, then assigned through a punch list to the builder, trim team, drywall finisher, or painter as appropriate. Once corrections and preparation items are complete, the sequence is straightforward: final trim review, surface preparation, primer, and finish coats. That organized handoff helps new construction trim in Casey Key arrive at paint with its lines and details already intentional.
Plan a Trim Package That Brings the Whole New Home Together
Bring the trim conversation in while the design still has room to respond. For a Casey Key new build, an early scope discussion can compare casing widths to door sizes, crown buildup to ceiling height, and panel layouts to the actual interior elevations before those details are fixed in the field.
To make that discussion productive, gather:
- Architectural plans and interior elevations, including shared walls where casing heads or panel lines need to align.
- Inspiration images that show whether you prefer quiet flat stock, layered depth, or more formal wall and ceiling treatments.
- Ceiling heights, beam or ceiling-detail information, and door schedules showing opening sizes, swings, and hardware clearances.
- Flooring thicknesses, cabinetry drawings, hardware, wall finishes, and paint selections that affect baseboard height, trim transitions, and paint breaks.
A coordinated new construction trim Casey Key package turns those inputs into a defined installation scope, consistent profiles across related rooms, and a paint-ready handoff. Homeowners, builders, architects, and designers can begin with the plans and finish priorities, then carry those decisions through installation and a documented pre-paint punch review.
Plan the next step
Compare the broader New Construction Trim Packages service.
Review the Casey Key, FL service area for local planning context.
When you are ready, request a free estimate with the rooms, trim goals, city, and available photos.
FAQs
What is included in a new construction trim package in Casey Key?
A new construction trim package can include baseboards, door and window casing, crown molding, interior drywall returns, and transitions between trim, flooring, cabinetry, tile, and other finishes. It can also specify paint-grade or stain-grade millwork, with decorative paneling, beams, coffered ceilings, and built-ins added as separately approved scope.
When should trim carpentry be planned during a new home build?
Trim carpentry should be planned early, before drywall, cabinetry, flooring, and paint selections restrict profile and transition options. Plans and interior elevations should be reviewed before walls close so backing can be installed for heavy built-ins, ceiling beams, and precisely aligned panel molding.
How do you choose baseboard, casing, and crown molding sizes for a new home?
Choose trim profiles based on ceiling height, room scale, opening size, cabinetry, flooring thickness, and the home’s architectural style. Taller baseboards and built-up crown suit larger rooms and higher ceilings, while restrained profiles and flat-stock trim help smaller or contemporary spaces avoid looking crowded.
What should you look for during a pre-paint trim walkthrough?
Check that casing heads align across related openings, baseboards run straight, reveals are even, miters are tight, and returns are complete. Separate minor caulk-ready seams, nail holes, and patching from layout errors, open joints, irregular gaps, or unresolved transitions that require carpentry correction before primer.
What makes luxury finish carpentry different from standard builder trim?
Luxury finish carpentry uses coordinated proportions, consistent profile hierarchy, deliberate transitions, tight miters, clean scribe work, and controlled reveal widths across the home. Standard-looking results often rely on heavy caulk to disguise open seams, misaligned casing heads, uneven gaps, or poorly resolved intersections, while high-quality trim is already precise before paint.