
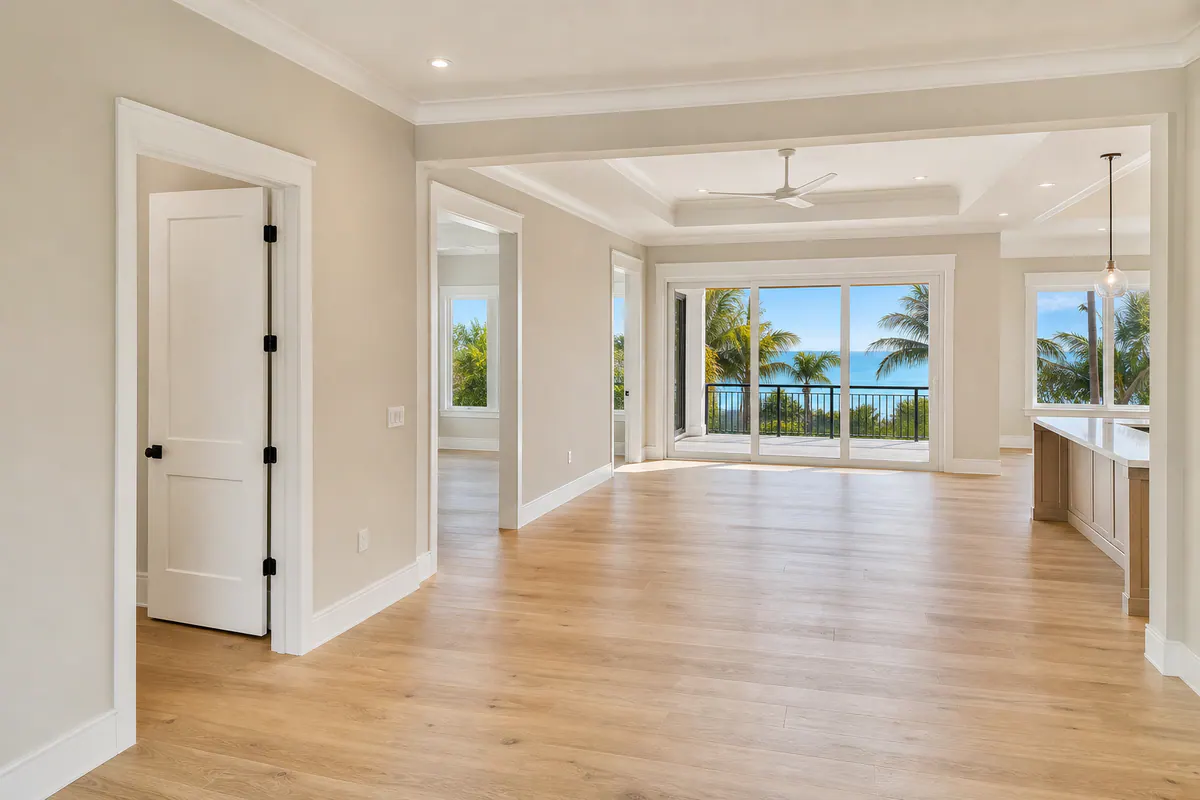
Coordinated Trim Packages for New Homes in Englewood
Trim should fit the home's design, transition cleanly between rooms, and arrive ready for the paint process, not feel like a collection of boards installed at the end of the build. A coordinated package brings baseboards, door and window casing, crown or other ceiling details, interior doors, and transition pieces into one finish-carpentry plan.
For new construction trim in Englewood, FL, the visible result depends on decisions made across trades. Finished-floor height affects where baseboard lands and whether shoe molding is useful. Door style influences the casing profile that feels appropriate around it. Cabinet runs, islands, and built-ins determine where trim stops, returns, or meets a finished panel. Paint sheen also matters: glossier finishes make seams, nail fills, and uneven caulk lines easier to see.
Material and profile choices belong in that same conversation. A paint-grade package can prioritize a smooth, uniform painted appearance, while a stain-grade package puts grain, color variation, and careful board selection on display. Likewise, a taller baseboard paired with substantial casing can read intentional; a narrow casing beside an oversized baseboard can make the rooms feel pieced together.
Sequencing is part of the package, too. Before trim is finalized, the team should align drywall readiness, door and jamb conditions, flooring plans, cabinetry locations where relevant, and the painter's preparation needs. A pre-paint walkthrough then gives homeowners, builders, and project managers a practical moment to review alignment, joints, transitions, and areas needing finish work before paint makes the details permanent.
What an Interior Trim Package Can Include
A room-by-room scope turns a broad trim concept into a buildable package. Baseboards finish the wall-to-floor line and establish a visual baseline around each room. Door casing covers the joint around a door jamb and drywall opening; window casing performs the same job at windows while giving the opening more visual presence. In a new build trim package in Englewood, the selected casing width may need to change at a tight wall return, a grouped window, or a door located close to a cabinet run.
- Baseboards: These run along the perimeter of finished walls. Their height and profile influence how formal or simple a room feels, and their layout must account for flooring, stairs, built-ins, and transitions to tile or other floor finishes.
- Door and window casing: Casing frames openings and conceals the gap between the finished wall and jamb. A clean package identifies which openings receive standard casing, wider casing, or a specialty detail rather than assuming every opening is treated alike.
- Jamb extensions: An extension brings a door or window jamb flush with the finished wall when the jamb is not deep enough. It creates a proper surface for casing and helps maintain an intentional reveal around the opening.
- Crown molding: Crown bridges the wall-to-ceiling transition. It can add a finished, more traditional note, but it is optional; a clean contemporary plan may omit it or reserve it for main living areas.
- Shoe molding or quarter round: These small pieces sit at the baseboard-and-floor edge. They can cover minor floor or wall irregularities, but are not automatically needed when baseboards and flooring meet cleanly.
- Interior-door details: Door slabs, jambs, stops, casing, reveals, and closet-opening treatments should read as one system. For example, a simple flat-panel door generally pairs more naturally with restrained casing than with an ornate built-up surround.
The final interior trim package is not necessarily identical in every room. A finish plan can assign crown to selected spaces, specify where casing terminates at cabinetry, and distinguish cased openings from drywall returns. Before installation, a written scope should identify those exceptions alongside window and door conditions, room transitions, and the chosen finish level so the details are decided before they become field improvisations.
Choosing Trim Materials for Paint-Grade and Stain-Grade Finishes
The finish schedule should drive the material conversation early: an opaque painted look can hide more variation than a clear or stained finish, while stain makes the wood itself part of the design.
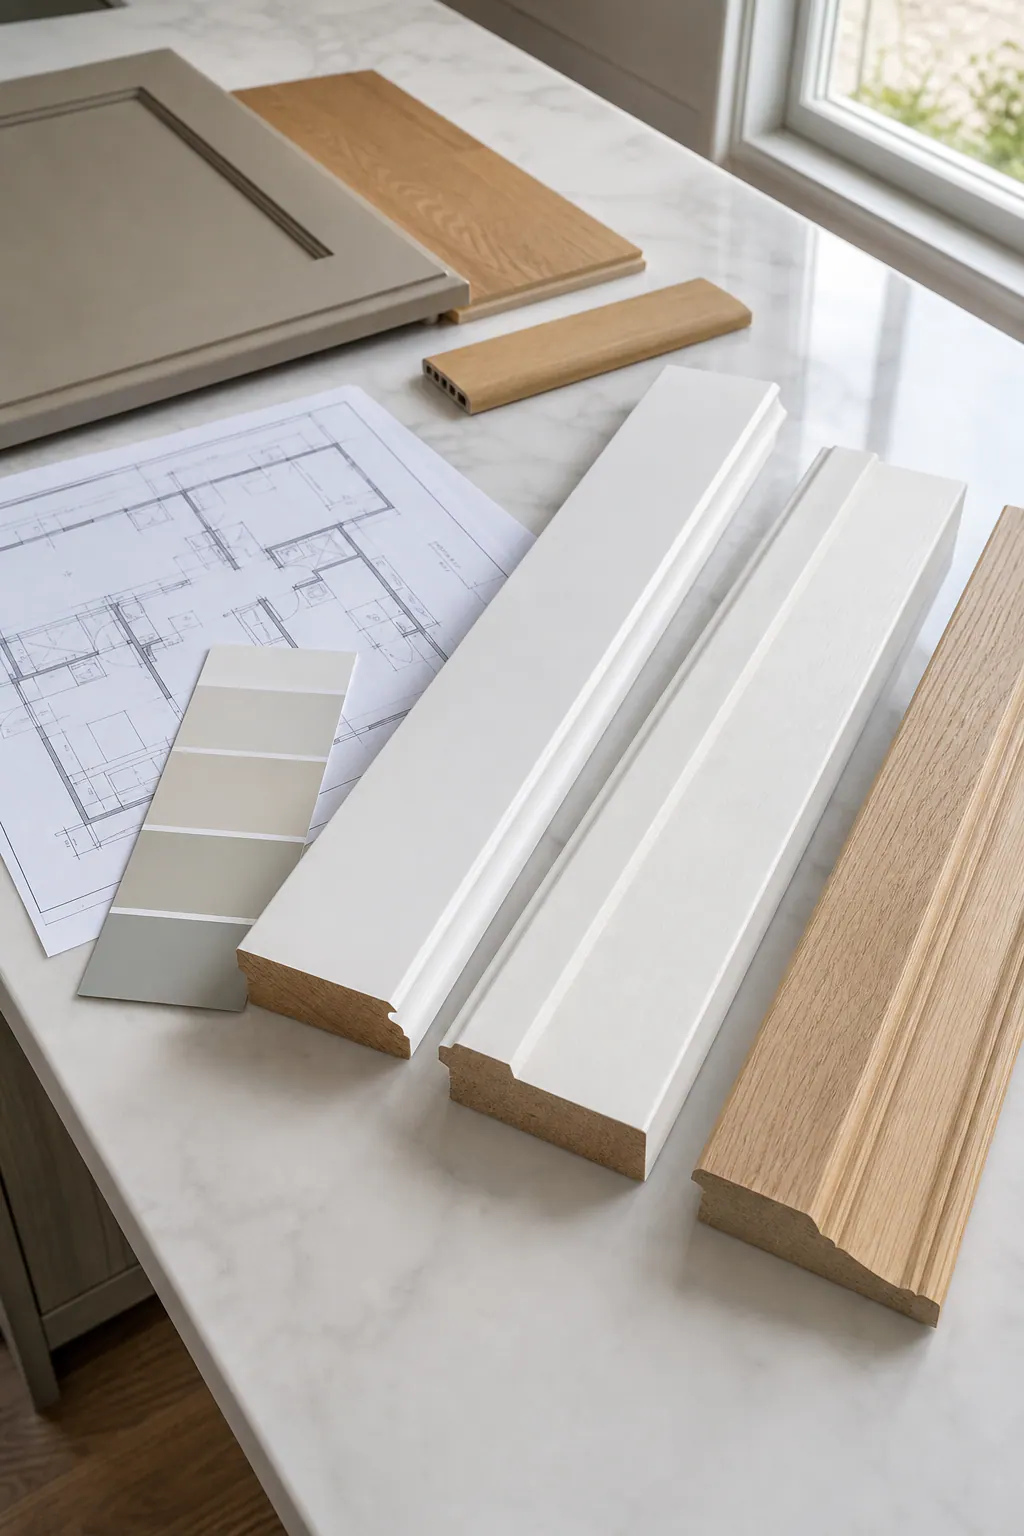
- MDF: For stable, paint-grade interior areas, MDF can provide a very smooth, uniform face with no visible grain. It is often a practical choice for simple baseboards and casing that will receive a solid-color paint finish. Its weak fit is an area with repeated moisture exposure or an edge likely to be damaged, so baths, laundry spaces, exterior-adjacent openings, and vulnerable wall conditions deserve a more tailored selection.
- Finger-jointed pine: This is a paint-grade wood product made from shorter pine pieces joined together. It can be a cost-conscious route to wood trim and suits many painted applications, but the joints and natural wood movement mean preparation and paint coverage matter to the finished appearance.
- Poplar: Poplar is commonly used for paint-grade custom details because it machines cleanly and works well for built-up casing, custom returns, and other shaped components. It is a useful option where the package calls for more than standard stock profiles and the finished surface will be painted.
Stain-grade trim calls for a different standard. Because the finish leaves grain, color variation, and natural character visible, boards should be selected as a group rather than treated as interchangeable pieces. A strong sample shows compatible grain direction and color from casing leg to header and across nearby doors; a weak sample shifts abruptly from pale boards to dark or heavily figured ones within the same opening.
For finish carpentry in Englewood, FL, the practical decision is room-specific rather than universal. Review the approved paint or stain color, sheen, profile samples, wall condition, and expected exposure before ordering. A painted bedroom package may prioritize a smooth, consistent surface, while a stained entry detail may justify closer piece matching and more selective material use.
Matching Baseboard, Casing, Crown, and Door Details
Scale is what makes separate trim pieces read as one design. Taller baseboards can give a room a grounded, substantial edge, but they need casing with enough width to hold its own at nearby doors and windows. Crown should also fit the ceiling: a delicate profile can disappear in a tall main living area, while an oversized crown can crowd a lower ceiling. Door style matters, too. Flat-panel doors generally pair comfortably with restrained trim, while more traditional door panels can support a layered profile.
For a clean contemporary direction, simple square-edge baseboards and door casing create crisp shadow lines without competing with cabinetry, hardware, or wall color. A more formal plan may use stepped casing or a traditional curved profile to introduce depth and a stronger transition at the ceiling. The key is not to make every component identical; it is to give them a shared visual language. A narrow, ornate casing beside broad slab-style cabinet fronts, for example, can look unrelated. A casing width that repeats the cabinet's straightforward proportions usually feels more resolved.
Consistent reveals, the intentional, even margin between casing and the jamb or opening, are equally important around doors and windows. They keep headers, legs, and adjacent openings from looking improvised. Review a physical assembled corner or elevation before ordering new-build trim packages in Englewood, especially where window depth, close wall returns, or cabinetry limits the available space.
Variation can still be deliberate. A dining room, entry, tray ceiling, or wide specialty opening may receive crown or a built-up casing detail not used in secondary rooms. Record those upgrades early, then keep the surrounding baseboard height, door style, and transition details connected to the overall package rather than treating the feature as an isolated choice.
When New-Construction Trim Should Be Installed
Installation timing is where the package meets the realities of the build. A practical handoff begins after drywall is complete and dry enough for finish work, the selected trim has had time to acclimate under the project's interior conditions, and the team has identified areas still subject to heavy traffic or moisture-producing work.
Interior doors and their jambs are usually important early reference points because casing depends on the jamb depth, opening condition, and intended reveal. Where the finished wall projects beyond the jamb, a jamb extension brings the jamb face outward so the casing can sit correctly. This is also the time to flag openings that are not square or walls that vary along their length; scribe cuts let a trim edge follow an uneven surface rather than leaving an oversized, inconsistent gap.
Cabinet placement should be settled before trim closes in key edges. At an island end panel, appliance surround, toe-kick return, or a baseboard run meeting built-ins, the visible termination needs a decision rather than an on-site guess. A clean plan may return baseboard into a cabinet panel or stop it at a deliberate block; a weak handoff leaves a narrow, awkward strip that neither trade intended to finish.
Baseboard installation can occur before or after flooring depending on the floor system and the desired detail. With floating flooring, baseboard is commonly positioned to cover the perimeter expansion space without pinning the floor in place. With flooring installed afterward, shoe molding may be used to cover a small floor-to-baseboard variation; it changes the finished look by adding a separate, smaller profile at the bottom edge. Flooring thickness, installation method, and every transition location should be known before final baseboard elevation is set.
Finish carpentry for new construction Englewood projects also benefits from a clear paint-stage plan. Trim can be installed before final paint, but floors should be protected and the handoff should state who handles filling, caulking, touchups, and damage discovered after other trades return. Before paint begins, walk the rooms for loose joints, incomplete returns, inconsistent casing margins, and transition pieces that do not sit cleanly against the finished floor, wall, or cabinet.
Pre-Paint Trim Walkthrough: What Clean Finish Quality Looks Like
A pre-paint walkthrough turns broad expectations into a visible punch list while corrections are still straightforward. Review each room in consistent lighting, then look again where daylight or a low, angled work light makes surface shadows easier to see. Photograph the completed trim before primer or final coats, and log every item by room, exact location, condition, and responsible trade.
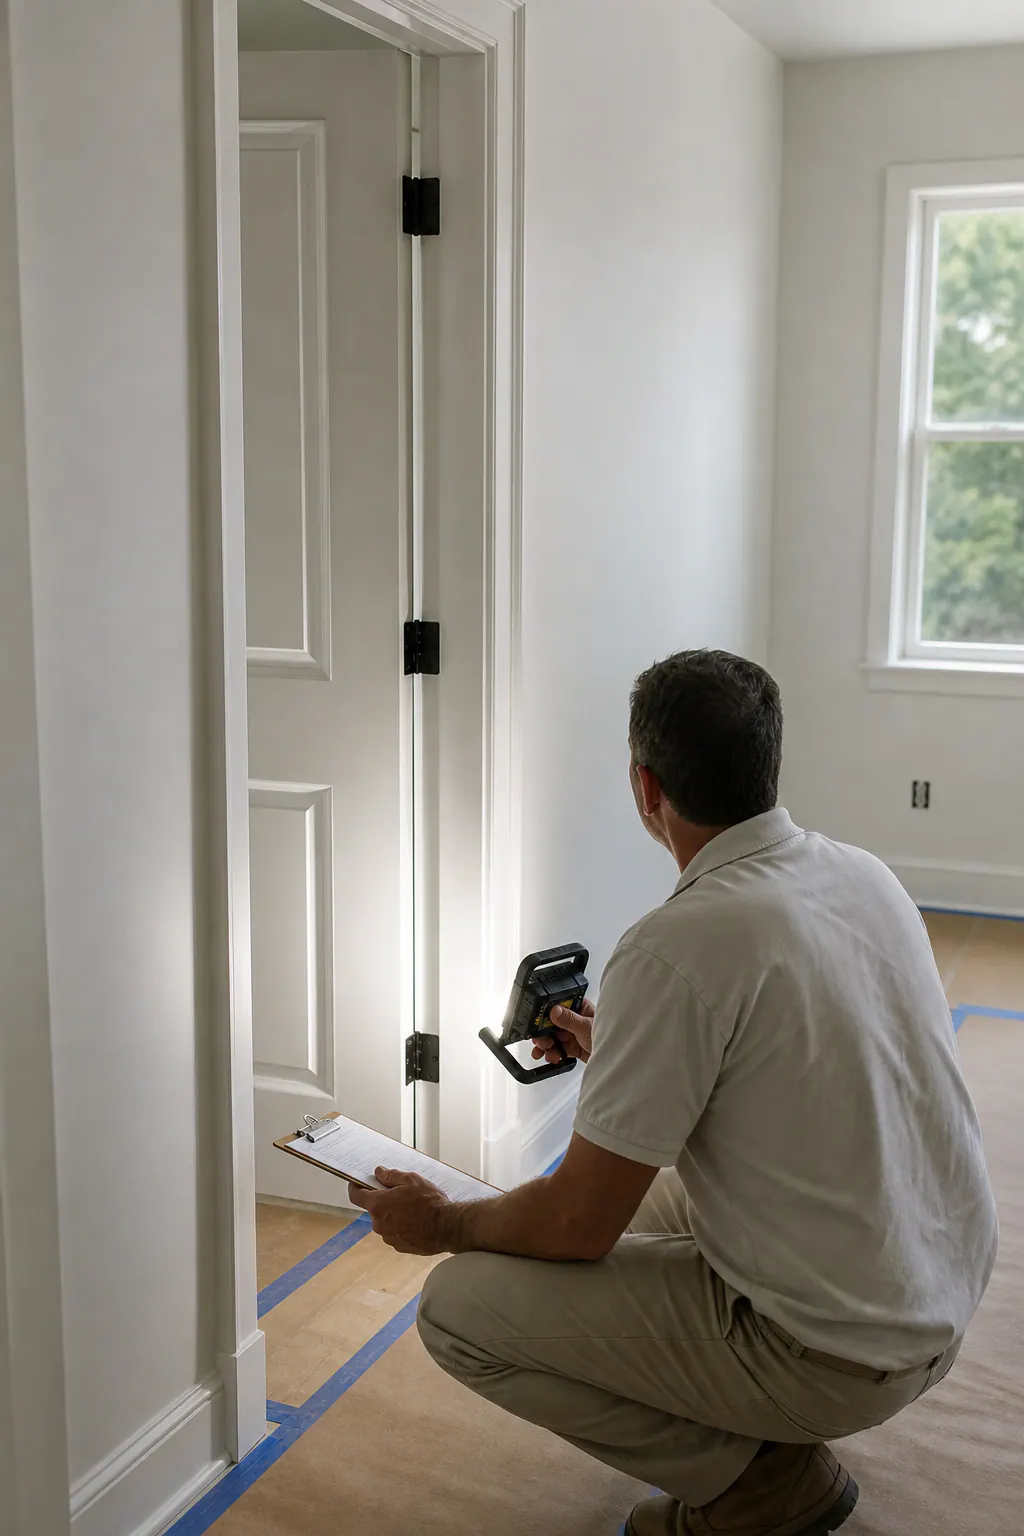
At doors and windows, look for even reveals and casing legs that read as aligned from floor to header. Tight miter joints should meet cleanly at outside corners rather than showing a stepped edge or open point. Inside corners need equally careful copes, while scribe cuts should follow an uneven wall without leaving a conspicuous gap. A strong result looks intentional at normal viewing distance; a weak one draws attention to one side of an opening or a corner that will remain visually broken after paint.
Also inspect fastener placement, nail-hole filling, and caulk lines. Fasteners should not split a narrow edge or sit where they are likely to telegraph through the finished face. Filled holes should be level and sanded smooth, not left as dimples or raised patches. Caulk can soften a small wall-to-trim gap, but a controlled, narrow bead is different from a heavy line that rounds over a crisp profile or masks an unresolved fit issue.
Floor protection belongs on the same review. Confirm that coverings remain in place around baseboards, transitions, and door openings, and that touch-up items, including scuffs, incomplete returns, and damaged edges, have a named owner. Paint preparation and final coating can change how joints, caulk, and nail holes read, so the trim crew, painter, and project manager should agree on who fills, caulks, sands, primes, and completes final touch-ups, as well as when each inspection occurs.
For a pre-paint trim walkthrough in Englewood, the goal is not to treat paint as a cure-all. It is to give every trade a clear, recorded path to a clean final presentation.
Plan a Trim Package That Fits the Build
Bring the decisions that shape the trim, not just a preferred baseboard sample, to the scope conversation. Architectural plans and the interior finish schedule show where details change; ceiling heights, door and window selections, flooring thickness and transitions, cabinet layout, paint direction, and inspiration photos make the intended look easier to translate into a room-by-room package.
It also helps to identify the desired profile level: simple square-edge selections create a quieter contemporary result, while layered casing or crown adds more formal visual weight. Share the current construction stage and a list of open decisions, such as unfinished flooring or a cabinet return that may affect a casing termination.
Homeowners, builders, and project managers planning new construction trim in Englewood, FL can use that information to start a focused review. Final materials, detailed scope, scheduling, and pricing should follow a project-specific assessment of the plans, selections, site status, and paint-stage handoffs.
Plan the next step
Compare the broader New Construction Trim Packages service.
Review the Englewood, FL service area for local planning context.
When you are ready, request a free estimate with the rooms, trim goals, city, and available photos.
FAQs
What is included in a new construction trim package in Englewood, FL?
A coordinated trim package can include baseboards, door and window casing, jamb extensions, crown molding, shoe molding or quarter round, interior doors, and transition pieces. The room-by-room scope should also identify exceptions such as cased openings, drywall returns, cabinetry terminations, and specialty trim details.
What trim material is best for a paint-grade new build?
MDF provides a smooth, uniform, grain-free face for stable interior paint-grade areas such as basic baseboards and casing. Finger-jointed pine is a cost-conscious painted wood option, while poplar is well suited to painted custom details, built-up casing, and shaped returns.
Should baseboards be installed before or after flooring?
Baseboards can be installed before or after flooring, depending on the flooring system and desired finished detail. With floating flooring, baseboard should cover the perimeter expansion space without pinning the floor; shoe molding can cover small variations when flooring is installed after baseboard.
What should be checked during a pre-paint trim walkthrough?
Check for even door and window reveals, aligned casing legs, tight miter joints, properly fitted copes and scribe cuts, smooth nail-hole filling, and narrow controlled caulk lines. Also inspect floor protection, incomplete returns, damaged edges, and assign responsibility for filling, caulking, sanding, priming, and touch-ups.
How do I choose matching baseboard, casing, crown molding, and door profiles?
Match trim by scale and visual style: taller baseboards need casing wide enough to feel balanced, and crown should suit the ceiling height. Simple square-edge trim pairs well with flat-panel doors and contemporary cabinetry, while layered casing and traditional profiles work better with more formal door styles and spaces.