

A Coordinated Trim Package for Siesta Key New Construction
For a new home, trim works best as one finish-carpentry system, not as baseboards, casing, and crown chosen separately at the end. A coordinated new construction trim Siesta Key package brings those pieces together with interior-door details, window returns, floor transitions, material choices, installation order, and a paint plan.
The goal is visual continuity from room to room. A taller baseboard may suit generous ceiling height, but its thickness, casing width, and crown profile need to relate to the doors, walls, and overall architectural direction. Clean, simple profiles can keep a contemporary plan crisp; more layered details need enough wall and ceiling scale to read intentionally rather than look crowded. Room layout, opening alignment, door package, flooring selections, and imperfect wall conditions all affect where profiles start, stop, and transition.
Material selection is part of that coordination. Paint-grade MDF can be a practical choice for stable interior areas, while wood may suit particular profiles or fastening needs; moisture-tolerant trim products can be considered where repeated indoor wet exposure is part of the application. The finish system should be selected alongside the material, rather than treating paint as a fix for unsuitable substrate or poor fit.
This is finish carpentry planned around a build sequence, not a collection of repair visits. The package should establish profile selections before installation, protect completed surfaces, and leave clean cuts, consistent reveals, intentional joints, and fill-and-caulk-ready details for a pre-paint review.
What a New Build Trim Package Can Include
That coordinated scope becomes tangible in the individual line items a new build trim package Siesta Key homeowners choose. Baseboards finish the wall-to-floor joint and establish a continuous line around each room, including where flooring changes at a bedroom, hall, or closet. Door casing frames the opening and covers the wall-to-jamb transition, while window casing gives a window a deliberate border when the plan calls for a trimmed opening rather than a drywall return.
- Crown molding finishes the wall-to-ceiling transition. It can add definition where a main living area has open wall space above doors and cabinetry; a clean ceiling transition may be the better fit for a restrained contemporary room or a ceiling interrupted by soffits.
- Shoe molding is the smaller profile at the baseboard-to-floor edge. It can cover a narrow, uneven floor perimeter without changing the main baseboard profile, particularly where finished flooring meets a long wall.
- Scribe molding is a narrow finishing piece fitted to an irregular wall where built-ins, cabinetry, or trim meet it. Its purpose is to close an uneven edge intentionally instead of leaving a changing gap.
- Panel molding and accent-wall trim create framed wall patterns or a focal area, such as a dining-room feature wall or a bed wall. These are optional details; their layout should relate to furniture placement, wall width, outlets, and ceiling features.
- Interior door reveals are the consistent shadow lines left between a door-frame detail and the adjacent wall surface. They support a crisp minimal look only when the selected door system, jamb treatment, and wall alignment can maintain that even line.
A trim package for a new build in Siesta Key should start with the drawings and finish selections, not a preset molding bundle. Door style affects whether casing reads best as a narrow, plain frame or a layered build-out. Window depth determines whether casing, an extension jamb, or a drywall return suits the opening. Flooring affects baseboard thickness and whether shoe molding is useful at the finished edge, while beams, soffits, and cabinetry determine where crown can end cleanly, or whether it should be omitted.
A simple package might use straight baseboards, restrained casing, and no crown in a clean-lined home. Wider casing, panel molding, or a composed accent wall can be intentional in a more traditional or tailored design, but the elevation needs enough clear wall area for the pattern to read rather than crowd doors, switches, or windows. The useful deliverable is a selected set of profiles and locations that fits the home's plans and architectural detail level, not a one-size-fits-all list of moldings.
Selecting Profiles That Fit the Home’s Scale and Style
Profile scale is easiest to judge from the room rather than from a short showroom sample. A compact room or lower ceiling generally calls for restraint, while a larger room with more wall height can visually carry profiles with greater depth. The goal is not to maximize molding size, but to leave enough surrounding wall area for each line to feel intentional.
Door proportions provide a practical reference. Casing should relate to the height and width of the opening instead of overwhelming a narrow door or looking insubstantial beside a taller one. A profile schedule can establish casing widths, door-head treatments, and reveal dimensions, the narrow setbacks between jamb and casing, so comparable openings receive the same treatment. When door heads line up along a hall or open living space, matching trim lines create consistent sightlines.
- Baseboards: Choose height and thickness in relation to wall height, furniture scale, and the finished floor. Tile, wood, and other flooring interfaces should be considered early so the bottom edge reads as one continuous line rather than relying on an awkward added strip.
- Crown: Use crown where there is enough uninterrupted wall-to-ceiling space for the profile to read. Beams, soffits, sloped ceilings, and upper cabinetry need planned returns, stopping points, or intentional omissions instead of a profile that appears to end abruptly.
- Decorative details: Panel molding, cap details, and built-up casing should follow visible reference lines such as door heads, furniture zones, or ceiling features. A feature wall that disregards nearby openings, switches, or windows can look improvised even when the molding itself is attractive.
For new home trim installation Siesta Key projects, continuity is the stronger signal: matching casing widths where intended, level head lines, repeatable reveals, and deliberate changes where a room receives a distinct treatment. Measured profile scale and planned transitions matter more than selecting the largest or most ornate molding.
Choosing Paint-Grade Materials and Finishes for Coastal Indoor Conditions
Material selection should follow each room's exposure and detailing needs, not simply the profile selected for it. For paint-grade trim in consistently conditioned living rooms and bedrooms, MDF can be a practical option when the application stays away from repeated wet exposure. Its smooth, uniform face suits a painted look, but cut edges, joints, and the bottom edge of baseboards deserve particular attention in the finish plan.
- MDF: Best considered for stable interior locations where a crisp painted surface is the priority. It may be less suitable where splashing, damp floor cleaning, or recurring moisture is part of daily use, such as certain bath, laundry, or entry-adjacent conditions.
- Solid or finger-jointed wood: Useful where the selected profile, fastening approach, shaped detail, or site adjustment calls for wood. It can make sense for more detailed casing, built-up elements, or locations where the installation needs a material that can be worked and secured to suit the condition.
- PVC and other moisture-tolerant trim products: Worth considering in locations with more demanding moisture exposure, provided their movement characteristics, fastening method, and intended use fit the assembly. They are not interchangeable with every interior molding or paint system.
Coastal finish carpentry in Siesta Key also benefits from planning for normal changes in indoor conditions. Air-conditioning cycles and humidity can affect how adjoining materials behave, so joints should be placed intentionally rather than relying on caulk to disguise a poor fit. Caulk is a finish-ready flexible seal at small paintable transitions; it is not a remedy for misaligned walls, loose fastening, or movement beyond what the selected system can accommodate.
The coating schedule should name the chosen substrate, primer, filler, caulk, and finish paint as one system. A good checkpoint is specific: confirm that cut edges receive the preparation required for that material, fastener holes are filled with a compatible product, and the selected paint-grade trim can receive the intended sheen without exposing joints or rough edges. Stain-grade trim is a different decision altogether, because grain, color variation, and board selection remain visible instead of being concealed by paint.
For a coastal finish carpentry Siesta Key package, the practical takeaway is to assign materials by location and detail, then match the installation and coatings to those choices. That creates a clearer path to a uniform painted finish without promising that one substrate, primer, or caulk will solve every exposure condition.
Installation Details That Support a Clean Finish
Installation begins when the conditions that govern fit are established: drywall is complete, interior door jambs are set, and the flooring plan is known. Baseboards may be installed before finished flooring in some assemblies or afterward in others; that decision changes the bottom gap, shoe molding need, and protection plan. Cabinetry also affects trim at appliance panels, islands, and built-ins, so those intersections should be laid out before pieces are cut. Final paint follows trim installation, filling, and caulking, not the other way around.
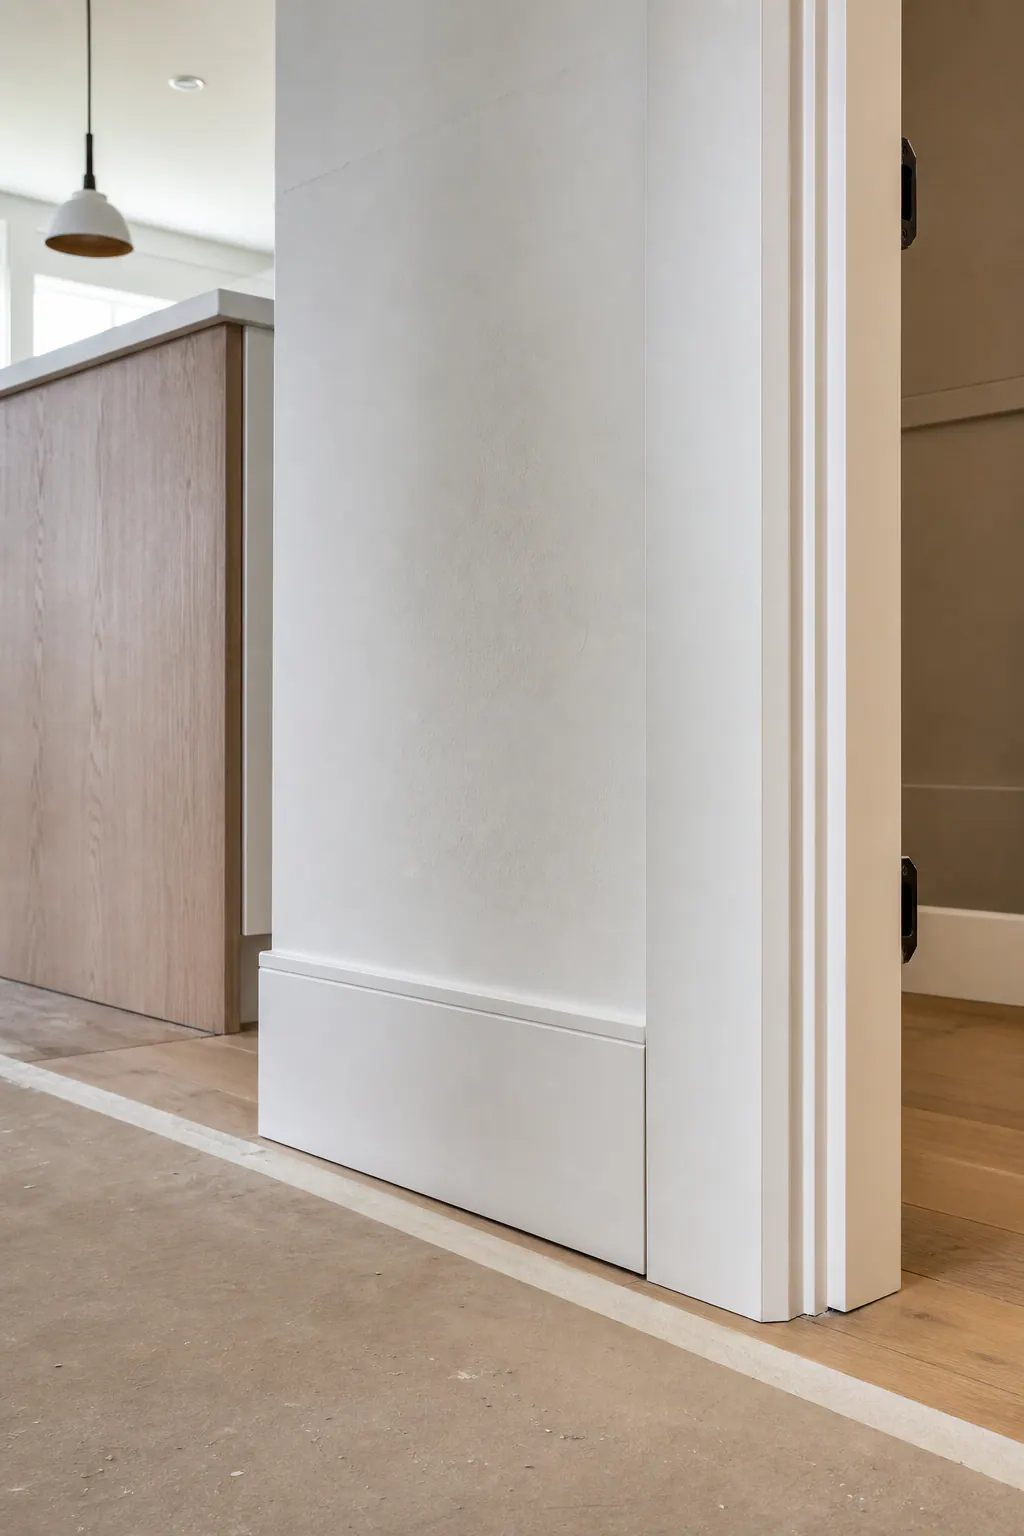
Good finish work is visible before any coating hides it. Layout should keep long baseboard runs straight, carry casing head lines consistently across comparable openings, and maintain an even reveal, the intentional narrow border between a door jamb and its casing. A controlled reveal looks deliberate; a reveal that widens or narrows along the same jamb signals that the piece or opening needs attention.
- Joint selection follows the location: cope joints shape one molding end to fit the face of another, often helping inside-corner trim meet cleanly. Miter joints use angled cuts and suit outside corners, picture-frame details, and other profile changes where the faces must align.
- Walls are treated as built conditions: planned scribe work trims an edge to follow an uneven wall, cabinet side, or floor rather than leaving a broad caulk line to bridge the mismatch.
- Fastening and transitions stay tidy: trim should be secured without proud fasteners, with clean returns, aligned casing-to-baseboard transitions, protected finished surfaces, and joints left ready for the specified filler, caulk, primer, and paint sequence.
For new construction trim Siesta Key projects, the useful jobsite standard is simple: before paint, a homeowner or builder should be able to spot straight lines, tight fitted joints, intentional changes in profile, and no damaged faces or unexplained gaps being passed off as normal.
What Happens During a Pre-Paint Trim Walkthrough
A pre-paint trim walkthrough is the last clear opportunity to assess the carpentry before primer and finish coats soften small defects or make corrections more disruptive. It works best as a room-by-room checklist, with the builder or designated project lead assigning each trim correction and separating those items from painter handoff work.

During a pre-paint trim walkthrough Siesta Key homeowners can expect the team to compare installed work with the selected profile plan: baseboards should transition cleanly into casing, comparable door and window openings should share intended alignment, and crown or other details should stop, return, or change profile deliberately. A missing return, chipped face, split edge, or mismatched molding piece belongs on the punch list rather than being treated as a paint issue.
- Fit and alignment: review open joints, uneven miters, inconsistent casing lines, and wall-to-trim gaps. A narrow, even caulk joint may be finish-ready; a wide irregular gap caused by poor fit needs carpentry attention first.
- Fill and caulk readiness: fastener holes should be set below the surface and ready for filler, while seams and perimeter edges should be accessible for the specified caulk process, not buried under debris or damaged by later work.
- Painter coordination: identify surfaces needing sanding, filling, caulk, spot priming, or protection, and note any damage discovered after installation so responsibility is clear.
The result is a defined finish-ready condition, not a promise that paint alone will correct every flaw or that later trades cannot cause damage. Final appearance still depends on the selected paint system, surface preparation, application method, and touch-up process.
Plan a Trim Package Around Your Siesta Key New Home
Bring the decisions that shape the trim to the planning conversation early: floor plans and interior elevations show wall runs and openings, door schedules establish jamb and door proportions, and flooring selections clarify where baseboards meet finished surfaces. Ceiling heights, paint direction, finish schedules, and a few preferred profile images help turn a general look into selections that can be priced and installed consistently.
For homeowners, builders, and designers, the useful starting point is a project-specific review rather than a fixed molding bundle. A tailored scope can document the selected profiles and room-by-room exceptions, assign materials to their intended locations, coordinate installation with doors, flooring, cabinetry, and paint, and include a pre-paint walkthrough before final coatings begin.
Share the available drawings, elevations, door information, finish selections, and inspiration references to plan a trim package for a new build in Siesta Key. The goal is a clear, buildable trim plan with defined handoffs and finish expectations, not a universal price or one material recommendation applied everywhere.
Plan the next step
Compare the broader New Construction Trim Packages service.
Review the Siesta Key, FL service area for local planning context.
When you are ready, request a free estimate with the rooms, trim goals, city, and available photos.
FAQs
What is included in a new construction trim package in Siesta Key?
A coordinated trim package can include baseboards, door and window casing, crown molding, shoe molding, scribe molding, panel molding, accent-wall trim, and interior door reveals. It also coordinates profile selections, materials, floor transitions, installation order, and the paint-ready finish plan.
When should finish carpentry be installed during a new construction project?
Finish carpentry should begin after drywall is complete, interior door jambs are set, and the flooring plan is known. Cabinetry intersections should be laid out before cutting trim, and final paint should follow trim installation, filling, and caulking.
How do I choose baseboard and door casing profiles for a new construction home?
Choose profile height, thickness, and detail based on ceiling height, wall area, door proportions, furniture scale, and flooring transitions. Use matching casing widths, level door-head lines, and repeatable reveal dimensions on comparable openings to maintain consistent sightlines.
How can I tell whether new-build trim is ready for paint?
Paint-ready trim has straight baseboard runs, tight joints, even door-casing reveals, clean returns, set fasteners, and no damaged faces or unexplained gaps. Fastener holes should be ready for compatible filler, while seams and perimeter edges should be accessible for caulk, primer, and finish paint.
Should I choose MDF, wood, or PVC trim for a Siesta Key home?
Use paint-grade MDF in stable, conditioned interior spaces where a smooth painted surface is the priority, but avoid repeated wet exposure. Choose wood where detailed profiles, fastening, or site adjustments require it, and consider PVC or other moisture-tolerant products for higher-moisture locations when their movement and fastening requirements fit the assembly.