

Rather than treating each molding as a separate purchase, remodel trim packages in Englewood, FL bring the room's finish details into one plan. Baseboards create the transition from wall to flooring; casings frame doors and windows; crown or other decorative pieces can complete the wall-to-ceiling transition. When their profile, size, and paint treatment relate to one another, new flooring, refreshed doors, and updated walls read as part of the same remodel.
A straightforward replacement package may use clean, paint-ready baseboards and matching casings to replace worn or mismatched trim. A more detailed package can introduce wider casings, layered baseboards, crown molding, or built-up window details for rooms that need more architectural presence. The practical choice is about scale: simple profiles keep compact or contemporary rooms crisp, while added width and detail can better support taller ceilings or traditional millwork.
Material and finish belong in the package decision from the start. Dry interior rooms may suit paint-grade wood or MDF, while areas exposed to recurring humidity or damp conditions call for more moisture-tolerant selections. Trim work is cosmetic finish carpentry; soft wall areas, damaged framing, leaking openings, or water-damaged substrates need to be addressed as separate repair scopes before new trim can provide a lasting finished look.
Preparation also shapes the result: aligned profiles, filled fastener holes, treated joints, caulked paintable gaps, primer where needed, and coordinated final paint turn individual pieces into a continuous visual line.
What Can Be Included in a Remodel Trim Package
The work list is most useful when it identifies both the trim pieces and the transitions the remodel will change. Baseboard replacement covers the wall-to-floor edge, while door and window casings create a clean frame around each opening. A package can also include shoe molding or quarter round: small finishing pieces installed at the baseboard-to-floor line to cover a narrow perimeter gap. They are useful when flooring leaves that gap, but they are not an automatic addition to every room.
- Baseboards: run around the room perimeter and should be planned after the finished flooring height is known.
- Door casings: cover the joint between the wall surface and the door jamb. Door casing installation is often paired with replacement doors because jamb depth, hinge-side clearance, and casing width affect the finished opening.
- Window casings: finish the wall-to-window transition and can be updated selectively when the window remains in place and the surrounding wall is sound.
- Crown molding: is an optional wall-to-ceiling detail. It can add visual weight in a larger room, but leaving it out can better suit a low-ceiling or pared-back design.
Interior trim replacement can be limited to one room when the adjacent areas are visually separate and the new profile can end naturally at a doorway or corner. Selective casing replacement also makes sense when baseboards remain consistent and only a door, window, or damaged opening is being rebuilt. In an open connected area, however, replacing all visible baseboards and casings usually avoids abrupt changes in height, profile, or paint sheen.
Flooring, drywall, doors, and windows often set the practical boundary of the trim scope. A thicker finished floor can change the gap below an existing baseboard; new drywall repairs may disturb casings; and a replacement door or window may leave old trim too narrow, damaged, or out of proportion. A complete scope should state whether removal and disposal, new installation, caulking, hole filling, joint treatment, and paint preparation are included, not simply list the molding being installed.
Choose Profiles That Fit the Home, Room, and Remodel Design
Profile choice changes the room's apparent scale before any furniture is moved back in. Taller, more detailed trim creates a stronger visual border; narrower, simpler trim lets wall color, flooring, and openings carry more of the design. Ceiling height, room width, door size, and the amount of uninterrupted wall space are useful reference points when comparing samples.
Square-edge and eased-edge profiles have flat faces with either crisp or softly rounded edges. They suit updated coastal interiors and lower-ceiling rooms because they provide definition without adding much visual weight. Stepped profiles build out in small flat layers for more shadow and dimension. Colonial profiles use curves, beads, and ogee-like contours for a traditional look, while craftsman-inspired trim typically relies on broad, flatter stock and simple cap details. More decorative combinations can make sense in a larger formal room, but can feel crowded around small openings or beneath a low ceiling.
The relationship between baseboards and door casings matters as much as either profile alone. A casing should look substantial enough to frame the opening, while the baseboard should carry enough height to anchor the walls without competing with it. Matching profiles create a deliberate, uniform look; intentionally complementary profiles can work when they share a similar edge treatment, thickness, and level of detail.
In open-plan areas, repeat one profile language across all visible rooms so the trim reads as one continuous finish rather than a series of changes. Older homes may call for retaining the character of existing millwork, using a sample or clear photo to reproduce its width and contour where new pieces meet old. For remodel finish carpentry Englewood projects that blend original and updated rooms, a restrained profile is often easier to carry through transitions than an ornate pattern that stops abruptly.
A good layout review also looks at the reveal, the narrow, even line left between a casing and jamb or between layered trim pieces. Consistent reveals, aligned casing legs, clean miters, and properly scribed baseboards help the selected profile look intentional when walls, floors, or openings are not perfectly straight.
Compare Trim Materials for Dry Rooms, Humid Areas, and Exterior-Adjacent Openings
The same profile can call for different material choices once room conditions enter the picture. A dry bedroom, living room, or hall usually gives the widest latitude: paint-grade wood, often poplar, provides a crisp painted appearance and can be filled, sanded, and spot-repaired when minor damage occurs. Solid wood can also suit these spaces when its grain, durability, or ability to reproduce an existing detail matters.
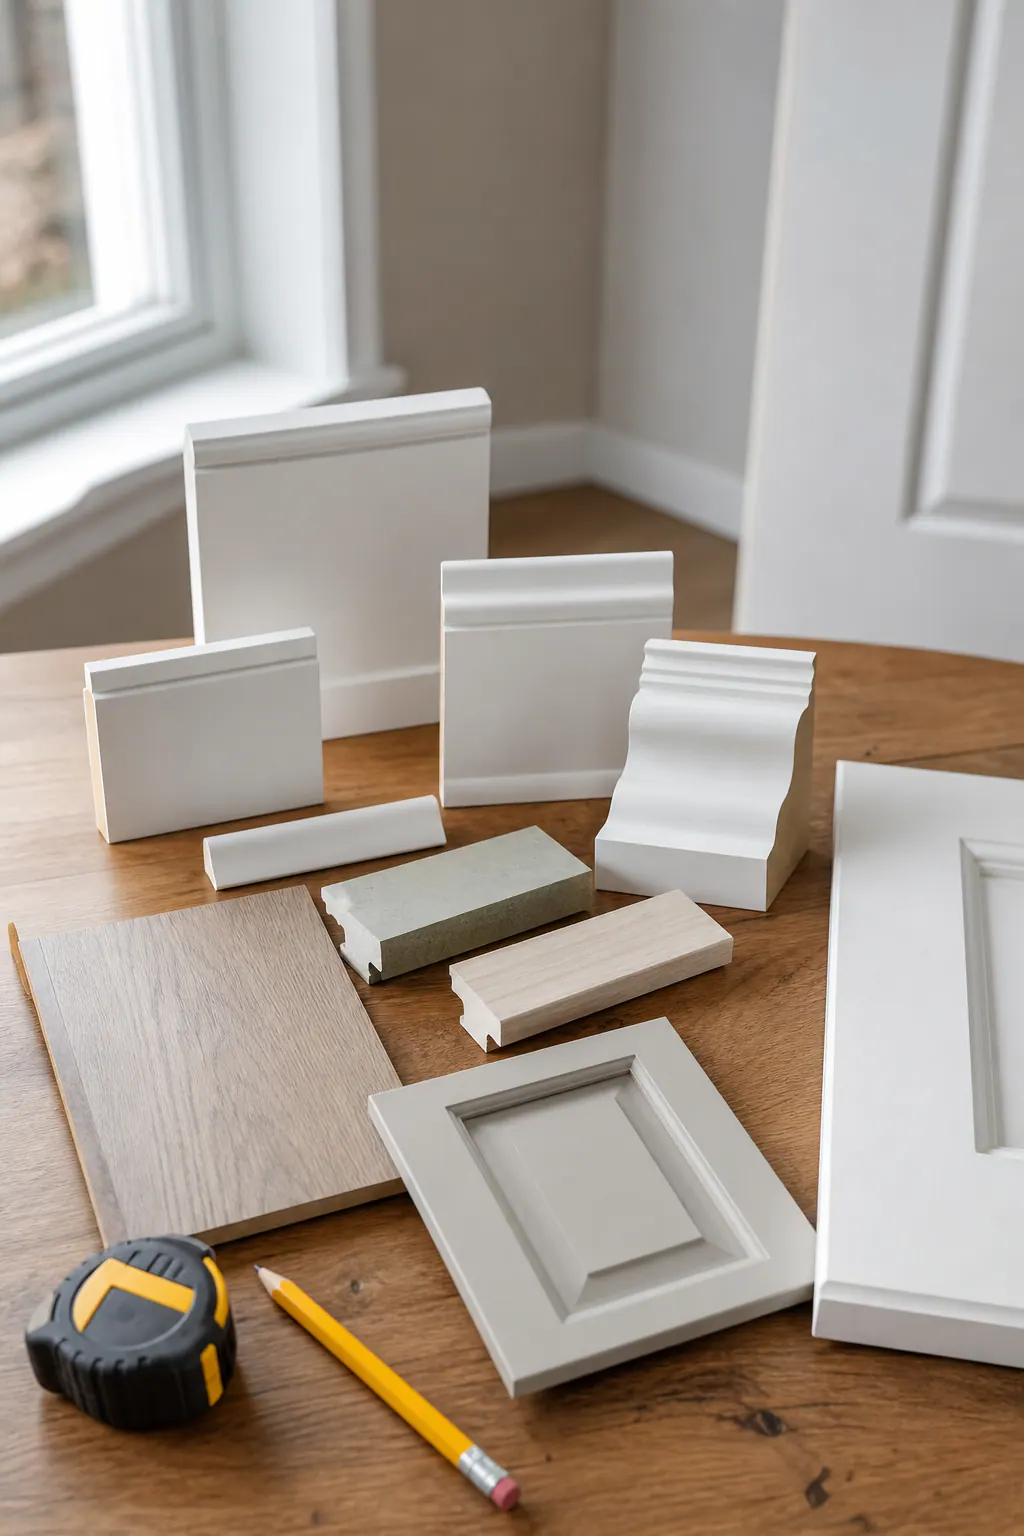
MDF is a smooth, engineered fiberboard option commonly selected for interior paint-grade trim. Its uniform face can make simple baseboards and casings look especially clean under paint, and it is available in many coordinated profiles. Its weaker fit is an area with repeated wetting, a leaking window, or chronic swelling at the floor line; prior moisture damage is a signal to choose the material around the cause of exposure, not simply replace the damaged piece with the same product.
Bathrooms, laundry rooms, and kitchens are not identical environments. Humidity alone differs from direct splash exposure at a tub, sink, dishwasher, or exterior door threshold. Paint-grade wood may work in a well-managed interior location, while PVC or composite trim can be a stronger candidate where occasional splash, damp flooring, or exterior-adjacent conditions are expected. PVC is a molded plastic trim with strong moisture tolerance; composite products vary, so their profile selection, cut edges, fastening approach, and paint system should be considered as a complete assembly.
For trim replacement in Englewood, FL, exterior-adjacent openings deserve a close look at the sill, threshold, flashing area, and wall condition. A water-tolerant casing cannot solve water entering behind it. Direct, recurring water exposure calls for correcting the opening or transition detail first, then selecting a trim material intended for that location.
Samples make the tradeoff easier to see. Compare the sharpness of routed detail, the feel of an edge after a small nick, the look of a filled repair, and the painted sheen across wood, MDF, PVC, and composite. The best package may use one consistent profile in multiple materials, reserving each material for the conditions it is equipped to handle.
Plan Trim Replacement Around Existing Details, Flooring, and Openings
A close field assessment often determines the replacement boundary more clearly than a room-by-room wish list. Measuring the face width, thickness, edge shape, and casing reveal of existing pieces, and comparing those measurements with a physical sample, shows whether a damaged section can blend into what remains. Minor paint damage, small dents, or isolated loose joints may justify repair. Swelling, splits, recurring caulk separation, and several mismatched profiles are stronger signs that selective fixes will continue to stand out.
In an older home, an existing profile may be reproduced when a sample is intact enough to measure and a compatible stock or custom-milled option is practical. When an exact match is not realistic, a complementary profile is usually the better design decision: choose a new baseboard and casing with a similarly simple or similarly traditional character, then make the replacement boundary occur at a doorway, corner, or other natural break rather than in the middle of a visible run.
New flooring deserves review before baseboards go back on. The perimeter gap, floor height, and levelness affect how the trim meets the finished surface. Shoe molding or quarter round can cover a narrow, consistent flooring-edge gap; it should be selected as an intentional finishing piece, not used to disguise poor layout or an uneven installation. A wall that bows or a floor that rises can require careful scribing, meaning the trim edge is shaped to follow the surface for a tighter fit.
Openings need the same attention. A replacement door may leave its jamb deeper or shallower than the wall plane, calling for a jamb extension so the casing sits on a flush, stable surface. Window extensions perform the comparable job when the window frame does not meet the finished wall depth. Reviewing these details together helps an Englewood FL trim remodeling project avoid a patchwork result: repair what can disappear into the existing work, selectively replace where transitions are natural, or update the full connected area when consistency is the priority.
Paint-Ready Installation Details That Define the Finished Result
The finish work begins before the first coat of paint. Trim is laid out so profile changes, scarf locations, and end conditions land where they will look deliberate; material is allowed to acclimate when the selected product and site conditions call for it. During installation, straight runs, even reveals, tight miter joints, and fasteners set just below the face are the useful visual checkpoints. A crisp cut cannot compensate for a casing leg that is out of line or a baseboard that has been forced to follow a gap without proper fitting.
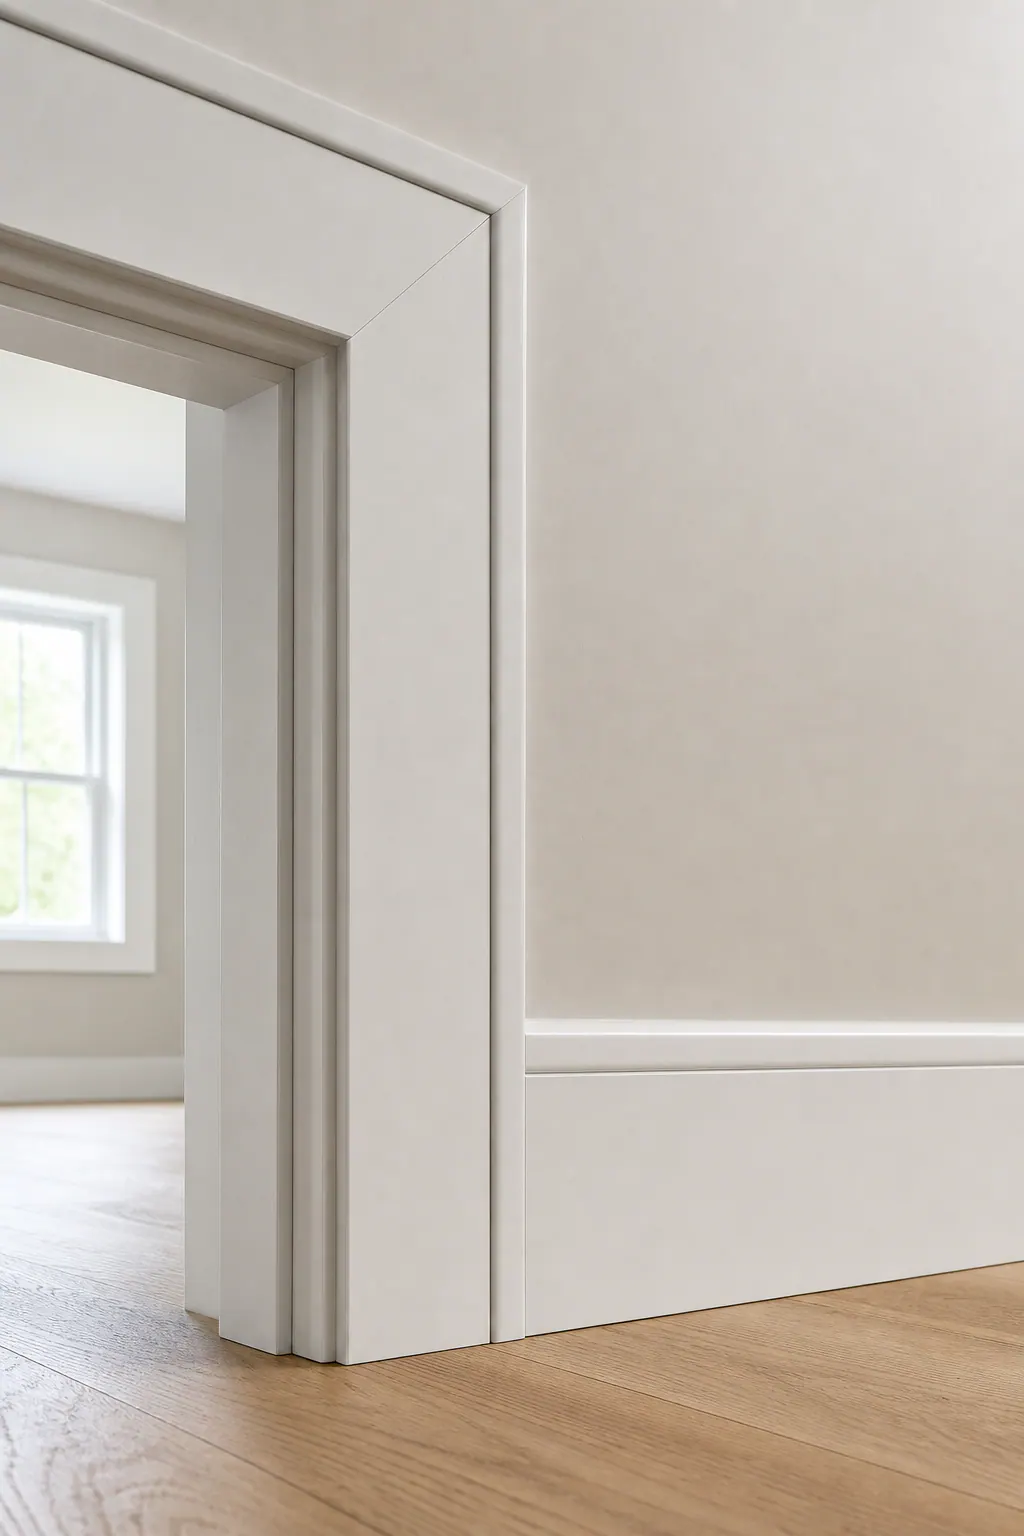
Paint-ready preparation follows the installation rather than treating paint as a cover-up. Nail holes and minor surface defects are filled, joints receive the treatment appropriate to their location, and filled areas are sanded smooth. Caulk is used in narrow paintable wall-to-trim transitions to create a controlled, clean edge; a thick or irregular bead is a weak signal because it can make the trim line look wavy. Primer, when required for the selected paint grade trim or repair area, should be coordinated with the intended topcoat so the sheen and color read consistently across new pieces, patches, and existing adjacent work.
Pre-finishing can suit selected components when a clean factory-like face is the priority, but installation still leaves cut ends, nail holes, joints, and touchups to address. Painting after installation makes it easier to blend those details and maintain clean wall transitions. A hybrid approach often reserves early coating for accessible faces, then completes filling, caulking, spot priming, and final coating after the trim is installed. The practical goal is not simply a fresh color, it is a continuous finish in which the carpentry details do not distract from the room.
Build a Trim Package That Works Across the Entire Remodel
A productive trim review looks at the remodel as connected rooms, not isolated walls. Walk each space to mark what remains, what changes, and where a new profile can terminate naturally. Set material and profile samples beside the actual flooring, doors, cabinetry, wall color, and any trim that will stay. That comparison can reveal, for example, whether a simple casing supports updated doors better than an added decorative header, or whether one profile should be carried in different materials where room exposure changes.
The written scope should name the rooms, baseboards, casings, optional details, selected profiles, materials, paint expectations, and exclusions. Replacement boundaries matter: retaining trim in a closed-off bedroom may be sensible, while replacing only one side of an open living area can leave an obvious transition. It should also identify who handles jamb extensions, wall patching, flooring-edge coverage, final caulk, and paint touchups.
Sequence the work so flooring heights, door installation, drywall repairs, trim fitting, and final painting support one another instead of creating avoidable rework. For remodel trim packages in Englewood, FL, a room-by-room consultation can turn those choices into a clear, restrained plan that fits the home rather than forcing one material or decorative treatment everywhere. Reach out to review your spaces and compare options before the finish work begins.
Plan the next step
Compare the broader Remodel Trim Packages service.
Review the Englewood, FL service area for local planning context.
When you are ready, request a free estimate with the rooms, trim goals, city, and available photos.
FAQs
What is included in a remodel trim package in Englewood, FL?
A remodel trim package can include baseboards, door casings, window casings, and optional crown molding. It may also include shoe molding or quarter round, removal and disposal, installation, caulking, hole filling, joint treatment, and paint preparation.
Should baseboards and door casings be replaced at the same time?
Replacing baseboards and casings together creates a consistent profile, height, and paint sheen, especially in open connected areas. Selective replacement works when a new profile can end naturally at a doorway or corner and adjacent trim remains compatible.
Can trim be replaced after new flooring is installed?
Yes, and finished flooring height should be known before baseboards are installed. Shoe molding or quarter round can cover a narrow, consistent perimeter gap, while bowed walls or uneven floors may require scribed baseboards for a tight fit.
What trim material is best for humid Florida homes?
Paint-grade wood or MDF suits dry interior rooms, while PVC or moisture-tolerant composite trim is better for recurring splash exposure, damp flooring, and exterior-adjacent openings. Water damage, leaking windows, failed flashing, and damaged substrates must be repaired before installing new trim.
Should trim be painted before or after installation?
Painting after installation makes it easier to fill nail holes, treat joints, caulk wall-to-trim gaps, spot-prime repairs, and blend the final finish. A hybrid approach can pre-coat accessible faces, then complete touchups and final coating after installation.